Wall-mounted ductless air conditioner is installed in a room of a residential house in Grants Pass.

AC Compressor Not Working? Troubleshooting Steps and Common Causes

When it comes to costly repairs, AC compressor issues can quickly add up. Before you worry about getting a compressor replacement, it’s important to figure out whether this is the actual issue. Once you have the problem diagnosed, you can decide if it makes more sense to repair or replace your cooling system.

To learn more about things you can check on your own and when you should call for help, read on.

What an AC Compressor Problem Usually Looks Like

If your compressor is the problem, you’ll likely notice warm airflow, poor performance, unusual noises, and higher-than-normal energy bills. In particular, pay attention to any loud banging, clanking, or rattling noises. There may also be buzzing or vibration on startup.

Because of how much energy a faulty or overheated compressor can pull, it’s common for the breaker to trip when the compressor is starting to fail. This increased energy draw can also trip the breaker, so note any frequent breaker trips.

Once you’ve noticed these signs of potential issues, the next step is using safe DIY checks to troubleshoot and detect the root cause. If these basic tips aren’t enough to resolve the issue, then you’ll need to schedule a professional heating, ventilation, and air conditioning (HVAC) appointment.

Start With Safe Troubleshooting Steps

When your AC suddenly makes unusual noises or stops working, you don’t have to panic. Instead, start with the following basic troubleshooting steps.

Check Thermostat, Power, and Breaker Status

First, you should see if something is wrong with your system’s controls. Check to make sure the thermostat is set to cooling mode and the temperature is cooler than your room temperature. 

If your air conditioner doesn’t kick on, look at the breaker position. A tripped breaker can cause your unit to stop working. If this is the case, turn the breaker all the way off. Then, turn it back on. 

While resetting the breaker often works, you should only do this once. Breakers that trip repeatedly need to be inspected by a professional because there is an underlying electrical or mechanical issue causing the repeated tripping. 

Check Airflow and Outdoor Unit Condition

The next step is to check your airflow and outdoor unit. When a filter becomes dirty, it can reduce airflow and cause the evaporator coil to freeze. Because this makes the compressor work harder, it can cause the compressor to fail. 

You should also inspect your outdoor condenser unit for airflow blockages. If it becomes blocked by plants or debris, the resulting airflow problem can end up affecting your AC compressor.

What Not To Do

Your AC is a complex machine. For your safety, you should never handle any wiring or capacitor repairs yourself. The capacitor is responsible for storing huge amounts of energy to start the compressor, so mishandling this component can cause electrocution.

Common Reasons an AC Compressor Stops Working

There are a few common reasons why an AC compressor may stop working suddenly.

Power Supply or Breaker Issue

When there are issues with your electrical supply or breaker, it can impact the AC compressor. In particular, electrical interruptions, failing switches, and repeated breaker trips are all signs that this could be the problem. Because electrical components are involved, you should leave these repairs to the professionals.

Failed Capacitor, Contactor, or Relay

Whenever a capacitor, relay, or contactor isn’t working right, it stops the compressor from starting up. Again, this is another repair that must be handled by licensed technicians.

Thermostat or Control Problem

If the thermostat isn’t communicating properly, it may not trigger the compressor to start up. For example, you may be dealing with a bad signal, low voltage, or incorrect settings. While you can check the thermostat settings on your own, any other repairs will necessitate a service call.

Low Refrigerant or Refrigerant Leak

When your refrigerant starts to leak, the levels can decline. This can cause heat to build up, and it results in more stress on your compressor. You’ll need a technician to find and fix the leak because, by law, refrigerants can only be handled by someone who has the appropriate certification.

Internal Compressor Damage or Age-Related Failure

If the internal compressor is damaged or fails due to age, the repair costs can quickly add up. Especially in older units, it is often better to replace the AC instead of performing an expensive repair.

What the Symptoms Can Tell You

You can get a better idea about whether you have a compressor problem by paying attention to a few common symptoms. The type of noise can also help you figure out if your AC needs to be repaired or if it is completely dead.

Clicking, Buzzing, or Humming

The sounds you hear can help you differentiate different kinds of AC problems. If you hear clicking, humming, or buzzing, it means your AC is trying to start and can’t. When there are no noises present at all, your compressor is likely dead.

Warm Air, Short Cycling, or Outdoor Unit Silence

When your AC isn’t functioning at its best, you may notice short cycling and warm air. Short cycling often occurs because of airflow problems, oversized ACs, and safety shutoffs. Warm air may stem from airflow problems or low refrigerant. A completely silent outdoor unit may be due to a faulty breaker, failed capacitor, contactor issue, or safety switch-related problem.

These types of symptoms are important because they help you narrow down the problem. Even if you can’t safely fix the issue on your own, this information will help the HVAC technician diagnose what is wrong with your unit.

When Troubleshooting Should Stop, and Repair Should Start

While there are some problems you can fix on your own, you should never put your health or the health of your AC at risk.

Electrical or Safety Red Flags

Electrical problems should never be dealt with on your own. Burned odors, visible signs of wire damage, and repeatedly tripped breakers are all indications that you should immediately stop working with your AC and call for help.

Signs the Compressor May Be Failing Internally

If the root cause of your AC malfunction is the compressor, you won’t be able to fix it on your own. You should schedule professional AC repairs as soon as you notice the following symptoms.

  • Loud noises, like clanking, banging, and rattling sounds
  • Overheating
  • Issues starting up
  • Age-related decline

Repair Versus Replacement: When the Conversation Changes

Our HVAC technicians will carefully evaluate your situation to determine which solution will work best for your short-term and long-term needs. The age of your unit, the extent of the repairs, and your future goals will determine whether a repair or replacement makes more sense.

When Repair Still Makes Sense

Repairs make sense when we only need to replace an isolated part, such as your contactor or capacitor. If you have a relatively new AC that has had minimal repairs, performing a repair is likely a good choice.

When Replacement Is Worth Discussing

Once units get older, they can start to fail. If you have an aging system or have experienced a significant drop in your AC’s energy efficiency, it is likely time to get it replaced. Repeated repairs are another indicator that your unit is starting to fail and needs a replacement.

Compressors are known for being one of the more expensive repairs. If your compressor is damaged and must be replaced, it may make more sense to replace the entire AC instead.

FAQs

Can an AC compressor stop working because of a dirty filter?

Yes, it can. When the air filter is clogged, it can restrict airflow and cause the evaporator coil to freeze. As the coil freezes, it forces the compressor to work harder in order to cool your home. Eventually, this can result in the compressor breaking down.

Why is my AC compressor not turning on, but the fan is running?

If this occurs, it is likely due to a failed capacitor. It could also be due to control problems, such as when the AC is set to fan mode only. Additionally, a tripped breaker can cause this to happen. While you can try resetting the breaker and adjusting your thermostat settings on your own, capacitors should only be handled by a licensed technician.

Is it safe to keep resetting the breaker on my AC?

No, it is not. If the breaker keeps tripping, it means that there is an underlying problem with your AC that needs to be addressed. Continuing to reset the breaker can end up damaging your unit.

Does a bad compressor mean I need a new air conditioner?

It depends. If your AC is already 10 years old or older and has a history of needing repairs, it’s probably time to get a new one. When our technicians come out, we’ll compare the cost of repairs to the cost of a replacement. Then, we’ll calculate the estimated lifespan left on your AC to help you determine which option makes more sense.

Diagnose Your AC Compressor Issues

With summer just around the corner, you can’t afford to have your AC stop working. If you think that your compressor is not working anymore, Rogue Valley Heating, Cooling & Electrical can help. 

Ready to schedule your AC diagnostics and repairs in time for summer? Give Rogue Valley a call today.
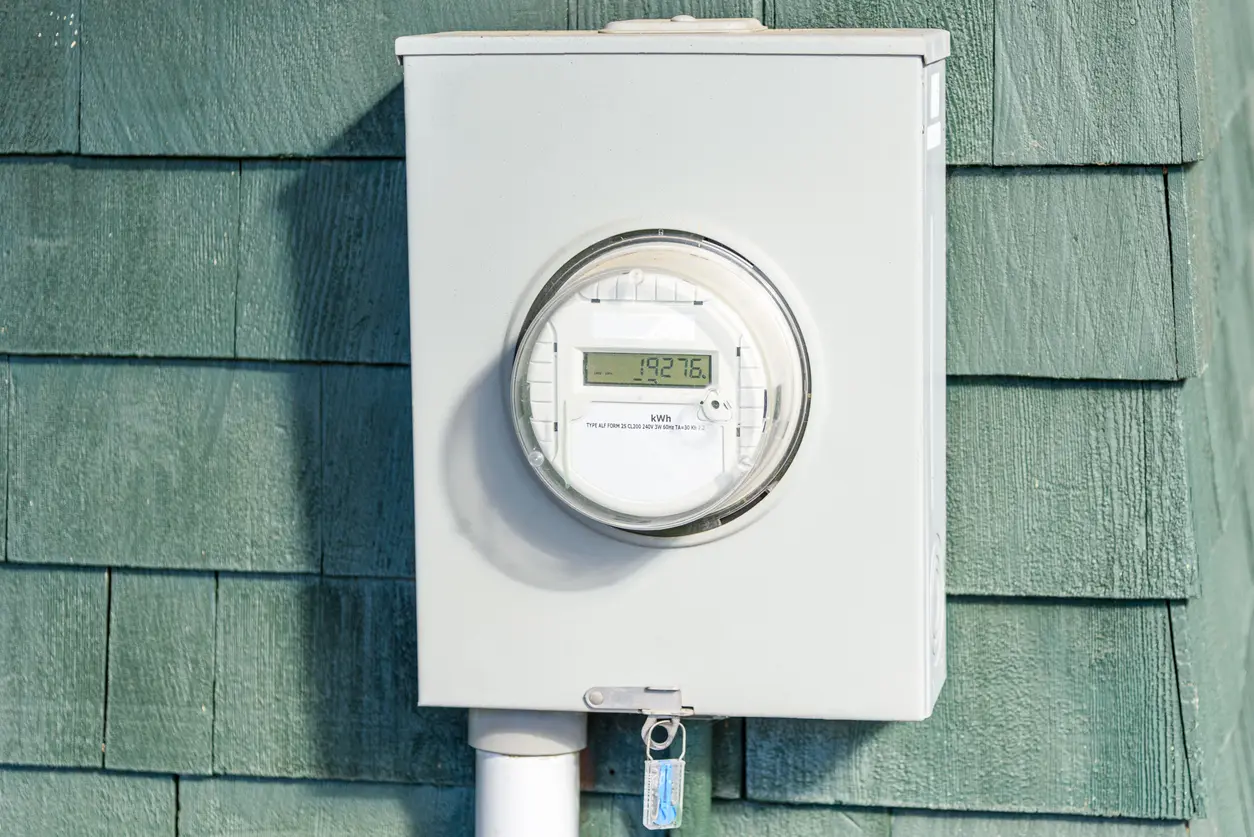
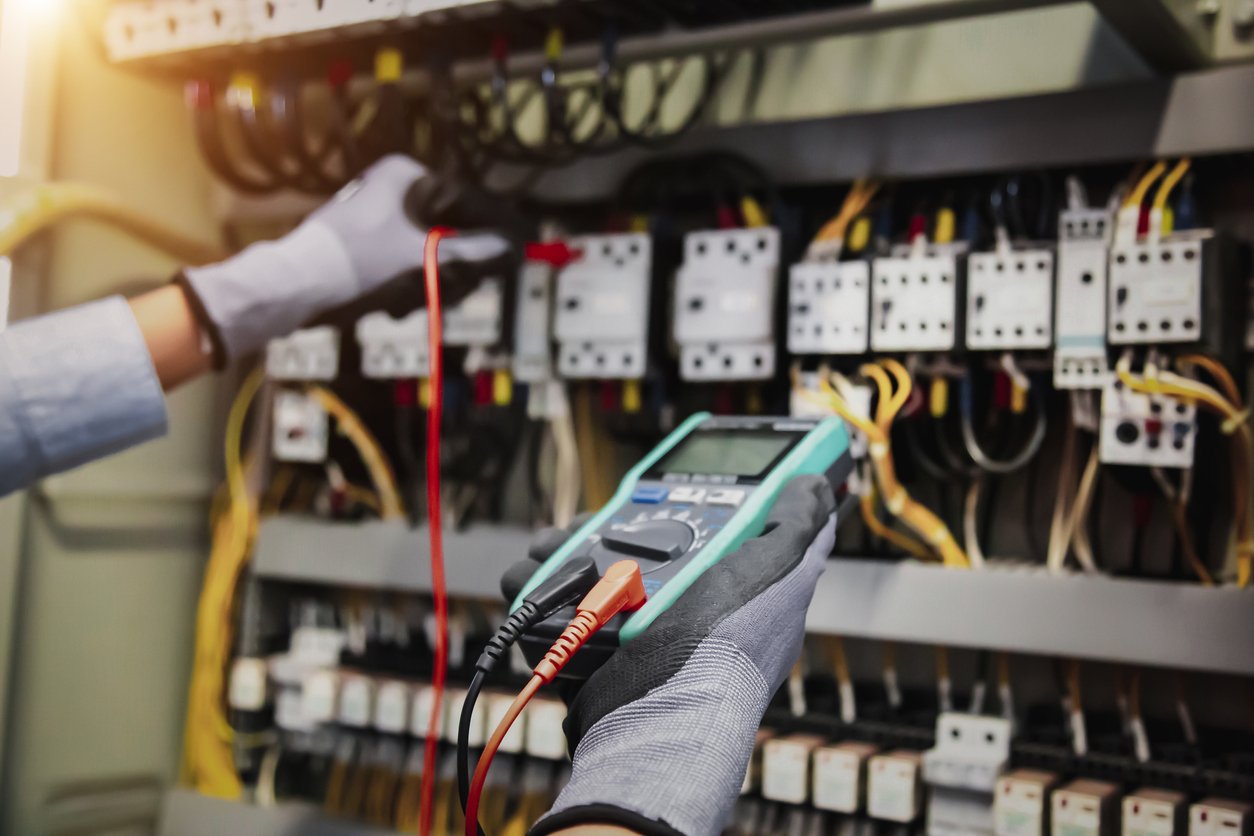
Meter Base Problems: Warning Signs, Safety Risks, and When Replacement Is Needed

A meter base is basically a socket that connects the electric meter to your home. It is responsible for carrying your full electrical load, making it especially important. From weather exposure to overheating to outages, there are many potential reasons why your meter base may need to be replaced. We’ll cover common indications of arcing and other issues so that you can easily tell when it’s time to call our electricians for help.

What a Meter Base Does (And Why It Matters)

Your meter base is a weather-resistant socket that connects the power lines to your home’s electrical panel. It houses the meter, which is responsible for tracking your home’s energy consumption.

Meter Base vs. Electric Meter vs. Panel

There are a few essential differences between electrical meters, meter bases, and panels. As we’ve already mentioned, the meter base is responsible for connecting your home’s panel to the utility lines. The electric meter is housed within the meter base, and it is often owned by the utility provider. Meanwhile, your panel is located indoors and is responsible for distributing power to different circuits.

Why Meter Bases Fail

A meter base can fail for many different reasons.

  • Overheating due to an excessive load or degraded lugs
  • Age
  • Excess wear
  • Loose connections
  • Debris intrusion
  • Moisture intrusion and corrosion
  • Storm-related damage
  • Pests

Warning Signs of Meter Base Problems

There are a few key signs your meter base may be about to fail.

Visual Warning Signs

  • Rust around the meter or on the meter base
  • Water stains
  • Warped housing
  • Bubbling paint
  • Cracked or broken meter base covers
  • Scorching, melted plastic, or burn marks
  • Missing seals
  • Gaps around the conduit entry points
  • A loose meter base or can

Smell and Sound Warning Signs

  • Burning odors, like something electrical is heating up
  • Crackling, buzzing, or sizzling noises, especially in damp conditions
  • Clicking that sounds like it is outside the meter location

Performance Warning Signs Inside the Home

  • Lights that dim or flicker, especially when appliances start up
  • Hot outlets
  • Sensitive electronics restarting
  • Power interruptions
  • Appliances behaving unusually
  • Frequent tripped breakers

While a frequently tripped breaker may be due to another reason, it is still important to get it checked out because a meter base malfunction could be the cause.

After Storms or Landscaping Work

Faulty meter bases often occur following storms and landscaping-related damage, such as:

  • Fallen branches
  • Hail impact
  • Weed trimmers are hitting the base
  • Wind-driven rain
  • Ladder damage
  • Car-related damage
  • Flooding or pooling water around the meter

Safety Risks You Should Not Ignore

Getting your meter base inspected is important because of the risks involved.

Fire Risk

When there is corrosion or loose lugs present, it can result in overheating and arcing. In turn, these issues can cause a higher fire risk.

Shock and Arc-Flash Risk

A malfunctioning base is incredibly dangerous because it handles utility-level power at the service entrance. Any shock or arc-flash could be potentially life-threatening.

Power Reliability and Damage to Electronics

Any voltage fluctuations can damage your appliances and HVAC equipment.

Urgent Situations

If you notice the following issues, keep everyone away and don’t touch anything. Instead, call a licensed electrician or your utility provider for help.

  • A meter base hanging loose
  • Visible scorching or melting
  • Burning odors
  • Crackling noises
  • Sparking
  • Water inside the meter base

What Causes Meter Base Damage

While many things can result in meter base damage, a few causes are the most likely culprits.

Moisture Intrusion

Anything that allows water to enter, such as failed seals, faulty conduit sealing, or missing gaskets, can damage the meter base. Additionally, wind-driven rain can get inside if the wind and rain are strong enough.

Corrosion and Rust

In areas with coastal moisture, poor drainage, or sprinklers, corrosion and rust are more common. However, corrosion can also happen with age.

Loose Connections

Over time, loose connections can develop from vibration, improper torque, or thermal expansion.

Overloading and Heat

If you’ve suddenly installed an EV charger, hot tub, or increased your electrical demand in some way, it could lead to overloading and excess heat.

Physical Damage

If a car or hail impacts the meter base, it can cause damage. Similarly, pests and UV exposure can harm the base’s components.

Repair vs. Replacement: How To Know Which You Need

Once your meter base is damaged, there are a few steps you can take to determine if a repair or replacement is necessary.

When a Repair Might Be Possible

A repair is a better option if you’re dealing with minor exterior issues, like conduit sealing, weather seal damage, or a cover replacement. Similarly, loose fittings and minor corrosion that isn’t on the socket or lugs can be quickly repaired by a professional.

When Replacement Is Typically Needed

Getting a replacement is preferable when severe damage is involved. For example, socket or lug corrosion, burn marks, water damage inside the can, melted components, and signs of arcing all necessitate a replacement. You should also call for a replacement if you have an outdated meter base, loose meter jaws, or cracked meter base housing.

Why DIY Is Not an Option Here

If you’re dealing with major repairs or plan on moving the base to a different location, you need to call a professional. Dealing with meter bases involves utility coordination and hazardous energized components. These tasks should only be handled by the experts.

What Happens During a Meter Base Replacement

Before your replacement appointment arrives, our team can walk you through what to expect.

Step-by-Step Overview

  • Inspect the meter base and diagnose the problem.
  • Apply for the permit, if necessary.
  • Coordinate with the utility provider for the meter pull and to disconnect power.
  • Replace the meter base.
  • Inspect the conduit, weatherhead, riser, and grounding for signs of damage.
  • Verify the connections before reinstalling the meter and turning the power on.
  • Conduct a final check. When necessary, complete the utility sign-off.

How long does it usually take?

The replacement timeline can vary based on utility scheduling, service entrance upgrades, and other factors. If you only need a straightforward swap, it can take as little as one day. For more complex replacements, it will take longer.

What Else Should Be Checked at the Same Time

To ensure the safety of your home and loved ones, we make sure to check your electrical setup for other issues before we leave. We inspect:

  • Service mast and weatherhead
  • Main lugs for signs of overheating
  • Grounding and bonding
  • The condition of the main panel
  • Load needed for new equipment or appliances

Cost Factors

The cost of the replacement will depend on a few different factors.

What Influences Meter Base Replacement Cost

When calculating the cost, you have to consider:

  • Severity of damage
  • Permit and inspection requirements
  • Meter base accessibility
  • Other replacement needs, such as for service entrance components
  • Utility scheduling requirements
  • Any required electrical service upgrades

How To Avoid Surprise Costs

As a homeowner, you can avoid surprise costs by getting a full service entrance inspection first. During that inspection, our electricians will provide you with a clear written scope so that you know exactly what services are involved. We also take our time explaining each step of the process and answering any questions.

How To Prevent Meter Base Problems

To avoid future meter base problems, there are a few simple steps you can take.

Basic Homeowner Checks

As a homeowner, you should visually check the meter base from a safe distance at least once a year. You should keep sprinklers from spraying the meter base and trim nearby shrubs. Additionally, pay attention to any signs that water may be pooling near the foundation.

Proactive Electrical Maintenance

To avoid future problems, remember to schedule periodic inspections. This is especially important for older homes. If you notice flickering lights, call an electrician and resolve the problem early. Additionally, you should get your electrical load evaluated before you add any new HVAC equipment, appliances, or EV chargers to your home.

FAQs

Who owns the meter base, the utility or the homeowner?

The homeowner generally owns the meter base, and the utility provider is responsible for the line side. This means any repairs or replacements to the meter base must be carried out by the homeowner.

Is a damaged meter base an emergency?

Absolutely. Meter bases handle utility-level power. If it is malfunctioning, there is a serious risk of a fire or shock.

Can a bad meter base cause flickering lights?

Yes, a bad base is often a cause of flickering lights. Because there are other potential causes, it’s essential to get a professional inspection. Additionally, any repairs should only be handled by a licensed electrician.

Can water inside the meter base cause a fire?

Any water inside the base can result in short circuits and electrical fires. To avoid this issue, you should keep water from pooling around the meter base and make sure sprinklers aren’t directed toward it.

Do I need a permit to replace a meter base?

While it depends on the area, most places require a permit before a meter base can be replaced. Because of the serious safety risks involved, this should never be a DIY task.

What should I do if I smell burning near the meter?

Any burning odors are an electrical emergency. They may indicate melting insulation or a fire, which represents an immediate danger to your loved ones. Evacuate the area and call one of our electricians right away for help. You should also shut off all of the electricity to your house at the electrical panel.

Fix Your Meter Base Issues

While a damaged meter base is a potential danger, many of these issues are fixable if they are caught and repaired early. By working with a licensed electrician, you can quickly diagnose the problem.

Schedule an electrical inspection with Rogue Valley today.

commercial electrical

Electrical Panel Red Flags Homeowners Should Never Ignore

You hear cautionary tales about old electrical panels acting up. As a homeowner, it’s hard to know when you should be concerned about your electrical panel’s age. In reality, age matters less than the condition of your panel. If you notice common warning signs, it’s important to get professional help right away.

Quick Safety Note

You don’t have to open your panel to notice common red flags, such as heat, burning odors, buzzing, or visible damage. If you see these signs, treat it like an emergency. Never tighten connections or change breakers yourself.

What the Electrical Panel Does

An electrical panel is responsible for distributing power to the different circuits in your home. The breakers protect your wiring by tripping as soon as there is a power fluctuation. If there’s an electrical problem in your home, the panel often serves as the canary in a coal mine.

The Warning Signs That Matter More Than Age

As a homeowner, you should reach out for an electrical panel inspection or repairs as soon as you notice the following signs.

Warning Sign #1: Heat You Can Feel

Warmth near the panel door, breakers, or on the wall around them indicates an overloaded circuit or failing breaker. It could also be due to a loose connection creating resistance. You should avoid using heavy electrical loads on the affected circuit and schedule an evaluation.

Warning Sign #2: Burning Smell or “Hot Plastic” Odor

A burning smell, especially during periods of high usage, may mean that there is arcing, overheating insulation, or melted components. This is an urgent problem and a potential fire hazard. If the smell is strong or ongoing, immediately turn off your power if it is safe to do so and call one of our licensed electricians.

Warning Sign #3: Buzzing, Humming, Sizzling, or Crackling Sounds

Any noise that comes from your panel could mean there is arcing, a faulty breaker, a loose connection, or other component problems. Don’t use the affected circuit and schedule your next service appointment.

Warning Sign #4: Corrosion, Rust, or Moisture Evidence

Any corrosion on breaker screws, rust on the panel, dampness, or staining shows that moisture is getting inside. This moisture can cause arcing, corrosion, and poor connections. Water and electricity are dangerous together, so immediately get the problem inspected.

Warning Sign #5: Scorch Marks, Discoloration, or Melted-Looking Plastic

Any dark marks, warped plastic, browning near breakers, or odors from melted wire insulation are signs you need to schedule an urgent service call. These problems can stem from arcing, breaker failure, overheating, or loose lugs.

Warning Sign #6: Breakers That Trip Often or Won’t Reset

If the same breaker keeps tripping all the time or trips frequently in the winter, it could be due to a wiring fault, an overloaded circuit, or a faulty breaker. These malfunctions can also make the breaker feel soft. While resetting the breaker once is fine, you shouldn’t repeatedly reset the same breaker. To ensure your safety, get the circuit evaluated by a professional.

Warning Sign #7: Flickering Lights and Inconsistent Power

When you switch on your HVAC system, dryer, or microwave, the lights shouldn’t flicker, dim, or surge. This symptom means that there are overloaded circuits, loose connections, or more serious electrical problems. Note what causes the problem and call a professional for help.

Warning Sign #8: “Double-tapped” or Cramped-Looking Wiring

Without opening the covers, look at the wiring. If the wiring is messy, there are crowded entry points, or multiple wires are entering oddly, your panel may have past modifications or additions. There could also be capacity-related issues.

This isn’t a DIY problem. To determine whether your panel is safe or not, you’ll need a professional inspection.

Warning Sign #9: You Rely on Power Strips and Extension Cords To Add Outlets

If you feel like you constantly need to use power strips or your breakers constantly trip, your home may have outgrown its electrical distribution. At this stage, it’s time to consider adding a subpanel or new circuits.

Red Flags That Require Immediate Action

Call for help if you notice any of the following signs.

  • Burning odors
  • Warm or hot panel doors and breakers
  • Visible melting
  • Smoke
  • Moisture in or around your panel
  • Scorch marks
  • Sizzling or crackling sounds

What Homeowners Can Do Safely Without Opening the Panel

As a homeowner, there are a few things you can do to improve your home’s electrical safety without opening your panel.

  • Keep your panel area clear and accessible.
  • Pay attention to patterns, such as when you notice tripped breakers and odd smells.
  • Reduce heavy loads if you’re experiencing circuit issues.
  • Look for sources of moisture nearby.
  • Replace the batteries in your smoke and carbon monoxide alarms. If a panel issue causes a fire, you need a functioning alarm.

What a Professional Panel Safety Check Typically Includes

During a typical panel safety check, our team will perform the following activities.

  • Evaluate the panel load and map circuits.
  • Check for performance and heat problems.
  • Inspect the connections for signs of looseness or corrosion.
  • Identify damage from moisture and the source.
  • Verify the panel’s grounding and bonding.
  • Recommend the right upgrade, subpanel installation, repair, or breaker replacement for your family’s needs.

When Replacement Becomes the Smarter Option

In some cases, a basic repair is all we need to do to keep your panel functioning at its best. If you’re experiencing the following problems, a replacement is likely the best course of action.

  • Repeated overheating issues
  • Signs of arcing
  • Major corrosion or moisture-related damage
  • Multiple failing breakers
  • Unsafe modifications

Many panels were designed for the electrical needs of yesteryear. If your home doesn’t have enough capacity for modern electrical loads, it’s time to upgrade. An upgrade is also essential if you have new electrical needs, like an EV charger, a remodeling project, or a hot tub.

Don’t Wait for a Major Failure

How old your electrical panel is matters less than seeing red flags, such as corrosion, buzzing, odd odors, or heat. If you notice these warning signs, reach out to Rogue Valley for help. Schedule a panel safety evaluation today!

FAQs

Is a buzzing panel always dangerous?

While a buzzing panel might not immediately be dangerous, it is a sign of arcing or other electrical issues. To stay safe, it’s important to schedule an electrical inspection.

Why does the panel smell when the heater or dryer runs?

You may be dealing with an overloaded circuit, a faulty connection, or a malfunctioning breaker. Heaters and dryers pull a lot of power, so they end up adding to the breaker’s existing issues. Any unusual odors are an indication that you should call for help.

Can I just replace one breaker instead of the whole panel?

It depends on the problem. If only one breaker is faulty, an electrician can quickly replace the affected breaker. For more extensive issues, other repairs may be necessary.

What causes corrosion in an electrical panel?

Corrosion occurs when there is moisture intrusion. Because water and electricity are a dangerous combo, you should immediately call for professional help.

How urgent is a warm breaker or flickering lights?

These symptoms often occur because of faulty components or overloaded breakers. Because these issues can cause a fire, you should immediately schedule an electrical inspection.

Summary

Electrical panel problems rarely improve on their own, and delaying service can increase the risk of damaged wiring, power interruptions, or an electrical fire. If you notice heat, unusual sounds, burning odors, corrosion, or frequent breaker trips, have the panel evaluated by a licensed electrician. Rogue Valley Heating, Cooling & Electrical can identify the source of the problem and recommend the safest repair or upgrade for your home. Contact our team to schedule an electrical panel inspection.

Image of a Rogue Valley Heating & Air technician helping a Grants Pass customer with their heat pump

Heat Pump Short Cycling: Causes, Signs, and Fixes

If your heat pump seems to switch on and off all the time, it is known as short cycling. When this happens, it can immediately impact your energy bills and comfort. Because the repeated on/off cycles cause extra wear on your compressor, it can also result in added repair costs.

Fortunately, there are a few steps you can take to troubleshoot the issue and prevent it from recurring. If troubleshooting doesn’t help, our heating, ventilation, and air conditioning (HVAC) team can quickly diagnose and repair the problem.

What Short Cycling Means (and What’s Normal)

Short cycling is when your system starts and stops before it can reach the appropriate comfort level. While short cycling due to mild weather conditions isn’t a concern, there are situations where short cycling reflects a potential issue.

Short Cycling vs. Normal Cycling

  • Short cycling involves the system turning on and off more frequently than normal and occurs when repairs, adjustments, or maintenance need to be performed.
  • Normal cycling refers to how your heat pump normally operates. It is able to continue running long enough to reach the appropriate comfort level.

Common Signs Your Heat Pump Is Short-Cycling

If you notice the following signs, your heat pump is likely short-cycling.

  • It turns on and off every few minutes.
  • The heat pump won’t maintain your set temperature, causing drastic hot and cold swings.
  • Your energy bill increases without a major change in the weather.
  • You feel clammy when the heat pump is in cooling mode due to less moisture removal.
  • There are clicking sounds or unusual start-up noises.
  • The thermostat frequently suggests calling for service or shows short run times.

Important Safety Note: If you smell any burning odors, notice ice buildup, or your breaker trips, shut your heat pump down and call for help right away.

Why Heat Pumps Short Cycle: The Most Common Causes

There are a few common reasons why your heat pump may short-cycle. By scheduling routine maintenance and timely repairs, you can prevent this issue from occurring during periods of peak heat.

Dirty Air Filter or Restricted Airflow

By far, this is the most common reason for short cycling. Clogged filters, closed registers, and blocked returns can impede airflow. In turn, this can cause the coil to freeze when the unit is in “cool” mode or overheat when it is in “heat” mode. To troubleshoot, replace the filter, open vents, and make sure the returns are unobstructed.

Thermostat Problems

When the thermostat is near a heat source or in direct sunlight, it can get an inaccurate reading. Similarly, wiring issues, calibration problems, and the wrong smart thermostat settings can lead to rapid cycling.

Start by checking the batteries and settings. If that doesn’t work, you may want to review the placement to see if the thermostat is in sunlight or a draft area.

Oversized System or Staging Issues

An oversized system can reach the appropriate temperature too quickly, causing it to shut off right away. As soon as the temperature changes, the heat pump has to turn back on. Over time, this rapid cycling can cause unnecessary wear and tear on your home.

To evaluate the problem, you need to get professional help. A technician will determine the accurate sizing and staging for your home. Our team will also look at your airflow settings to see if any adjustments are necessary.

Low Refrigerant or Refrigerant Leak

When refrigerant levels fall, it leads to an incorrect pressure level. Because this can cause the coil temperature to drop and result in freezing, you’ll often notice repeated icing and a decline in cooling performance.

This is a problem that must be diagnosed by a professional. A technician can inspect and repair existing leaks. Once this is done, they will charge up your refrigerant levels.

Dirty Coils (Indoor or outdoor)

Dirty coils restrict airflow and heat transfer, causing short cycling and unusual pressure. As a homeowner, you can prevent this issue by keeping your outdoor unit free from debris. Once the coil is dirty, you should call a technician to schedule a cleaning appointment.

Electrical and Control Issues

Sometimes, your heat pump’s capacitor, control board, sensors, or contactor may malfunction. If this occurs, you may notice intermittent starts, error codes, and random shutdowns. Electrical diagnostics and component testing are not DIY activities, so reach out to our HVAC technicians if you think this is the problem.

Duct or Static Pressure Issues

If you have a ducted system, it’s common to experience leaky ducts, crushed flex, and incorrect airflow balance. When these problems occur, they can result in high pressure and inhibit your system’s performance.

To remedy the problem, our technicians will do a static pressure measurement and duct evaluation. Afterward, we can seal, repair, and replace the ducts as needed.

Defrost Cycle Confusion

In the winter, the defrost cycle helps to melt ice off the outdoor unit. Basically, the heat transfer process is reversed temporarily. Because the heat is being sent outdoors, the air coming from your vents may temporarily feel cool.

Normal defrost cycles are not a cause for concern. However, you should call for help if you have continued comfort issues, the heat pump has excessive defrost cycles, or heating mode never switches on again.

What To Do First: A Safe DIY Checklist

To troubleshoot the issue, start by using the following checklist.

  • Replace the air filter with the correct size filter.
  • Ensure the supply vents and returns are open and unobstructed.
  • Set the thermostat to a steady temperature. Avoid any drastic up or down adjustments.
  • Confirm that the thermostat’s mode, fan, and schedule settings are appropriate.
  • Clean around the outdoor unit to ensure proper airflow.
  • Turn off your system at the first sign of ice. Then, let it thaw before calling us.

Don’t Do This

  • Don’t chip ice off of sharp parts.
  • Don’t force the system to run if it continues to short-cycle.

When To Call a Pro (And Why Waiting Can Get Expensive)

When short cycling occurs, it can stress important components in your HVAC system. If this problem isn’t fixed, it can lead to higher energy costs and expensive repairs. By reaching out for support, you can get a technician to help with airflow diagnostics, electrical checks, and measuring refrigerant levels.

Call for help if:

  • Short cycling comes back after you check the filter and airflow.
  • Ice returns again.
  • The breaker keeps tripping.
  • You hear an unusual clicking or buzzing noise.

How We Diagnose Heat Pump Short Cycling: What To Expect

We diagnose short cycling through a few important steps.

  • Verify that the system staging and thermostat are operational.
  • Measure the system’s temperature performance and airflow.
  • Inspect the filter, blower performance, and coils.
  • Confirm that there is the right level of airflow.
  • Check the refrigerant readings.
  • Test electrical components and controls at startup.
  • Review ductwork for signs of holes, tears, or gaps.

How To Prevent Short Cycling: Maintenance Tips

To avoid short cycling in the future, we recommend performing the following maintenance activities.

  • Consistently replace the filters. This should be done more often if there are pets or a lot of dust present.
  • Clear a 2- to 3-foot space around the outdoor unit throughout the year.
  • Schedule seasonal tune-ups to catch airflow and refrigerant issues before they become major problems.
  • Book a duct maintenance and balancing appointment for ducted systems.

Remembering to schedule routine maintenance can be challenging. To make it easier, we offer a convenient membership plan. It features complimentary tune-ups, discounts, and special promotions, so you can easily maintain your HVAC system.

FAQs

Is a heat pump’s short cycling bad?

In general, short cycling isn’t a good sign. No matter what the cause is, short cycling causes the compressor to turn on more frequently than normal. This type of added strain can lead to premature failure, resulting in higher repair bills. Even before parts start to fail, you’ll notice worse performance and higher energy costs.

How often should a heat pump cycle?

In most cases, heat pumps run for 10- to 20-minute stretches. Depending on the temperature required, these cycles may occur around two to three times per hour.

Can a dirty filter cause short cycling?

Absolutely. Anything that impedes the unit’s airflow can cause it to short-cycle.

Can low refrigerant make a heat pump short-cycle?

Yes, it can. When refrigerant levels are low, it changes the pressure and temperature of the refrigerant. In heating mode, this can make the heat pump overheat and trigger a safety shutoff. During cooling mode, the indoor coils can freeze and cause the system to stop working.

Why does it short cycle only in winter?

During cold weather, the heat pump has to work harder. Normally, the underlying cause might not be bad enough to cause short cycling. Because the system has to work so much more than normal, it amplifies the problem and results in more frequent cycling.

Why does it short cycle only in summer?

Heat pumps are used the most during the hottest days of summer. This increased use heightens any underlying strain and leads to more frequent cycles.

Can an oversized heat pump be adjusted without replacing it?

Yes, it is possible to adjust fan speeds, add buffer tanks, change control settings, or install special devices for modulating the capacity. Each heat pump is different, so talk to an HVAC technician about what will work best in your situation.

Should I turn my heat pump off if it’s short-cycling?

Yes. Shutting off the heat pump can prevent short cycling from damaging the compressor. It also gives you a chance to troubleshoot common problems, like clogged air filters and airflow issues.

Keep Your Heat Pump Working at Its Best

Short cycling is often caused by problems related to the refrigerant, controls, or airflow. If frequent on/off cycles keep occurring after you’ve performed basic checks, you should schedule a diagnostic appointment. With proper repairs and a tune-up, you can prevent short cycling from recurring.

Book your next heat pump tune-up today.

Wall-mounted ductless air conditioner is installed in a room of a residential house in Grants Pass.

Why Your AC Coil Freezes Up: Causes and How To Fix It?

When you have ice on your indoor coil or the large copper line, it’s an immediate cause for concern. Once the coil becomes too cold, moisture freezes on it. This reduces your air conditioner’s efficiency, leading to wasted energy and poor comfort. Because this situation causes added wear on your compressor, you’re more likely to need repairs or a replacement.

If you notice icing on your coil, the first step is letting it thaw out. Then, there are a few troubleshooting tips you can try before reaching out to our heating, ventilation, and air conditioning (HVAC) team for a professional inspection.

Let’s take a look at why coils freeze, how to prevent freezing, and what to do if you experience this problem.

What To Do Right Now If Your AC Coil Is Frozen

Immediately after your AC coil freezes, follow these steps.

  • Turn your thermostat off or raise the temperature.
  • As long as your airflow is fine, switch your fan to “On” to help your coils thaw.
  • Allow the coils to thaw completely. This is necessary for us to make an accurate diagnosis.
  • Replace your air filter while the unit thaws.
  • Ensure your return vents aren’t blocked.
  • Open supply vents.
  • Monitor for signs of water runoff. Protect your floors and use towels to clean any runoff.

Once your AC has thawed completely, try running it briefly to see if icing returns. If it doesn’t, you need to call for professional AC repairs.

Important Safety Notes

  • Don’t chip ice with sharp tools
  • Don’t continue to run the AC if it is frozen.

If you notice a burning odor, signs of electrical issues, or a tripped breaker, immediately shut down your unit and reach out for help.

Why an Evaporator Coil Freezes

Evaporator coils are supposed to absorb heat from your indoor air, so they require warm airflow. They also need the right amount of refrigerant present to absorb the heat. If airflow or refrigerant levels are off, the coil’s temperature can drop below freezing. This causes moisture in your home’s air to freeze around the coil.

Callout: Most frozen coils start with airflow problems.

The Most Common Causes of a Frozen AC Coil

There are a few common reasons why you might experience a frozen AC coil.

Dirty Air Filter

Signs: Weak airflow, dirty filter, and rooms that won’t cool

This is the most common reason. When a filter is clogged, it restricts airflow and results in the coil becoming too cold. You can fix this on your own by replacing the filter with a new one that is the right size.

Blocked Return Vents or Too Many Closed Supply Vents

Signs: Whistling, uneven comfort levels, and low airflow from your vents

When a return or supply vent is closed or blocked, it starves your unit of air. You can fix this yourself by opening vents, removing any obstructions, and checking the return paths.

Blower Fan Issues

Signs: Low air from the vents, odd sounds, and intermittent airflow.

If the blower fan’s motor, capacitor, or blower wheel isn’t functioning properly, it reduces airflow and can cause the coil to freeze. You need an HVAC technician to measure the airflow and test electrical components. Then, the technician can clean and repair the blower as needed.

Dirty Evaporator Coil

Signs: Occasional musty odors and recurring freeze-ups even when the filter is clean

When your coil is dirty, the dirt can form an insulating layer that blocks airflow through the fins. Unfortunately, this must be addressed by a professional technician. Once we arrive at your home, our technician can quickly work to clean the coil, inspect your drain pan, and ensure a clear airflow path.

Low Refrigerant

Signs: Poor cooling performance, recurring icing on coils and lines, and longer runtimes

Refrigerant levels don’t just run out. If your refrigerant levels are low, it is because of a leak. This can cause the pressure levels to drop, resulting in a low coil temperature and icing. By law, refrigerants can only be recharged by a certified technician. Our team can quickly detect and repair the leak to prevent this issue from returning.

Metering Device Problems (TXV or Fixed Orifice)

Signs: Inconsistent cooling and freeze-ups that aren’t related to your filter or airflow

When there isn’t enough refrigerant, it can impact your metering device and result in freezing. Our technicians can diagnose whether you’re dealing with superheat or subcooling. Then, we can perform repairs and replacements as needed.

Ductwork Restrictions or Leaks

Signs: Weak airflow in different rooms, hot spots, and dusty attic odors

In a ducted system, leaks and gaps can develop in the ductwork. This allows conditioned air to escape and attic or crawlspace air to enter your ducts. You can get the problem repaired by having a technician perform a static pressure test, duct inspection, and correction.

Outdoor Condenser Issues That Can Contribute

Signs: An outdoor unit clogged with debris, hot air discharge, and long runtimes

When dirt and debris clog the outdoor unit, it can affect your system’s pressure and performance. Eventually, this can cause icing conditions. You can fix the issue by clearing away debris from around the unit and gently cleaning it as needed.

Thermostat and Settings

While it won’t cause icing on its own, your AC’s setting can increase the likelihood of icing. If you have extremely low setpoints and the AC is constantly running, it can worsen any existing airflow issues. Although adjusting your thermostat settings can help alleviate the icing, you’ll still need to diagnose and fix the underlying problem.

Ice on the Outdoor AC Line: What It Means and Why It’s Usually an Indoor Coil Issue

Sometimes, you might notice ice develop on the outdoor AC line. If the large copper line is iced up, the evaporator coil is likely frozen as well. The root cause of both issues is refrigerant or airflow problems.

It’s important to note that there is a difference between sweating and icing. While icing is a cause for concern, sweating is completely normal. As the system cools, moisture condenses around the cold line and causes sweating. This is a normal part of the line’s operation and isn’t an issue.

How To Tell If It’s Airflow or Refrigerant

There are a few signs that you’re likely dealing with an airflow or refrigerant problem.

More Likely To Be Airflow:

  • Your filter is obviously dirty.
  • The vents or returns are blocked.
  • The airflow is weak.
  • Freeze-ups improve once you change the filter or fix the vents.

More Likely To Be the Refrigerant or Metering Device:

  • The filter is clean, vents are open, and your airflow appears normal.
  • Your cooling performance steadily declines over time.
  • The coil refreezes right after it thaws.
  • Your AC suffers from repeated freeze-ups.

No matter what the problem is, diagnosis must wait until after the coil has fully thawed.

What a Technician Checks During a Frozen Coil Diagnostic

To diagnose and repair the issue, our HVAC technicians will perform a few key checks.

  • Confirm that the coil has thawed completely.
  • Measure the AC’s airflow and static pressure.
  • Inspect the blower performance and the condition of the indoor coil.
  • Make sure the refrigerant is charged and not experiencing superheat or subcooling.
  • Find and repair leaks if the refrigerant levels are low.
  • Inspect the metering device and overall system performance.
  • Check ductwork for leaks, gaps, and other issues if poor airflow is a consistent problem.

Preventing Frozen Coils (So It Doesn’t Keep Happening)

To avoid this issue in the future, there are a few important steps homeowners can take.

  • Filter Replacement: Filters should be replaced according to the manufacturer’s schedule. Change your filter more often if your home has pets, smoke, dust, or allergy issues.
  • Clear Vents: Make sure return vents and registers are clear. Avoid closing too many registers.
  • Seasonal Maintenance: Schedule a tune-up to get your blower and coils inspected and cleaned.
  • Seal Ducts: If there are duct restrictions or leaks, seal the ducts and resolve the airflow problems.
  • Clean Outdoor Unit: Clear a 2- to 3-foot space around your outdoor unit to ensure proper airflow.

If you experience freezing at any point, it’s a good idea to get a tune-up before peak heat arrives. Through our maintenance plan, you can get a complimentary tune-up just in time for summer and enjoy special discounts on our services.

FAQs

Can I run my AC if the coil is frozen?

No. Even if you can technically have your AC on, using it will lead to increased wear, higher energy costs, and performance issues. Once the coil is frozen, the best thing you can do is thaw the coil and then resolve the underlying problem.

How long does it take for a frozen AC coil to thaw?

It generally takes between 1 and 24 hours, but most freeze-ups thaw out in 8 hours or less.

Will a dirty filter cause ice on the coil?

This is the most common cause of frozen coils. Clogged filters impact airflow, which causes the coil to ice up.

Does low refrigerant always mean a leak?

Yes. Refrigerant lines are a closed system, so the only way for refrigerant to escape is through some type of leak or break in the lines.

Why is my AC blowing warm air and freezing up?

If your AC is blowing warm air and freezing up, it is likely due to refrigerant or airflow issues. You can check for clogged air filters and obstructed vents on your own. However, you’ll need to schedule professional repairs if these DIY steps don’t resolve the issue.

Is ice on the outside AC pipe normal?

No, it is not. While sweating on the outside pipe is normal, icing likely means that your indoor evaporator coil is freezing.

Can a frozen coil damage the compressor?

Absolutely. Frozen coils mean the refrigerant is likely in liquid form instead of gas when it reaches the compressor. Because the compressor isn’t intended to deal with a liquid, this can lead to broken components and overheating.

What temperature should I set my thermostat to avoid freezing?

To prevent freezing, the lowest you should set your AC is 70℉ to 72℉.

Prevent Your AC Coil From Freezing

In most cases, freezing occurs due to low refrigerant or improper airflow. Once you have turned off the unit and allowed it to thaw, you can perform basic checks to determine the underlying problem. If the AC continues to have issues, it’s important to schedule a service appointment.

Get help with your diagnostics, repairs, and maintenance by reaching out to Rogue Valley Heating, Cooling & Electrical today.

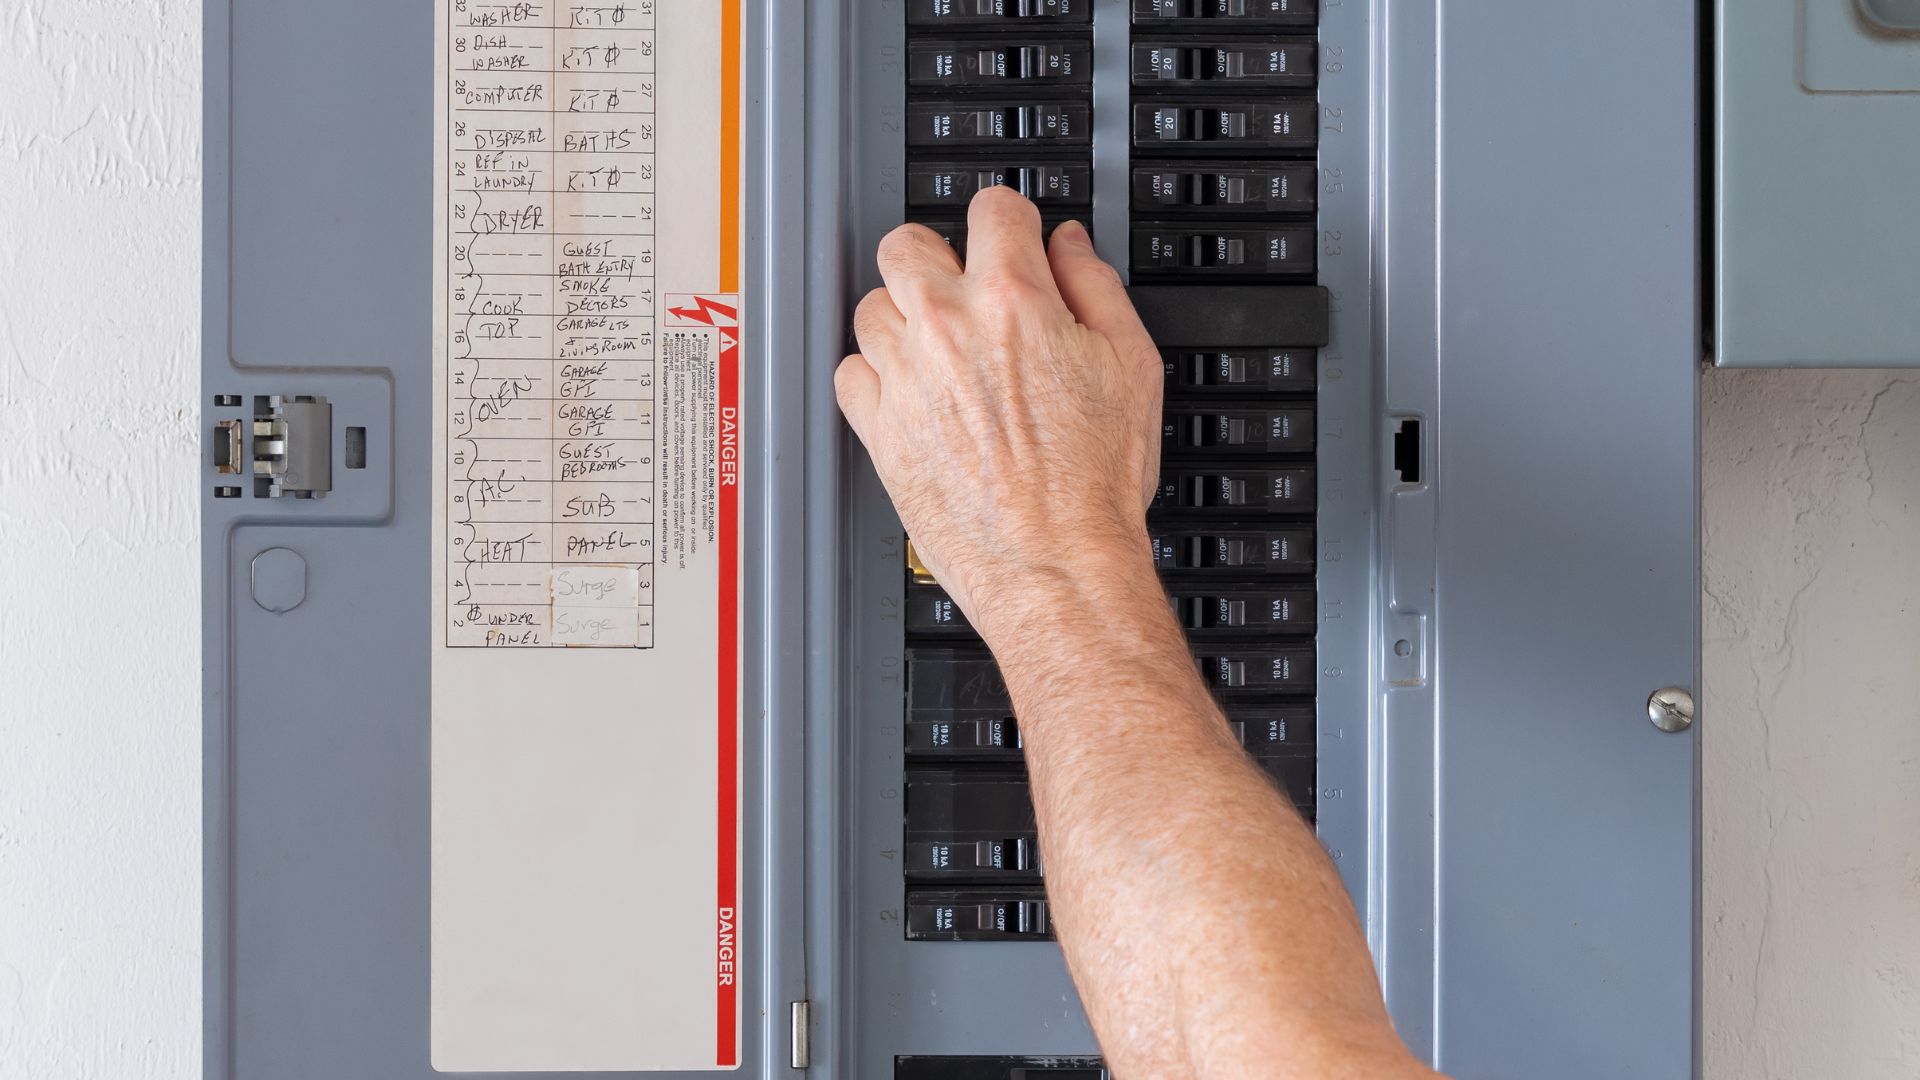
Image of a homeowner turning off one of their electrical breakers

Why Breakers Trip More in Winter (And What It’s Trying To Tell You)

It’s chilly out, so you plug in the heater to warm up. Suddenly, your lights blink and the breaker trips. While this might seem like a problem, the reality is that the breaker tripping is a safety feature designed to protect you. There are safe changes you can make to your home to prevent tripped breakers. However, if this continues to happen frequently, you should reach out to Rogue Valley Heating, Cooling, & Electrical for professional help.

What a Breaker Trip Actually Means

Breakers shut off power when they detect a short, ground fault, or overloaded circuit. This is more likely in winter because demand for electricity is higher.

Important Safety Note: Resetting the breaker once is fine. Repeatedly resetting it without determining the underlying cause is a major safety hazard.

The Big 3 Reasons Breakers Trip More Often in Winter

There are a few main reasons why breakers trip more in the wintertime.

Reason #1: Space Heaters and High-Wattage “Quick Heat” Devices

A space heater pulls a lot of power, especially as you crank up the temperature setting. When added to the rest of the gaming consoles, televisions, microwaves, and hair dryers on the same circuit, this can lead to problems.

Reason #2: Aging Circuits and Older Electrical Panels

Older homes weren’t designed for all of the electrical devices and appliances we have today. Worse still, breakers and wiring can become worn and sensitive over time. Plus, a lack of dedicated lines and limited circuits per room can lead to overloaded circuits during the winter.

Reason #3: Loose Connections That Act Up When Temperatures Drop

Finally, falling temperatures can cause metal to contract. This results in loose connections, which create resistance, heat, and power issues. Combined with a higher wintertime electrical load, this creates potential hotspots and causes a danger to your home.

Common Winter “Trigger Scenarios”

When multiple devices are used at once, it can lead to tripped breakers. In the winter, the following trigger scenarios are fairly common.

  • Using a heater, holiday lights, and a TV in the same room
  • A heater hooked up to an extension cord or power strip
  • A coffee maker that runs while the heater is on
  • Garage and outdoor circuits using heaters, tools, and freezers
  • A bathroom or bedroom heater tripping the breaker once it’s switched to high

Overload vs. Short vs. Ground Fault: How It Looks at Home

To tell if it is an overload, short-circuit, or ground fault, consider the following signs.

Overload Signs

You can tell if it is an overloaded circuit if it trips within a few minutes of running or after extra devices are added.

Short-Circuit Signs

Short circuits happen right after something is plugged in or switched on.

Ground-Fault Signs

These occur when moisture is present, such as in outdoor areas, bathrooms, kitchens, damp basements, or garages.

Space Heater Reality Check

Space heaters are a major fire hazard. Through a few safe habits, you can make sure your space heater is used safely.

Safer Heater Habits

  • Always plug space heaters directly into wall outlets. Never use power strips.
  • If it is a shared circuit, keep the space heater on a lower temperature setting.
  • Try to limit each circuit and outlet to one high-watt appliance.
  • Turn off the space heater if you are sleeping or not in the room.
  • Make sure there is a three-foot clearance around the space heater.

What Not To Do

  • Don’t daisy-chain extension cords.
  • Don’t use space heaters as a long-term solution.
  • Don’t repeatedly reset the breaker.

The “Quiet Warnings” You Should Not Ignore

Watch out for quiet warning signs. Immediately stop using the circuit and schedule professional electrical repairs as soon as possible.

  • Repeated breaker trips, even when the load is small
  • Warm outlets and switches
  • Flickering lights when appliances turn on
  • Burning odors
  • Buzzing or crackling sounds
  • Discoloration around the outlet
  • Sparking

Safe Steps Homeowners Can Take Today

If you are experiencing tripped breakers, there are a few proactive steps you can take right now to ensure the safety of your home and loved ones.

  • Unplug the last device you just plugged in to see if the circuit still holds.
  • Try reducing the load. For example, move the heater to a different outlet or circuit.
  • Run fewer high-watt devices at the same time.
  • If your space heater is old, damaged, or has a frayed cord, get a new one.
  • Record which breakers and devices were involved. Track the time of day as well.

When It’s Time To Call Rogue Valley Heating, Cooling and Electrical (Or a Licensed Electrician)

It’s time to call for electrical repairs if you notice any of the following issues.

  • Breakers trip repeatedly during normal winter use.
  • Sections of your home keep losing power.
  • You have to use space heaters every day.
  • The home has an older panel or not enough circuits.
  • There are buzzing noises, flickering lights, unusual odors, or heat.

Winter Trips Are Common, but They’re Not “Normal” To Live With

While winter trips are a common occurrence, they aren’t normal and shouldn’t be something that your family has to live with. Space heaters, loose connections, and aging circuits can all contribute to this nuisance. By making a few smart changes and scheduling a professional electrical inspection, you can avoid tripped breakers this winter.

For help with your tripped breakers this winter, reach out to Rogue Valley Heating, Cooling, & Electrical. We’ll determine the cause, so your family can enjoy a safe, steady power all winter long.

FAQs

Why does my breaker trip only when it’s cold outside?

When it’s cold, metal contracts. This potentially loosens connections and wiring, causing shorts. Additionally, many people use space heaters, electric blankets, and other items in the cold that can overload breakers.

How many space heaters can I run at once?

In terms of safety, you should only be using at most one per breaker. Realistically, you should consider an HVAC upgrade if you feel the need to use more than one space heater. If your furnace or heat pump can’t keep up in the cold, it’s time for an upgrade.

Is it dangerous to keep resetting a breaker?

Yes, it can be. If your breaker keeps tripping all the time, it indicates that there is an underlying problem with the circuit panel, electrical wiring, or appliances. Continuing to reset the breaker increases the likelihood of damage, electrical hazards, and fires.

Why does the breaker trip instantly when I turn something on?

There is likely a short circuit or ground fault occurring. Damaged wiring, moisture, and faulty appliances can all cause the breaker to trip repeatedly. To avoid causing a fire or additional damage, reach out to our team of experienced electricians for professional help.

Do I need a panel upgrade if breakers trip often?

Possibly. While there can be other causes of this symptom, it’s also possible that you are overloading the panel and need to upgrade. To find out the best option for your situation, reach out to our team for a detailed inspection.

Summary

Electrical panel warning signs should never be ignored, even if your home still has power. Heat, buzzing, burning odors, corrosion, and repeated breaker trips can point to problems that may worsen over time. Rogue Valley Heating, Cooling & Electrical can inspect your panel, explain what is causing the issue, and recommend the appropriate repair or upgrade. Contact our team to schedule an electrical safety evaluation for your home.

Frequent breaker trips should not become part of your normal winter routine. They may point to an overloaded circuit, damaged wiring, a failing breaker, or an electrical panel that can no longer support your home’s power demands. Rather than repeatedly resetting the breaker, have the problem inspected by a licensed electrician. Contact Rogue Valley Heating, Cooling & Electrical to identify the cause and keep your home’s electrical system safe and dependable throughout the colder months.


Why Your Furnace Is Blowing Cold Air And When To Call For Help

It’s cold outside, so you crank up the heat on your furnace. Instead of getting a welcoming rush of warm air, you get a chilly blast instead. For local homeowners, this type of experience can feel incredibly stressful. If you have young children or elderly family members at home, it can even be dangerous.

Fortunately, a furnace blowing cold air is often a normal symptom. However, it can be a warning sign of a potential problem, so it’s essential to understand when you need to call for help.

When a Furnace Blowing “Cold” Air Is Actually Normal

There are a few indications that a furnace blowing cold air is a part of its normal operations.

At Start Up, the Air May Feel Cold for a Minute or Two

When the heating cycle first starts, there is still cold air in the ducts. Once the furnace has a chance to warm up, this issue will go away.

The Thermostat Fan Is Set to “On” Instead of “Auto”

You should also check your fan settings. If the fan is in “On” mode, the fan will run all the time instead of just during heating cycles. The air may be cold if the furnace isn’t actively running.

Having the fan in “On” mode helps ensure even temperatures in every room and good airflow. However, you can easily switch it to “Auto” mode if you want it to only run when the burners are on.

The Furnace Is in a Short Cool-Down Cycle

Certain heating, ventilation, and air conditioning (HVAC) systems will run the blower for a short period of time after the burners switch off. As long as your home is warm and comfortable, you don’t have to worry about temporary periods of cold air at the end of the cycle.

Normal Temperature Difference at the Registers

Even though the air is warm, it might not feel hot to your hand. The real question is whether your home is able to reach and maintain the temperature on your thermostat.

When a Furnace Blowing Cold Air Points to a Problem

You may need to reach out for emergency repairs if you experience the following symptoms.

  • The Air Stays Cold the Entire Time the Furnace Is Running: This type of issue often indicates a problem with your burners, gas supply, or ignition.
  • The Furnace Turns on and off Quickly and Blows Lukewarm Air: Because this could be due to a safety limit tripping, a dirty filter, or overheating, it’s a good idea to get your furnace looked at by a professional.
  • The Burner Lights but Won’t Stay On: Often, you’ll notice a brief period of warm air followed by cold air if there is a problem with your flame sensor or safety controls. Because safety issues can result in gas leaks, fires, and electrical hazards, it’s essential to call a professional instead of just resetting the unit.
  • Thermostat Problems Making the Furnace Misbehave: Incorrect settings, the wrong mode, or a faulty thermostat can lead to this problem. If adjusting the settings and mode doesn’t work, it may be time for a thermostat replacement.
  • Issues With Ductwork or Airflow: Duct leaks, blocked vents, and disconnected ducts can result in airflow issues and colder air. You can try opening and unblocking vents on your own. If this isn’t enough, schedule professional repairs.

Simple Checks You Can Safely Do Before Calling Rogue Valley Heating, Cooling and Electrical

Before you reach out for help, try performing the following troubleshooting steps.

  • Confirm Thermostat Settings: Make sure that your thermostat is in “Heat” mode with the fan on “Auto.” The temperature should be several degrees above your current room temperature.
  • Check and Replace the Air Filter: Filters should be replaced every 30 to 90 days, but this should occur more frequently during periods of heavy usage. Otherwise, a dirty filter can reduce airflow and cause overheating. In turn, overheating can lead to short cycling and cold air.
  • Look at Vents and Returns Around the House: Make sure furniture and rugs aren’t obstructing the registers. Then, clear dirty or blocked return grilles. For proper airflow, all of the vents should be open.
  • Check the Furnace Power Switch and Breaker: Make sure your furnace switch is in the “On” position. See if there is a tripped breaker on your electrical panel. You can try to reset it once. If it trips again, call for professional help.

Safety First: Cold Air Issues You Should Not Ignore

To ensure the safety of your home and family, never ignore the following issues.

Signs It Is Time To Shut the Furnace Off

If you experience the following signs, immediately turn the furnace off.

  • There’s a strong odor of gas or rotten eggs.
  • There is a burning smell or an electrical odor that won’t go away.
  • Your carbon monoxide alarm went off.
  • You see visible damage, such as melted wires or scorch marks, around the unit.

Situations Where DIY Can Make Things Worse

When dealing with furnace problems, avoid doing the following things.

  • Don’t just reset a furnace repeatedly if it keeps shutting off.
  • Never clean or adjust burners or flame sensors on your own. Call a technician instead.
  • Don’t work on any safety controls or gas lines.

How Rogue Valley Handles Cold Air Complaints

When you reach out to Rogue Valley Heating, Cooling and Electrical for cold air issues, our experienced technicians will remedy the problem in a few key ways.

  • Diagnosis: We’ll carefully diagnose the root cause instead of simply guessing or swapping parts.
  • Inspection: As a part of our diagnosis, we will check your airflow, ignition, burners, ducts, and safety controls.
  • Explanation: Finally, we’ll explain the results of our testing and recommended course of action.

Preventing Cold Air Problems in the Future

To prevent your furnace from blowing cold air in the future, remember the following steps.

Simple Habits That Help Your Furnace Run Smoothly

Open your vents, track your filter changes, and monitor any unusual changes.

Why Annual Furnace Maintenance Matters

Remember to schedule your annual furnace tune-up to ensure proper ignition and airflow. Besides protecting the safety of your family, routine maintenance can help you avoid repairs, improve your energy efficiency, and catch worn parts before they fail unexpectedly.

Frequently Asked Questions About Furnaces Blowing Cold Air

Why does my furnace sometimes blow cold air at the start of a cycle?

This is because the air in the ducts is cold. Once the furnace has had a chance to warm up, the air won’t feel so cold.

How long should it take for the air to feel warm?

You might start noticing that your home feels warmer after 15 minutes or so. However, it generally takes around an hour for your indoor air temperature to really heat up.

Is it safe to keep running the furnace if the air feels only slightly warm?

If your furnace is struggling to heat your home or has to run nonstop to maintain the temperature, there is something wrong with it. Schedule professional furnace repairs so that you don’t end up with an unexpected furnace failure in the middle of winter.

Why does my furnace keep shutting off and then blowing cool air?

While a few different issues can cause this, it is often due to overheating. If the furnace gets too hot, the high-limit switch shuts the burners off. Alternatively, the flame sensor may have triggered the furnace to shut off. Once the furnace is off, the fan keeps running to help the furnace cool down.

Can Rogue Valley Heating, Cooling and Electrical fix cold air issues on all furnace brands?

Absolutely. Our team has years of experience working with local homeowners to diagnose and repair furnace issues. For a professional furnace inspection or repairs, give us a call today.

Still Getting Cold Air From Your Furnace? Rogue Valley Heating, Cooling and Electrical Can Help

There are many normal reasons why you might feel cold air coming from your furnace. However, you should immediately call for help if the air never warms up or the furnace keeps shutting down. If you smell or see anything unusual, schedule your next furnace service right away.

With the help of our experienced technicians in Grants Pass, you can get help diagnosing problems and getting your furnace working again. Schedule an HVAC appointment today for help.

Zoning vs. Balancing: The Right Fix for Upstairs/Downstairs Temperature Differences

When winter arrives in Medford and Grants Pass, it brings the thermostat wars along with it. While your downstairs is at a comfortable temperature, your upstairs isn’t. Before long, each family member is sneakily adjusting the thermostat as they walk by.

Although this is a common complaint for two-story homes, you don’t have to just put up with it. By deciding if you need simple balancing or true zoning, you can take the first step in enjoying a more comfortable home.

Why Upstairs and Downstairs Temps Drift Apart: The Simple Physics

Upstairs and downstairs have different temperatures because of basic physics. Warm air rises, while cooler air settles closer to the ground. This can mean your downstairs is significantly hotter than your upper stories. Additionally, upstairs rooms often get more sun exposure from the roof and windows, which can be heightened if the insulation is poor. If there are issues with your duct layout and return air placement, it can result in uneven temperatures.

Quick Definitions: Balancing vs. Zoning

The good news is that this problem can be resolved quickly through balancing or zoning.

Air Balancing

Balancing improves the setup to ensure airflow is distributed evenly. You use the same thermostat, but your airflow is updated with dampers, return improvements, and vent adjustments. To ensure the air balancing worked, we conduct airflow testing once everything is complete.

Zoning

Zoning divides your home into sections, with different thermostats and zone control boards. Thanks to motorized dampers, you can change the temperature in each section of the home separately.

The Key Question: Is Your Problem Airflow or Control?

Let’s look at common ways to decide between balancing and zoning.

  • One Floor Lacks Airflow: Balancing
  • Airflow Is Normal, But There Are Major Comfort Swings Between Floors: Zoning

When in doubt, we can always start by using balancing. Then, we can incorporate zoning if additional comfort improvements still need to be made.

Signs You Likely Need Air Balancing (And Not Zoning)

You may need air balancing if:

  • Certain areas have weaker airflow.
  • Rooms on the same floor have major temperature differences.
  • You noticed noisy airflow, static pressure, or whistling vents.
  • Changing vent or door positions affects your comfort.
  • Specific rooms have temperatures that don’t match the thermostat.
  • The system has never been properly balanced after you installed it or remodeled your home.

What Balancing Typically Includes

To balance your home, we measure each room’s airflow and temperature. After checking your duct sizing, restrictions, and disconnected runs, we can adjust your supply distribution and manual dampers. Our team will also review your filter choices, add returns, and repair leaky ducts as needed.

Signs You May Be a Good Candidate for Zoning

You are likely a good candidate for zoning if:

  • Each story has good airflow but consistently different temperatures.
  • You are constantly updating the thermostat because each floor has different comfort needs.
  • Your home has a “two floors, two comfort needs” pattern.
  • People are using different areas at different times, such as home offices.
  • Your upstairs bedrooms need a different temperature from the downstairs living spaces.
  • You want targeted comfort for specific areas instead of adjusting the temperature in your entire home.

What Zoning Typically Includes (And What It Does Not)

With zoning, you can expect some of the following benefits. However, there are limitations to what zoning can change.

What Zoning Adds

Zoning offers a few important improvements.

  • Separate thermostats for each zone
  • Motorized dampers to control airflow in your ductwork
  • A control board
  • Improved comfort control on each floor

What Zoning Does Not Fix by Itself

However, zoning will not be able to fix these issues on its own.

  • Major duct leaks
  • Poor insulation or big drafts
  • Undersized HVAC equipment
  • HVAC systems that have poor airflow or high static pressure

The “Start Here” Decision Path: How To Resolve Your Temperature Differences

To decide which option will solve your temperature wars, consider the following factors.

Step 1: Rule Out Easy Airflow Problems

Before you attempt balancing or zoning, rule out common airflow issues. Make sure your filter has been recently changed and is the right type for your HVAC system. Inspect for duct damage or leaks in your attic or crawlspace. Then, make sure your return and supply vents aren’t blocked.

Step 2: Do a Professional Balancing Assessment

If airflow is the issue, zoning is only going to move the problem around. This is why it’s so essential to get a professional balancing assessment before you decide to try zoning.

Step 3: Consider Zoning if You Still Have Floor-to-Floor Comfort Fights

To manage floor-to-floor comfort fights in a home that has good airflow, zoning is an effective option. This is especially true if you have home offices, guest rooms, or kids’ rooms that have specific comfort needs.

Cost and Complexity Expectations

Balancing will generally be more affordable and involve less disruption, which is why we try this option first. In comparison, zoning involves the installation of dampers, controls, and thermostat wiring, so it’s a better option if you’re trying to deal with ongoing floor-to-floor differences. Ultimately, the right choice will depend on your home’s layout, duct design, returns, and HVAC capacity.

Common Myths To Clear Up

Myth: “Closing vents upstairs or downstairs will fix it.”

Reality: Closed vents can increase static pressure, leading to premature wear and more frequent repairs.

Myth: “Zoning is always the best fix.”

Reality: Zoning is only effective if your ductwork and airflow are already in optimal condition.

Myth: “If your upstairs is hotter, your HVAC is failing.”

Reality: In most cases, this is due to problems with your design, airflow, or return path.

What RV Heat Can Check To Give You a Clear Answer

At Rogue Valley Heating, Cooling & Electrical, our team can help with the following HVAC tasks.

  • Airflow testing and comfort mapping
  • Duct inspection for leaks and airflow restrictions
  • Return air evaluation
  • Static pressure review
  • Equipment performance check

Once we’ve finished our inspection and performance tests, we’ll provide you with customized recommendations. Each home is different, so there’s no one-size-fits-all solution that works for every situation.

Comfort Shouldn’t Require Constant Thermostat Changes

While balancing changes the distribution of air, zoning gives you added control. Because each solution addresses a different problem, it’s essential to get an accurate diagnosis to resolve the root cause.

If your upstairs and downstairs temperatures are never the same, Rogue Valley Heating, Cooling & Electrical can help. Our thorough evaluations can give you an effective solution to your thermostat problems. Call today to learn more.

FAQs

Can I balance my system by closing vents?

No. This will actually increase the static pressure, leading to additional issues in the long run.

Will zoning increase my energy bills or lower them?

Zoning typically lowers your energy bills because it allows you to reduce your energy consumption in unused areas.

Do I need two systems for a two-story home?

Instead of getting two different HVAC systems, you can use zoning to control which story is being heated and cooled at any given point. For comfort and efficiency, zoning is the recommended course of action.

Why is my upstairs hotter in summer but colder in winter weather?

In summer, heat gain occurs because sunshine is warming the roof and windows. The upstairs may be cold in the winter if your furnace struggles to push enough heat upstairs. Alternatively, poor insulation can cause excessive heat loss through your attic.

How do I know if my ductwork can support zoning?

To find out if your home can support zoning, you’ll need to schedule a professional evaluation by an experienced HVAC technician.

electrical wiring

Winter Electrical Safety Checklist for Rogue Valley Homes

While winter in Medford and Grants Pass tends to be milder than the rest of the country, it can still get fairly cold. When this happens, your heating, ventilation, and air conditioning (HVAC) system has to run longer. Earlier sunsets and cold temperatures mean more lights are plugged in, and more electricity is needed.

Because of all these reasons, minor electrical issues are more likely to appear. Temporary setups, like space heaters and holiday lights, can quickly stress electrical systems. By understanding how to inspect your electrical systems and when you need professional help, you can ensure your family’s safety and comfort this winter.

Quick Safety First Tips (Read This Before the Checklist)

Don’t put your family’s safety at risk. Immediately call for help if you notice any of the following symptoms.

  • Burning odors, sparking, smoke, or buzzing sounds around the switches, panel, or outlets
  • Discolored or hot outlet covers
  • Lights that significantly brighten or dim throughout your home
  • Breakers that keep tripping, especially if nothing new is getting plugged in
  • Any indication of melted plugs, power strips, or cords

Why Winter Stresses Your Electrical System

In the wintertime, your heating system becomes extra stressed for a few key reasons. Because heating equipment runs longer and cycles more frequently, your electrical system has to work harder. Often, homeowners plug in extra devices in the winter, such as holiday lighting, garage heaters, electric blankets, portable humidifiers, and space heaters.

Wintertime also brings along increased moisture, storms, and darkness. This means you likely need more lights on for longer periods of the day. Outdoor outlets and connections can also face added risks because they’re exposed to increased moisture and storms.

The Winter Electrical Safety Checklist

To keep your home safe, work through each room and system in your home to make sure everything is working properly.

1. Electrical Panel and Breakers

To keep your panel safe, you need to make sure it is easy to access and not blocked by storage. Pay attention to any buzzing noises, burning smells, rust, water staining, or moisture. You should also note any breakers that feel loose when you gently touch them. While a single trip following a storm or power surge is normal, frequently tripped breakers are a cause for concern. Call if you notice recurring trips, burning odors, heat, buzzing sounds, or corrosion.

2. Outlets and Switches in High-Use Areas

High-use areas include bathrooms, kitchens, bedrooms, garages, and living rooms. Working room by room methodically, check each outlet for warmth, discoloration, crackling or buzzing sounds, sparks, or scorch marks. There shouldn’t be any sparks when you plug something in.

If you notice any of these problems, stop using the outlet. Ideally, move the device to a different circuit to see if this balances the electrical load. If you notice any warmth or discoloration on the outlet, call for professional help.

3. Test Your GFCI Outlets

In your home’s moisture zones, like the bathrooms, laundry room, kitchen, or garage, you’ll typically find GFCI outlets. Test them by clicking on the “Test” and “Reset” buttons. If the outlet won’t reset or immediately trips, it’s a sign you need professional help. Thanks to condensation and wet weather, shock hazards are especially likely in garages and outdoor areas.

4. Extension Cords and Power Strips: Winter’s Biggest Troublemakers

As a general rule, extension cords should only be used temporarily. If you need to keep using them all winter, it’s a good idea to find a more permanent solution. To ensure your cords and power strips are safe, verify that they have the correct safety rating for the device. Never daisy chain power strips or run cords underneath rugs. You also want to avoid pinching the cord in a window or door. If you do notice any indications of warmth, cracks, or frayed insulation, it’s time to replace the cord.

5. Space Heaters and Electric Blankets: Use Them Safely or Skip Them

Space heaters are a known electrical hazard when they are used incorrectly. To protect your family, remember the following space heater safety tips.

  • Never plug a space heater or electric blanket into a power strip or extension cord.
  • Make sure the space around it is clear of any bedding, curtains, or furniture.
  • Always turn off the space heater if you’ll be asleep or out of the room.
  • Pick a space heater that automatically shuts off if it is tipped or overheats.
  • Before using electric blankets, check for worn fabric, hot spots, and damaged cords.
  • Never fold an electric blanket while using it.
  • Replace the blanket if it is old or in questionable condition.

If you are constantly needing a space heater or electric blanket to stay warm, it may be time to upgrade your heating system. At the very least, you may need to install a dedicated circuit.

6. Holiday Lights and Seasonal Decor

For your indoor lights and decor, try using LEDs to lower the load and limit the amount of heat produced. Try plugging the strands into different outlets to avoid overloading a single outlet. Additionally, a timer is an effective safety measure so that you don’t leave the lights on all night.

As you put up your outdoor lights, check to make sure all of the lights and extension cords are rated for the outdoors. They should never be placed on the ground or in pooling water. To protect your family, all outdoor outlets should be designed with GFCI protection and a weather cover.

You should never overload your home’s circuits. A single overloaded circuit can lead to overheated cords, inconvenient trips, and flickering lights.

7. Heating Equipment Electrical Checks

To protect your home, pay attention to signs that your furnace, heat pump, or air handler might not be functioning at its best. If the lights dim dramatically when your system starts, your electrical systems may need to be upgraded to handle a larger electrical load. Similarly, pay attention to frequent cycling, unusual buzzing near the HVAC unit, burning odors that don’t dissipate, and breakers tripping when the unit starts. If you notice any of the previous symptoms, you should call for professional help right away.

In between your HVAC tune-ups, make sure your unit is functioning properly by regularly replacing the air filter and keeping the area around the equipment clear. Additionally, verify that the vents are open and unobstructed.

Call for help when:

  • Dimming or flickering occurs when the heater kicks on.
  • The breaker keeps tripping.
  • Your HVAC unit refuses to start.

8. Garage, Attic, Crawlspace, and Outdoor Electrical

All of these exposed spaces are subject to significant temperature swings, higher moisture levels, and more pests. To protect your electrical systems, check for damp spots near outlets, cords, and open junction boxes. Avoid having large appliances share the same circuit. In addition, pay attention to any outlet looseness or issues with the weather protection.

Rodents can cause major damage to electrical components. If you notice droppings near your outlets or chewed insulation, call for professional electrical help. You should also call for help if you notice any kind of moisture intrusion, damaged wiring, or frequent tripping.

9. Surge Protection and Power Outage Readiness

Sensitive electronics can be damaged if your power supply fluctuates during a storm. In the long term, you can prevent issues by installing a whole-home surge protector. In the short run, make sure to know where the main breaker is and have your flashlight in an easy-to-access spot.

10. Smoke Alarms and Carbon Monoxide Alarms

As part of your wintertime electrical safety checklist, don’t forget the following tasks.

  • Replace any alarms that have reached the end of their service life.
  • Test alarms each month to ensure they work.
  • Make sure to install a carbon monoxide alarm, especially if there is an attached garage or gas appliance in your home.
  • Check your batteries and replace them as needed.

Homes are sealed up tightly in the winter, and heating equipment runs all the time. Because of this, there is an added risk of carbon monoxide leaks, overheated appliances, and electrical overloads.

A Simple “Winter Electrical Risk Score” You Can Use

If you answer yes to two or more of the following questions, you need to schedule an inspection right away.

  • Do your breakers trip more than once per month?
  • Are you relying on space heaters to warm your home daily?
  • Do you notice lights flickering in more than one room?
  • Are you using extension cords permanently?
  • Do your outlets feel especially warm? Are they loose or discolored?
  • Is your home older? Has it been years since your last inspection?

When To Call a Pro

If you see any red flags from the safety section or want a safer capacity for your winter electrical needs, call for an electrical appointment right away. Any time you suspect a loose connection, panel problem, or overloaded circuit, our team can help. In addition, it’s a good idea to get a breaker checked out if it won’t reset or trip as soon as you reset it.

What To Expect During Your Electrical Inspection

During a professional visit, our team will perform the following tasks.

  • Check the condition of your panels and breakers.
  • Review what’s currently drawing the power on each circuit.
  • Calculate the electrical load needed.
  • Test your GFCI protection.
  • Inspect for loose connections.
  • Monitor any signs of overheating.
  • Provide you with transparent, straightforward recommendations for resolving problems.

FAQs

To ensure your safety this winter, we’ve gathered together some of the most frequent questions we hear about winter electrical safety.

Is it normal for lights to flicker when the heat pump starts?

Because the heat pump draws so much power, it’s normal for there to be a brief flicker when the heat pump switches on. However, this should not occur any other time, and it shouldn’t last for long. If the lights flicker for more than a few seconds, you need to reach out for a full inspection.

Why do breakers trip more in winter?

When you have many heating systems and electrical devices running at once, it increases the electrical load and leads to tripped breakers. However, it can also be due to the connections contracting in the cold weather, causing looseness and electrical resistance.

Can space heaters be used safely in bedrooms?

It is possible to use space heaters safely in the bedroom, but they need to be used with care. They should always be placed at least three feet away from any curtains, blankets, or other furnishings. Additionally, they should never be operated unattended or while the user is asleep.

How do I know if an outlet is overloaded?

An outlet may be overloaded if you notice any of the following symptoms.

  • Warm outlets
  • Burning odors
  • Crackling or buzzing noises
  • Frequently tripped breakers
  • Flickering lights

Why do my outdoor outlets trip when it rains?

This is a safety mechanism. When water gets into a GFCI outlet, it automatically trips to prevent ground faults. However, to avoid a serious hazard, it’s important to fix the underlying issue causing the ground fault.

Should I upgrade my electrical panel for winter heating needs?

Wintertime tends to involve high-draw appliances, increasing the strain on your electrical panel. Because of this, it’s a good time to get an upgrade. If your panel is already 25 years old or is only 100 amps, you may need a new one. Warm breakers, buzzing noises, flickering lights, and frequent breaker trips are all signs you may need to install a panel with a larger capacity.

Do LED holiday lights reduce electrical risk?

LED holiday lights can potentially lower your electrical risks. They produce less heat, use less energy, and remain cool to the touch. As a result, they can decrease the likelihood of a fire or shock hazard.

What are the warning signs of a loose connection?

If there is a loose connection, you may notice a hot outlet, discoloration, burning odors, electric shocks, flickering lights, or frequently tripped breakers. Additionally, you may hear popping or crackling noises near the loose connection.

Prepare Your Home for Wintertime

During the winter, your electrical systems have to work at their hardest level. Because of this, small problems can quickly become more noticeable. To prevent fires and other electrical hazards, it’s important to be proactive about using this winter safety checklist.

If you do notice any questionable symptoms, don’t wait to get help. Schedule an electrical inspection right away to ensure your family is safe throughout the winter.

lighting

Why Your Lights Flicker and When It’s an Electrical Safety Issue

You’re trying to read, but the kitchen lights flicker. Gradually, you realize that your LEDs always seem to flutter at night. Even your bedroom lamp appears to be pulsing.

While these symptoms may be harmless, they could be a warning sign of overloaded circuits and loose wiring. To help you avoid potential safety risks, we’ll cover common reasons for lights flickering, simple safety checks you can do, and red flags that mean you should call our electricians right away.

What Counts as “Flickering”?

Flickering is when your lights seem to flutter or blink. Often, this happens when an appliance turns on. However, it can occur randomly as well. Besides flickering, you should also pay attention to dimming and pulsing. While dimming is when the room gets noticeably darker for a second, pulsing is when your lights steadily go through a bright-dim-bright pattern.

The Most Common, Non-Emergency Reasons Your Lights Flicker

There are a few common reasons why your lights may flicker. These aren’t emergencies, and they can often be safely dealt with on your own.

Loose Bulb or Failing Bulb

A loose bulb will cause just one fixture to flicker, and there may be vibrations as well. You can fix this by simply shutting the light off, allowing it to cool, and tightening the bulb. If this doesn’t work, try replacing it with a new one.

LED Bulb and Dimmer Incompatibility

If the light flickers only at lower settings or when it is dimmed, it may be due to a poor-quality LED driver or a dimmer that isn’t designed for LEDs. Fix this issue by switching to a dimmable LED bulb or installing an LED-rated dimmer.

A Big Appliance Starts Up and the Lights Dip for a Moment

If your lights dim when a heat pump, refrigerator, or other appliance turns on, it’s likely not an issue. However, dramatic flickering or flickering on other sides of your home are indications of a problem.

Utility Power Fluctuations

When your utility power fluctuates, you’ll notice flickering lights in multiple rooms. It is more common during rain or wind events. Additionally, your neighbors will likely notice it as well. Just to be safe, it’s still a good idea to schedule a professional inspection.

LED-Specific Flicker: Why “New Bulbs” Can Still Flicker

When there is a low-quality LED driver or an incompatible fixture for LED lights, you may notice pulsing or flickering. Additionally, smart bulbs can flicker because of faulty internal electronics or dropped signals. If there is a neutral connection issue, it will often be more noticeable with an LED light than with incandescent bulbs.

When Flickering Lights Are a True Electrical Safety Concern

If you’re experiencing flickering lights in your Oregon home, remember the following red flags and emergency signs. Whether you need help with electrical switches or panel upgrades, our team can ensure your electrical systems are functioning as safely as possible.

Red Flags That Mean “Call an Electrician”

The following red flags are indications that you should call our electricians and schedule electrical repairs.

  • There is flickering in multiple rooms or your entire home.
  • Your home is also experiencing buzzing noises near the outlets, switches, or panel.
  • Lights in your home brighten and dim significantly.
  • There are burning odors, warm outlets or switch plates, and scorch marks.
  • The breaker keeps tripping repeatedly, or there are “half-trips.”
  • There is flickering and a power loss in part of your home.
  • The flickering starts all of a sudden or becomes worse over time.

Emergency Signs: Stop and Get Help Right Away

The following symptoms are signs of an emergency. Immediately call for help to prevent a fire, electrical shock, or damage.

  • Sparks, arcing sounds, or smoke
  • Repeated popping noises in your electrical panel, outlets, or switches
  • Burning odors that don’t dissipate quickly

The Behind-the-Scenes Causes Pros Take Seriously

If the flickering is caused by any of the following causes, it is important to get professional evaluations and repairs.

  • Loose Connection in Your Switch, Outlet, Fixture, or Junction: Loose connections can cause arcing and added heat. You may notice flickering when you walk across the room or touch a switch. Windy days may also make flickering more likely.
  • Loose or Failing Neutral Connection: A loose or failing neutral connection can cause major swings in brightness, flickering all over the house, and other unpredictable behavior.
  • Overloaded Circuit or Poor Load Distribution: Overloaded circuits and poor load distribution are a problem when there are too many high-draw devices on a single circuit. This can cause repeated dips, stressing your wiring. You may experience flickering whenever you use your hair dryer, vacuum, space heater, or similar appliances.
  • Aging Panel, Failing Breaker, or Busbar Issues: If aging panels, failing breakers, or busbar problems are the cause, you may hear buzzing or notice random trips. When flickering occurs, the breakers will often feel warm as well.
  • Service Entrance Problems: The service entrance is the connection that runs from the meter to the panel. If a problem occurs here, it can affect the safety of your entire home and be incredibly dangerous. As a homeowner, you may notice a widespread flicker that doesn’t align with appliance usage, windy days, or similar factors.

A Simple Troubleshooting Guide: Where Is It Happening?

To determine the underlying cause, there are a few troubleshooting tips you can watch out for.

If It’s Only One Lamp or One Fixture

If it seems like only one light or fixture is affected, it is likely due to a localized problem, such as an issue with the socket, bulb, fixture wiring, or switch. You can troubleshoot by trying a different outlet or swapping the bulb. Additionally, try touching the light or fixture to see if it flickers when you touch it.

If It’s One Room or One Circuit

When one room or circuit is involved, it is likely due to an overloaded circuit or a loose neutral on that circuit. Alternatively, the switch connection could be at fault. Monitor which devices are running when it flickers to narrow down the cause.

If It’s the Whole House

This likely happens because of a panel connection, power fluctuations through the utility provider, or the service neutral. For these issues, the only way to check is by calling a licensed electrician for professional help.

Safe DIY Checks You Can Do Without Taking Anything Apart

For safe troubleshooting, try the following tips.

  • Replace the bulb with one you know works well.
  • Test the dimmer at full brightness and different levels.
  • Make sure you have the right bulb for the fixture.
  • Unplug a high-draw device, such as a washer, to see if the flicker changes at all.

When trying to figure out the problem, start by considering the timing. For example, does it happen only at night? Pay attention to whether flickering occurs when HVAC systems, microwaves, or other appliances switch on. Similarly, note any unusual warmth, noises, or smells.

To protect the safety of your family and your home, you should never open the electrical panel. Additionally, don’t pull switches or outlets out of the wall.

If your breaker keeps tripping, don’t continue to reset it. This indicates underlying safety issues that need to be addressed by a professional electrician.

What a Professional Electrical Inspection Typically Includes

During an inspection, a professional electrician will go through the following steps.

  • Identify if the flicker is occurring at a fixture, circuit, or whole-home level.
  • Inspect for issues with your circuit load or breaker connections.
  • Look for signs of overheating.
  • Test voltage stability.
  • Look for neutral problems.
  • Inspect key connection points where flickering issues begin.

Once these steps are complete, the electrician can recommend whether a simple repair, circuit adjustment, or panel repair is needed. If the issue is occurring upstream with the utility provider, the electrician can work with them to resolve the problem.

How To Prevent Flickering Issues Long-Term

Over the long run, there are a few effective measures you can take to prevent flickering in your home.

  • Always use high-quality LED bulbs that are designed for the dimmer and fixture.
  • Don’t overload your circuits with high-draw appliances, like space heaters and microwaves.
  • In heavy-use areas, consider getting dedicated circuits. For example, dedicated circuits are effective for shop tools, EV charging, and home offices.

FAQs

To help you manage your flickering lights, we’ve compiled some of the most frequently asked questions.

Are flickering lights dangerous?

Sometimes. They can occur due to non-dangerous reasons, such as a big appliance starting up, a loose bulb, or fluctuations in power from the utility provider. However, flickering lights can also happen because of wiring issues or faulty components. To avoid a potential safety hazard, it’s essential to get your flickering lights checked out by a licensed electrician.

Why do my lights flicker when the heater or heat pump turns on?

When a large appliance turns on, it requires an extra surge of power. This surge causes the lights to briefly flicker. Excessive flickering or flickering at other times is a sign that you should get a professional inspection.

Why do LED lights flicker, but old bulbs don’t?

LED bulbs have incredibly fast switches that respond immediately to dips in power. In comparison, old bulbs have thermal inertia and don’t respond quickly enough to have this type of flickering. The filament in incandescent bulbs glows because it is heated, and temporary dips in power don’t cool it enough to stop it from providing light.

Can a bad breaker cause lights to flicker?

Absolutely. Breakers are responsible for stopping major power surges from getting into your home, so a bad breaker can cause power surges and flickering.

What does a loose neutral look like in real life?

If your neutral wire is loose, you may notice visible looseness, buzzing noises, or signs of corrosion. There may be heat-related symptoms, such as burning odors, discolored plastic, and charred insulation. You may also have flickering lights or experience electrical shocks.

If my neighbor’s lights flicker too, do I still need an electrician?

Widespread flickering in your neighborhood is often related to the utility provider and not your home’s electrical systems. As long as the flickering occurs at the same time as the rest of your neighborhood, it probably isn’t a problem.

Should I replace my dimmer switch if my LEDs flicker?

It is often a good idea to replace dimmer switches if LED lights flicker. This is the leading reason why LEDs flicker, and it is relatively easy to resolve.

When should I call for emergency electrical service?

You should call as soon as you notice any potential safety hazards. Discolored outlets, outlets that are hot to the touch, burning odors, buzzing noises, frequently tripped breakers, and sparks are all indications that you should immediately call our electricians for immediate help.

Get Help With Your Flickering Lights

While some flickering is normal, recurring flickering, big swings in brightness, whole-home flickering, buzzing sounds, burning odors, and warm electrical systems are all signs of potential problems. If your flickering lights are a persistent issue, don’t wait to call for help. Schedule an electrical inspection today to ensure your systems are safe and functioning properly.