Author: zeeshan@advantage-services.com

Two-Prong Outlets in an Older Home: Understanding Your Upgrade Options

In many older homes, it is still common to see two-prong outlets. While these outlets continue to provide power, they lack the grounding connection that many modern appliances and electronics use.

Homeowners often assume that the outlet can simply be popped out and replaced with a three-prong version, but this is not the case. To upgrade, there needs to be the right wiring and grounding behind the wall. By gaining a better understanding of why two-prong outlets exist, how grounding works, and your upgrade options, you can determine which electrical update makes sense for your needs. For a full evaluation of your home’s electrical systems, reach out to Rogue Valley Heating, Cooling & Electrical.

Why Do Older Homes Have Two-Prong Outlets?

Many older electrical systems were designed differently. They were installed with hot and neutral conductors and no dedicated equipment-grounding conductor. Since then, electrical requirements and household power needs have changed. Modern homes have more electronics and more appliances that require three-prong outlets.

Seeing a two-prong outlet is just one part of the story. If this outlet type is present, you may also be dealing with older branch-circuit wiring, older electrical boxes, no equipment grounding conductor, and older wiring methods. Many parts of the home’s electrical system have likely never been modernized. However, each home is different, so seeing a two-prong outlet doesn’t necessarily mean your home needs complete rewiring.

What Does the Third Prong on an Outlet Actually Do?

The third prong on the plug is designed to be a grounding path. Meanwhile, the two flat prongs connect to the hot and neutral conductors that carry current during normal operation. Then, the third prong links the equipment to the grounding system. This provides a path for fault current when the equipment is connected to a properly grounded electrical system.

Having a properly connected third prong adds an important level of electrical safety by providing a path for fault current. Grounding is especially important for expensive, sensitive electronics, such as computers, televisions, gaming systems, power tools, kitchen appliances, and home office equipment.

Are Two-Prong Outlets Dangerous?

Having a two-prong outlet isn’t an automatic emergency. Your wiring isn’t inherently dangerous or damaged. The major issue is that the ungrounded circuit doesn’t have the same level of protection as a grounded electrical system. When it comes to safety, wiring condition, age, electrical load, and how the outlet is used matter as well.

However, problems can occur if you try to work around a two-prong setup. For example, homeowners sometimes rely on three-to-two-prong adapters, overuse power strips, or set up extension cords. In some cases, homeowners try to install a three-prong receptacle without setting up the right grounding or protection. This is especially dangerous because it can create a false sense of security by making it seem like an outlet is grounded when it actually isn’t.

Can You Just Replace a Two-Prong Outlet With a Three-Prong Outlet?

It’s not always possible to just replace a two-prong outlet with a three-prong one. A new receptacle doesn’t create the ground. One of our electricians must first determine what wiring and grounding are currently available at the location. 

The appropriate solution can vary based on the home, receptacle, and wiring. You may have a situation where the grounding conductor is already present, or no ground is available. Alternatively, your circuit may require another form of protection, or the wiring may need to be replaced. In some cases, the electrical path may have a useful grounding path available. The right solution is going to depend on how your electrical system is set up.

Your Options for Upgrading Two-Prong Outlets

Once you have decided to upgrade your two-prong outlets, there are a few different approaches you can use.

Option 1: Install a Grounded Three-Prong Receptacle When a Ground Is Available

If there is an existing circuit with an appropriate grounding path, we may be able to replace the receptacle with a properly grounded receptacle. This is one of the most straightforward options. 

When This Option May Make Sense

Before we begin any work, we’ll verify that proper grounding exists. We’ll also check to see if your existing wiring is in serviceable condition. This option is a good choice if you simply want compatibility for three-prong devices.

Option 2: Add GFCI Protection Where Appropriate

Alternatively, you can install GFCI protection where permitted to provide additional protection against electric shock, even if an equipment ground is not available.

What GFCI Protection Does

GFCI outlets monitor the current flowing through the circuit. When a current imbalance is detected, it can quickly interrupt power to reduce the risk of serious electric shock. 

A GFCI Does Not Add a Ground Wire

It’s important to note that GFCI protection and grounding are not the same thing. A GFCI-protected receptacle on an ungrounded circuit is still ungrounded. GFCI protection is only intended to provide an additional form of shock protection.

Option 3: Install New Grounded Wiring

If you don’t have existing grounded wiring, installing new grounded wiring is an effective option.

What Rewiring Accomplishes

When you run new wiring, it ensures that a proper equipment-grounding conductor is present that you can use with your three-prong receptacle. This option offers better support for modern use and is an effective way to address aging wiring.

When Rewiring May Make More Sense

Rewiring can be the best choice if your existing wiring has deteriorated, you have too few receptacles, your circuits are overloaded or poorly distributed, or you’re already planning on an electrical upgrade. Additionally, this option is worth considering if you are already opening your walls during a remodeling project.

Option 4: Upgrade Selected Rooms Rather Than the Entire House at Once

Rather than upgrade your entire home, you can choose to update specific areas based on your personal preferences or budget. If you go this route, it generally makes sense to target areas that have high electrical demand first. For example, kitchens, home offices, living rooms, bedrooms that have computers and gaming equipment, garages, workshops, and laundry areas are all great locations for electrical upgrades.

Prioritize How You Actually Use the Home

To determine which area should be upgraded first, consider the following questions.

  • Which rooms currently have three-prong appliances? 
  • Are you planning on any future renovations?
  • Where are you using extension cords right now?
  • Are there any areas where multiple devices have to share a limited number of outlets?
  • Which rooms contain your expensive electronics?

When Two-Prong Outlets May Point to a Bigger Electrical Problem

While a two-prong outlet isn’t necessarily an issue, there are situations where it may indicate a larger electrical problem.

Look Beyond the Receptacle

Because modern electrical installations generally use grounding-type receptacles, two-prong outlets are primarily found in older homes. As a result, they typically co-exist alongside aging electrical components. If you notice any of the following warning signs, it’s time to schedule a professional evaluation.

  • Warm outlets
  • Burning smells
  • Loose outlets
  • Frequently tripped breakers
  • Flickering or dimming lights
  • Older fuse panels
  • Questionable or older wiring
  • Discolored receptacles or scorch marks near receptacles
  • Buzzing or crackling noises 
  • Limited outlet availability

Should You Replace Every Two-Prong Outlet in the House?

There is no universal answer to whether you should replace all of your home’s two-prong outlets or not. You’ll need to consider whether grounding is available, how you use each room, your budget, planned renovations, current electrical demand, and other electrical upgrades your home may need.

Planning a larger upgrade may make sense if most of your home has two-prong outlets, the number of circuits is limited, and your electrical panel requires modernization. A more comprehensive project also makes sense for homes that have deteriorated wiring, major remodeling plans in the future, and new high-demand equipment.

Should You Upgrade Two-Prong Outlets During a Remodel?

If you’re already performing a remodeling project, it’s a good idea to consider upgrading your two-prong outlets. You’ll have easier access to wiring that’s normally concealed behind finished walls, making wiring and receptacle replacements easier.

Additionally, you should automatically consider electrical system updates if the remodeled room will contain significantly more equipment than before. This type of situation is common with finished basements, garage workshops, bedroom additions, home-office conversions, and kitchen renovations.

What About Three-Prong Adapters?

A three-to-two-prong adapter does not create an equipment ground simply by being plugged into an ungrounded two-prong receptacle. Simply adding a three-prong adapter can make it appear that there is protection without any protection actually existing. Because of this, it’s highly recommended to skip this shortcut and schedule a professional evaluation instead.

Do Surge Protectors Work With Two-Prong or Ungrounded Outlets?

Surge protection and grounding are different concepts. While some surge-protection equipment relies on an effective grounding path, this isn’t true for all types of equipment. If you plug expensive electronics into ungrounded circuits, your computers, televisions, and sensitive electronics may not have the level of protection you need. Before assuming that protection is present, you should have your grounding arrangement checked by a professional.

Should You Upgrade Two-Prong Outlets Before Selling Your Home?

If you are selling your home, it’s possible that your two-prong outlets may come up. These outlets are an indicator that a home has older electrical systems, so buyers may ask more questions about wiring, grounding, and electrical panels. While the presence of these outlets doesn’t mean that a home is inherently unsafe or that the receptacles must be replaced, they are a sign that buyers should ask questions.

By getting an electrical inspection, you can determine if some electrical concerns or upgrades should be addressed. The electrician can talk to you about which circuits and outlets are grounded as well as where GFCI protection may be needed.

What Does an Electrician Check Before Recommending an Upgrade?

During a professional evaluation, the electrician will typically consider the condition of your receptacle, wiring, electrical panel, grounding system, circuit protection, bonding system, and electrical boxes. Besides considering the wiring type, they will also check for an available grounding path. The electrician will also review your circuit capacity, check for signs of overheating, and look for any poor connections. Ultimately, the electrician’s goal is to determine what’s going on behind your walls before they recommend a solution.

Two-Prong Outlet Upgrade Options at a Glance

To get a better understanding of your upgrade options, check out the various solutions, whether they offer a ground, and the situations where each solution makes sense.

Upgrade Option

Does It Provide a Ground?

Best Used When

Properly Grounded Three-Prong Outlet

Yes

An existing grounding path is available

GFCI Protection on a Qualifying Ungrounded Circuit

No

Additional shock protection is required

New Grounded Wire

Yes

Wiring needs to be modernized, or existing circuits lack grounding

Targeted Room Upgrades

Depends on the solution

Homeowners want to prioritize high-use areas

Larger Electrical Modernization

Depends on the scope of the project

Wiring, circuits, and other electrical components are outdated

Two-Prong Outlet Upgrade Checklist for Homeowners

Before you get an upgrade, ask yourself the following questions.

  • Do I have any renovations planned? 
  • Are my current outlets grounded?
  • What type of wiring is used in my system?
  • Is rewiring a practical option?
  • Am I overusing adapters and extension cords?
  • Which rooms need three-prong outlets the most? 
  • Have I noticed any electrical warning signs? 
  • How old is my electrical system?
  • Would installing targeted upgrades fix the problem?
  • Does my electrical panel also need repairs or upgrades?

Frequently Asked Questions

Are Two-Prong Outlets Illegal?

Two-prong outlets were legal when they were installed, so it shouldn’t be automatically assumed that they are illegal. Upgrade requirements will vary based on the applicable electrical code and the kind of work being performed.

Can I Replace a Two-Prong Outlet With a Three-Prong Outlet?

This is only an option if the appropriate grounding or another permitted protection method exists. If there is no grounding wire, you can’t just switch out the receptacle.

Does a GFCI Outlet Need a Ground Wire?

GFCI protection is intended to reduce the risk of electric shock from ground faults, not to provide equipment grounding.

Are Three-Prong Adapters Safe?

Adapters are not a substitute for having a three-prong outlet installed with proper grounding. These adapters can give the illusion of safety without providing any grounding.

Do I Need to Rewire My Whole House Because I Have Two-Prong Outlets?

Not necessarily. It depends on the condition of your current wiring, whether you have planned improvements, what three-prong appliances you need to plug in, your existing grounding wires, and your overall electrical needs.

Can Two-Prong Outlets Damage Electronics?

Two-prong outlets lack grounding and have reduced compatibility with certain protective devices. They don’t automatically damage electronics, but damage can sometimes occur.

How Do I Know Whether My Outlet Is Grounded?

To find out if your outlet is properly grounded, schedule a professional test with our team of licensed electricians.

Choose the Right Upgrade for Your Older Home

Having two-prong outlets doesn’t automatically mean that your home’s electrical system must be completely replaced. Before performing any update, you’ll need to determine what wiring and grounding exist. Then, you can determine what solution makes sense. 

From adding permitted GFCI protection to installing new grounded wiring, our team can help with all of your electrical needs. We can inspect your existing outlets and recommend the best upgrade options.

Learn more by scheduling an electrical inspection today.
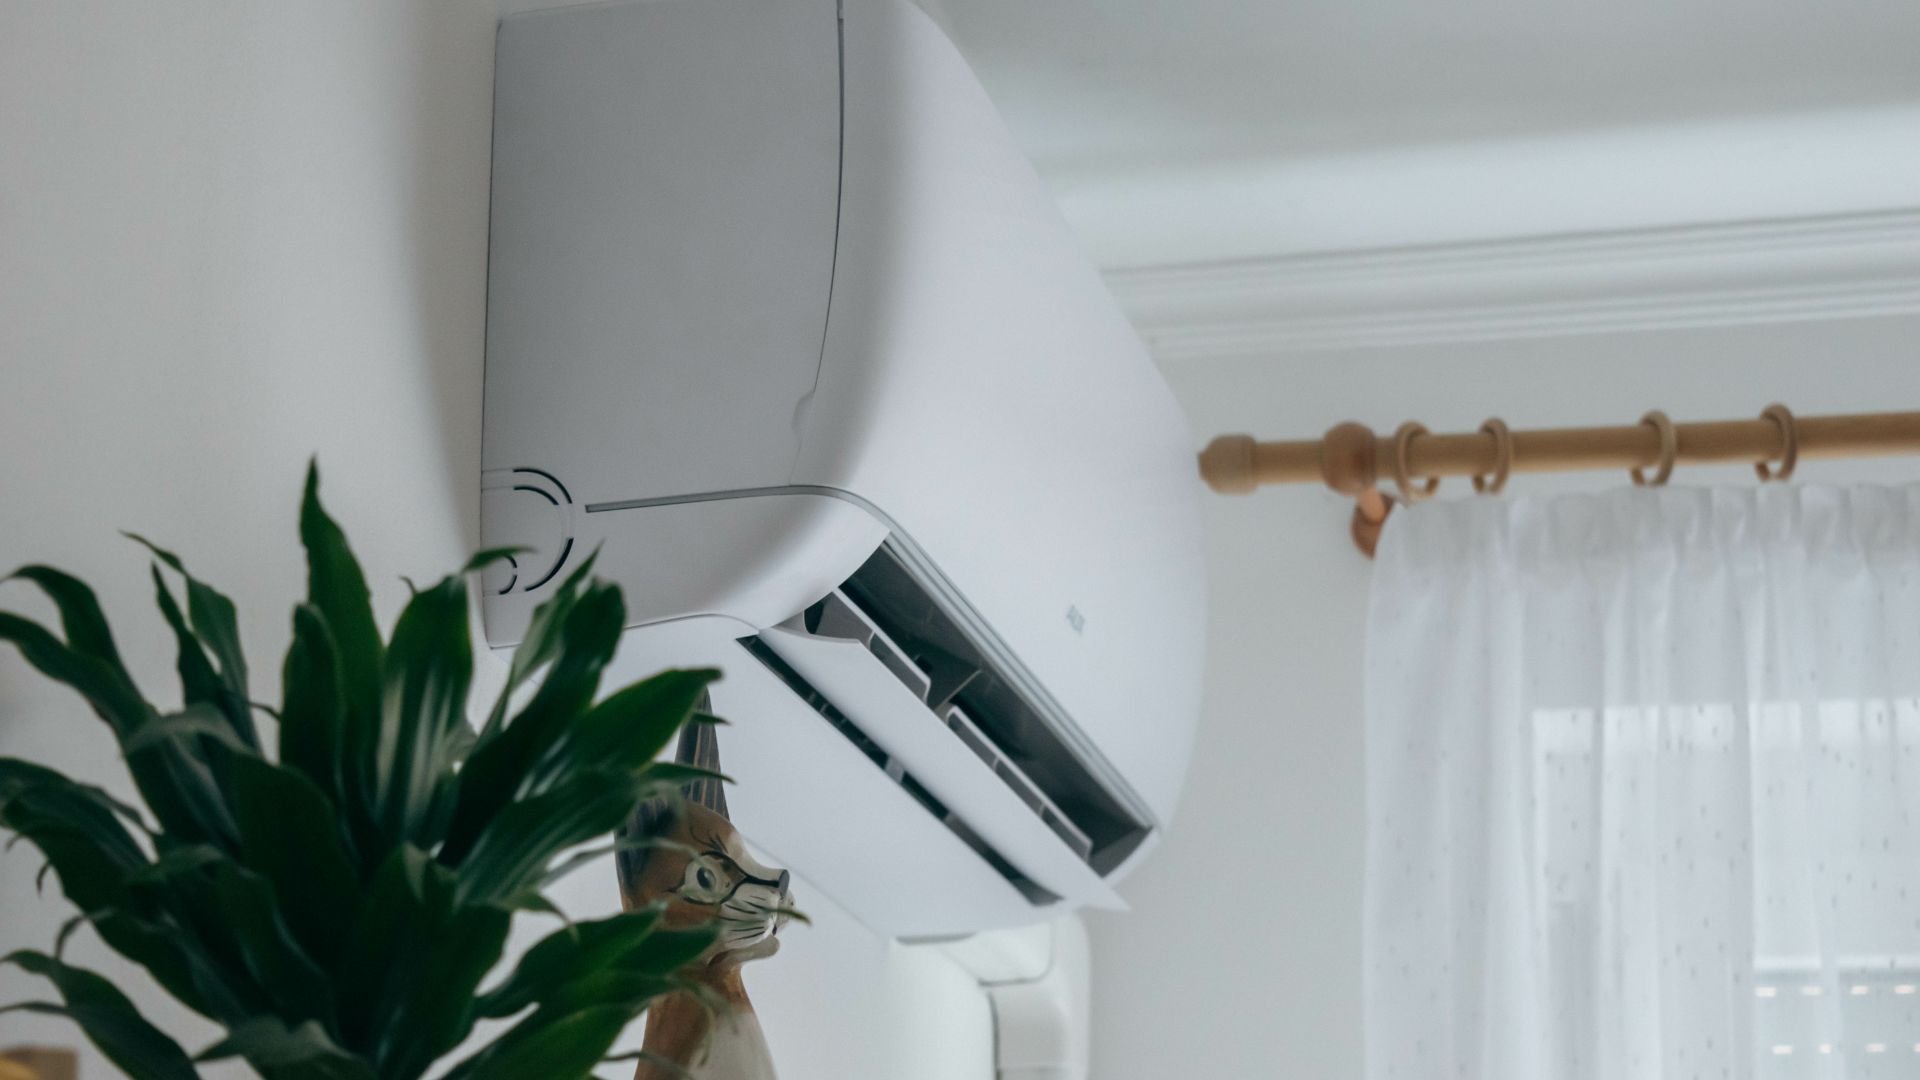
Image of a ductless mini-split air conditioner mounted on the wall

Wall-Mounted vs. Ceiling-Cassette Mini-Splits: Which Fits Your Home?

While ceiling-cassette mini-splits and wall-mounted mini-splits are both types of ductless mini-split indoor units, they are used in different situations. The right choice for your home will depend on your existing room layout, airflow, aesthetic goals, installation access, and budget. For a full evaluation of your heating and cooling options, reach out to Rogue Valley Heating, Cooling & Electrical.

What Is a Wall-Mounted Mini-Split?

A wall-mounted mini-split is typically installed high up on the wall. It directs air outward across the room. Often, you’ll see these units installed in bedrooms, offices, additions, and smaller spaces. They tend to be easy to access and less complex to install.

What Is a Ceiling-Cassette Mini-Split?

A ceiling-cassette mini-split is recessed into the ceiling. From the outside, only the grille is visible. These units can be set up to distribute air in multiple directions. You’ll often see these units in larger rooms and open floor plans. Homeowners tend to use them in areas where they want to preserve the wall space.

Wall-Mounted vs. Ceiling-Cassette Mini-Splits

To get a better understanding of how these heating, ventilation, and air conditioning (HVAC) types differ in practice, it helps to break down the differences.

Factor

Wall-Mounted Mini-Splits

Ceiling-Cassette Mini-Splits

Placement

High on the wall

Recessed in the ceiling

Airflow

More directional

Broader, multi-directional

Appearance

More visible

More discreet

Installation

Usually fairly simple

Usually more complex

Maintenance

Easier to access

Overhead access

Best For

Bedrooms, offices, and smaller rooms

Great rooms and open spaces

Which Provides Better Airflow?

The real question isn’t which unit produces better airflow. Instead, it’s important to understand how airflow varies between units.

Wall-Mounted Units

These units can deliver excellent airflow in small, defined rooms where their placement allows conditioned air to circulate effectively. However, you should avoid placing them directly over beds, sofas, or desks.

Ceiling Cassettes

Multi-way ceiling cassettes are often well suited for delivering even airflow across large, open spaces. When properly sized and positioned, they can work extremely well in open layouts.

Which Is Easier To Install?

As a general rule, wall-mounted systems are going to be more straightforward to install. Ceiling cassettes can only be installed if there is enough space above the ceiling. Your ceiling framing, plumbing, wiring, structural support, and drainage can significantly affect which option is practical for your space.

Which Looks Better in the Room?

Wall-mounted units are visible, which affects the aesthetics of your room. In comparison, most of the equipment will be hidden with ceiling cassettes. Because of this, cassettes are often the preferred option in formal living areas, remodeled rooms, and any space where appearance matters.

Which Is Easier To Maintain?

In most cases, wall-mounted units are easier to maintain. Homeowners can generally access the wall-mounted filters easily, while ceiling cassettes require overhead access. It’s important to note that both systems will require routine filter care and professional maintenance.

Can You Use Both Types in the Same Home?

If you have a compatible multi-zone system, it is possible to use both types in the same home. For example, you may want to use wall-mounted units in bedrooms and a ceiling cassette in a large living room. By using both unit styles, you can match each unit type to the room it suits best.

Which Mini-Split Is Right for Your Room?

For an easy way to decide between your mini-split options, check out the following checklist.

Choose a Wall-Mounted Unit If:

  • You want a simpler installation process.
  • You prefer a setup that offers easy maintenance access.
  • The room is relatively small or enclosed.
  • Your ceiling space is limited.

Consider a Ceiling Cassette If:

  • You have a large or open room to condition.
  • The ceiling has enough space to install the ceiling cassette.
  • You want broader airflow in your space.
  • You want to preserve your wall space.
  • You’d like to maintain a clean, uncluttered aesthetic.

Frequently Asked Questions

Are ceiling cassettes better than wall-mounted mini-splits?

No unit is inherently better than the other. Instead, the right choice is situational. Wall-mounted mini-splits are generally a better option for small spaces. They offer easy access for maintenance and a simple installation process. In comparison, ceiling cassettes blend in better with your ceiling and are good for large, open spaces. However, they are also more complex to install and more difficult to maintain.

Are ceiling-cassette mini-splits more expensive to install?

In general, they are more expensive to install. Because installation within the ceiling is generally more complex, ceiling cassettes often require more labor and may require additional installation materials. Before beginning any installation work, our team will always evaluate your mini-split options and costs.

Can you install a ceiling cassette in any room?

It depends. For a ceiling cassette to be installed, there must be enough space above your ceiling. Besides adequate ceiling space, the ceiling framing must provide enough room and structural support for the specific cassette being installed. Ceiling cassettes generally need to be installed level, so sloped ceilings may require additional framing or make installation impractical. Improper positioning can interfere with condensate drainage and potentially cause leaks.

Are wall-mounted mini-splits good for bedrooms?

Yes, they are generally an excellent choice for bedrooms. These units are designed to cool small, enclosed spaces. For the best level of comfort, make sure the unit’s airflow isn’t directed toward your bed.

Can wall-mounted and ceiling-cassette units be used together?

In compatible multi-zone systems, they can be used together. For example, homeowners may opt for a wall-mounted unit in their bedroom and home office. Then, a ceiling-cassette unit may be installed in their living room. For this approach to work, the indoor units must be compatible with the outdoor unit, and the system must meet the manufacturer’s capacity and combination requirements.

Choosing the Right Mini-Split for Your Home

While there are distinct advantages to each type of mini-split, neither option is automatically better than the other. Wall-mounted units may be preferred in situations where simpler installation and easier maintenance access are desired. Meanwhile, ceiling cassettes are often ideal for large rooms and any situation where broad airflow and appearance matter.

From flexible financing to transparent estimates, Rogue Valley can help Medford and Grants Pass homeowners select the right heating and cooling system. We’ll thoroughly evaluate your room size, layout, ceiling space, and system capacity before helping you choose the ideal indoor unit style for your situation.

Schedule your mini-split evaluation today.

What Size Generator Do You Need to Power Your Home During an Outage?

When stormy weather arrives, power outages are more likely to occur. An extended outage can interrupt your family’s lighting, refrigeration, cooling, heating, and medical devices. 

By getting a generator, you can maintain your power during an outage. For the best results, your generator will need to be appropriately sized by an electrician. Otherwise, an incorrectly sized generator can cause overloads or leave your essential systems without power.

Start by Listing Essential Loads

Before you invest in a new generator, you first need to decide what it will be powering. Depending on your family’s health, comfort, and convenience preferences, you may need it to power the following things.

  • Your refrigerator and freezer
  • Important lights
  • The internet router
  • Medical devices
  • Phone charging 
  • Your well pump or sump pump
  • The garage door opener 
  • Heating and cooling equipment
  • Your security system

Understand Running Watts vs. Starting Watts

Running watts are the watts needed to power the equipment while it is actually running. In comparison, starting watts are the extra power the equipment needs when it first powers on. Some devices, like refrigerators, compressors, pumps, and HVAC systems, require significantly more starting watts than running watts.

Your generator must be able to supply the starting watts you need and not just the running watts. Otherwise, a large device could trip the breaker, fail to start, or cause voltage changes that harm your sensitive appliances.

Small, Mid-Size, and Whole-Home Generator Options

The generator type and size you need will depend on what you want to power and the size of your home.

  • Small, Portable Generators: This option works if you only want to power your basic essentials.
  • Mid-Size Generator: If you want to power more circuits or appliances, you’ll need to upgrade to a mid-size generator.
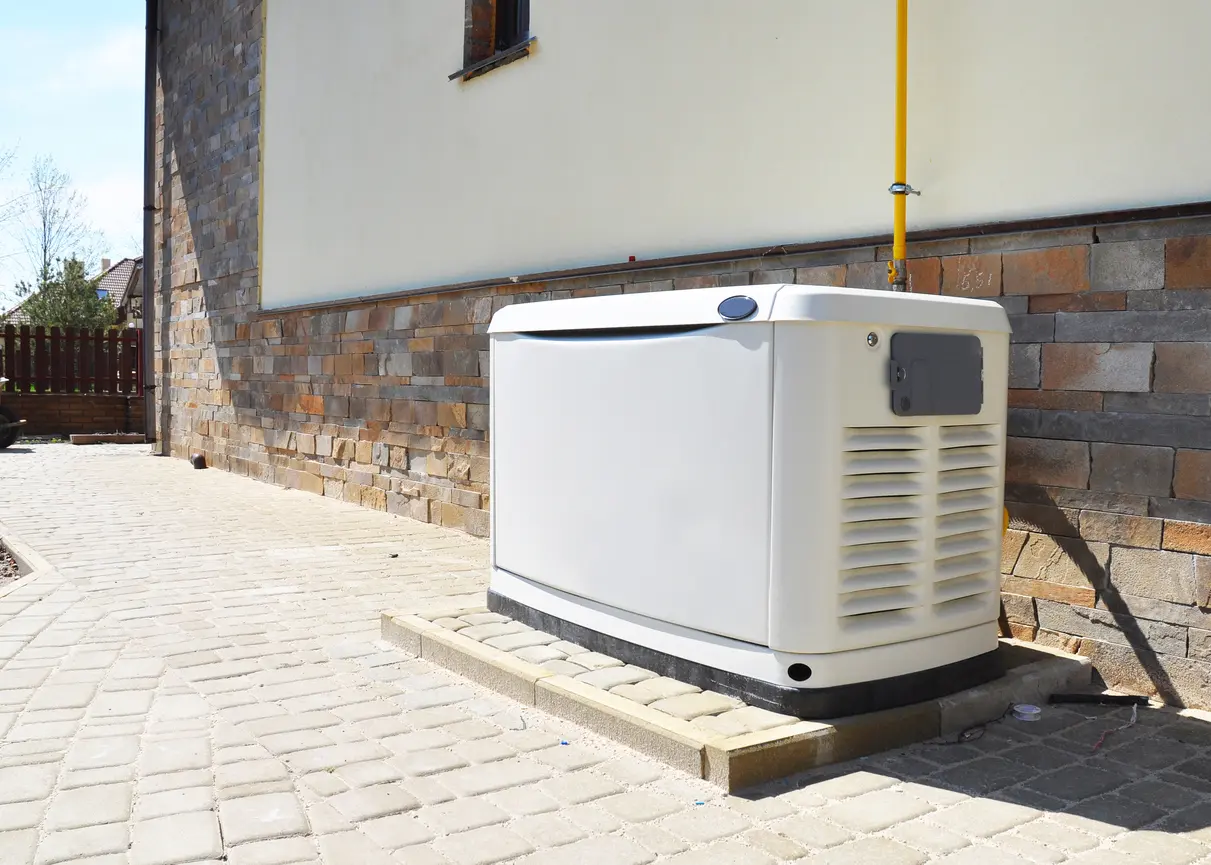
  • Whole-Home Standby Generator: A whole-home standby generator monitors your home’s electrical connection, so it can automatically switch on when the power goes out. In addition to automatic startup, it offers broader coverage for your home and is an excellent option for extended outages.

Before you can buy or install any generator, it’s essential to complete a load calculation. One of our electricians can handle the load calculation, so you can get an appropriately sized generator for your home.

Can a Generator Run Your HVAC System?

A generator is capable of running your HVAC system, but there are some important caveats to consider. Central ACs and heat pumps draw a significant amount of power. This means that you’ll need to have a generator with a larger capacity in order to power your HVAC system.

If you have ductless mini-splits, the power requirements will likely be different. You may also be able to reduce your power demand by limiting the equipment you use.

Because of the power capacity required, you shouldn’t just hook a generator up to your HVAC equipment. To avoid damaging your HVAC equipment and generator, you should check with an electrician to see if your generator can safely support the HVAC load.

Why Transfer Switches Matter

A manual transfer switch is set up to connect your generator to the breaker panel. It prevents backfeeding and is significantly safer than relying on extension cords.

Backfeeding is when the power produced by the generator goes backward into the utility lines. It is considered illegal because of how unsafe it is for any utility workers working on the lines. Additionally, backfeeding can cause explosions, fire hazards, and electrocutions, making it dangerous for any person or equipment in your home.

A transfer switch can be set up by an electrician so that you can plug your generator into an outdoor inlet when the power goes out. Then, you just have to flip a switch on your breaker panel to switch from utility power to generator power. 

Common Generator Sizing Mistakes

When sizing a generator, homeowners often make several frequent mistakes. By working with a professional, you can avoid these common pitfalls and safely power your home.

Forgetting Starting Watts

Your generator’s capacity needs to be enough to meet your running watt and starting watt needs. Many appliances pull extra power when they first start up, so you may need a higher capacity than you expect.

Using a Small Generator To Power an Entire Home

Portable generators aren’t intended to power an entire home. Initially, using an undersized generator can cause the generator’s circuit breaker to trip or the engine to stall. Eventually, overloading the generator can damage your appliances and cause the generator to break down. It can also lead to fire hazards, electrocutions, and backfeeding.

Overusing Extension Cords

Extension cords aren’t intended to be used for extended periods of time. When too much wattage runs through extension cords, it can cause melted insulation, overheating, damaged appliances, and fires. Installing a transfer switch is a much safer alternative.

Ignoring Fuel Type and Runtime

There are dual-fuel, tri-fuel, gasoline, diesel, propane, and natural gas. Even if you have a basic gas generator, the manufacturer likely requires a fuel stabilizer to be added to the tank if the generator will sit unused for 30 days. 

Similarly, the generator’s manufacturer will have specific rules about runtime. For example, portable generators are often limited to 8- or 12-hour runtimes. With a whole-home generator, you’ll need to check the oil every 24 to 72 hours of runtime, depending on the manufacturer.

Skipping Professional Electrical Review

The best way to ensure your electrical systems and generator are safe is by scheduling a professional electrical review. Our team can perform a load calculation and help you determine the best generator setup for your home.

When To Call a Licensed Electrician

If you are considering a generator upgrade for your home, we recommend calling a licensed electrician if any of the following situations apply. 

  • You plan on connecting your generator power to your breaker panel.
  • Your current electrical panel’s breakers trip frequently.
  • You need a generator that can power your HVAC equipment, pumps, or medical equipment.
  • You currently have an older electrical panel.
  • You’ve remodeled or added home additions without increasing your panel’s capacity.
  • You want to set up a whole-home standby generator.

Get Your Home Prepared for the Next Power Outage

Before the next power outage arrives, it’s important to make sure your Medford and Grants Pass home is prepared. If you are going to install a generator, you need to figure out the right electrical load for your needs. More importantly, you need the help of a professional electrician to ensure the generator is set up safely.

Schedule a generator consultation in Southern Oregon by reaching out to Rogue Valley Heating, Cooling, & Electrical today.

Closeup image of a Rogue Valley Heating & Air vehicle en route to a Grants Pass customer

Swamp Coolers vs. Central AC in Southern Oregon: Which Homes Are a Good Fit?

Summers can get hot in Southern Oregon. For Grants Pass and Medford homeowners, central air conditioners and swamp coolers are both effective options for keeping cool. The right choice will depend on your family’s comfort goals, home layout, air quality requirements, and overall budget.

For a quick evaluation of your home’s cooling system, reach out to Rogue Valley Heating, Cooling, & Electrical today.

How Swamp Coolers Work

While they are popularly called swamp coolers, these units are also known as evaporative coolers. They are specifically designed to work in dry areas. Basically, the system is set up so that hot air flows over a wet pad. The water absorbs the air’s heat. Then, the cool air flows into your home.

Because this system uses water and evaporative cooling, indoor humidity can build up and reduce comfort if there isn’t enough airflow. For most homes, this means you’ll need to leave your windows cracked open so that fresh air can circulate into your home.

Swamp coolers are quite effective in dry conditions, but they aren’t ideal for humid climates. If the air already holds a lot of moisture, water won’t evaporate and cool the air as easily.

How Central AC Works

A central air conditioner transfers heat with the help of refrigerant lines. The refrigerant absorbs heat while it is inside your home. As it circulates outdoors, it releases heat in your condenser coil. 

Your indoor unit has a return register that brings in air, which is filtered before it passes over the evaporator coil. Because of this design, the central AC can recirculate and filter your indoor air. During wildfire season, this offers a major indoor air quality (IAQ) benefit.

Once the air in your system has been conditioned, it is delivered to each room through a network of ducts and vents. Because of this, your windows should remain closed when the AC is on.

When a Swamp Cooler May Be a Good Fit

Thanks to Medford’s dry summers, swamp coolers can be an effective option. They work best in the following situations.

  • Dry, Low-Humidity Days: If the humidity level is too high, the unit’s cooling effects will be reduced significantly.
  • Small Homes: Swamp coolers require airflow. A whole-home unit may also need ductwork. Because swamp coolers must use different ducts than the rest of your heating, ventilation, and air conditioning (HVAC) system, this can quickly get expensive. As a result, swamp coolers are better suited to smaller homes or specific living areas.
  • Cost-Conscious Homeowners: In one Arizona-based estimate published in Southwest Hydrologics, a swamp cooler used just 250 kilowatt-hours per month versus a central AC’s 850 kilowatt-hours. While costs vary based on the area, home layout, and system type, swamp coolers are known for being extremely energy efficient.
  • Homes With Good Ventilation: Swamp coolers require a constant supply of fresh air, so they only work well in homes that have good ventilation.
  • Homes That Have Looser Requirements: A central AC offers far more control of your IAQ, air temperature, and humidity. If you aren’t worried about having a controlled cooling setup, a swamp cooler may be a good choice.

When Central AC Is the Better Choice

In comparison, central ACs are generally a better option if you’re dealing with the following situations.

  • Larger Homes: A large home would likely need specialized ductwork to have a swamp cooler, increasing the cost and complexity. Central ACs are designed to cover the entire home.
  • Homes With Existing Ductwork: If your home already has ductwork, you don’t have to worry about the cost of new ducts when installing an AC. Unlike swamp coolers, central ACs can use the same ducts as your furnace installation.
  • Consistent Cooling Needs: When it comes to temperature control, a central AC delivers more consistent temperatures throughout the home.
  • Families That Need IAQ Improvements: If you are struggling with wildfire smoke, pollen, and dust, a central AC can help by filtering your home’s indoor air.
  • Anyone Who Wants Better Temperature and Humidity Control: A central AC allows you to control your temperature and humidity precisely.

Cost Comparison

The cost of each setup will vary significantly based on the unit type, your home layout, and any duct requirements. In general, a central AC is going to have a higher upfront cost. An average homeowner often spends between $1,544 and $3,759 setting up a swamp cooler. Meanwhile, central ACs typically cost between $3,882 and $8,063.

Besides the upfront costs, it’s important to consider operating costs and long-term value. Your operating costs are going to vary based on your overall energy use, maintenance consistency, and system efficiency. Similarly, long-term value will depend on your comfort needs and home size. While swamp coolers are generally less expensive to operate, having improved IAQ and better temperature control may make a central AC upgrade a worthwhile investment for your family’s comfort.

Air Quality and Wildfire Smoke Considerations

Swamp coolers are designed to pull outdoor air into your home, which creates an IAQ issue when the outdoor air is dusty, smoky, or full of pollen. Considering the frequency of wildfires and high pollen days, a central AC’s improved filtration may be a better choice. Central ACs are also meant to operate with the windows closed, which is a distinct advantage over a swamp cooler’s design.

Maintenance Differences

How you maintain each system will also vary. A swamp cooler’s pads should be replaced twice during the cooling season, depending on the pad type and usage. Depending on the pad type, you may need to clean the pad with soap and water once per week as well. You should also check the pads, reservoir, filters, and water lines at least once a month. Each season, the entire system must be drained and cleaned to remove mineral buildup. Water lines should also be cleared and checked for leaks.

Meanwhile, a central AC needs to have its filter changed once every 30 to 90 days, depending on the manufacturer. During your routine tune-up before each cooling season, the technician will clean the coil, check your refrigerant levels, lubricate moving parts, and ensure your system is in working order.

Which Cooling System Fits Your Home Best?

The best way to determine which cooling system is the right choice for your home is by getting a professional cooling assessment. Our team will review your home’s size, ductwork, budget, allergies, wildfire smoke concerns, and comfort needs. Then, we can help you compare the available options.

Stay Cool This Summer

While they aren’t right for everyone, swamp coolers are an effective option for some Southern Oregon homes. For better comfort and air quality, homeowners can opt for a central AC setup.

Learn more about cooling options in Grants Pass, Medford, and Rogue Valley by scheduling a cooling consultation today.

Why Does My Air Conditioner Smell Like Burning Plastic

When your AC makes a burning plastic or sharp electric smell when it kicks on, it is an immediate cause for concern. This odor can be caused by a failing motor, overheating wiring, or another electrical malfunction. While some faint, dusty odors are able to clear up quickly on their own, the strong or persistent smell of burning plastic is not normal. 

To help you troubleshoot, we’ll cover basic safety steps, common causes, and what you can check on your own. If basic troubleshooting doesn’t work, Rogue Valley Heating, Cooling & Electrical offers 24/7 emergency repairs and same-day service.

What To Do First If Your AC Smells Like Burning Plastic

If you notice the odor of burning plastic, there are a few quick things you can do to prevent additional issues or safety risks.

  • Immediately turn off your AC at the thermostat.
  • If the odor is particularly strong, has an electrical scent, or is persistent, you should turn off power to the system at the breaker as long as it is safe to do so.
  • You should immediately leave the area and call 911 if you notice a burning odor near your electrical panel, smoke, sparks, or flames.
  • Do not continue running the system in the hope that the smell will go away.
  • Never reset a tripped breaker repeatedly because repeated trips are a sign of an underlying electrical issue.
  • Do not open your AC’s panels or touch any wiring.
  • Call our heating, ventilation, and air conditioning (HVAC) experts for an inspection before you try using the system again.

Is a Burning Plastic Smell From an AC Dangerous?

Burning odors can be dangerous because they are often caused by melting wire insulation or overheated parts. Both of these problems can create a fire hazard. Additionally, burning plastic fumes can irritate your eyes, throat, and lungs.

The risk of harm is higher if the odor is especially sharp, acrid, or chemical-like. It’s also concerning if the smell is stronger near your air handler, outdoor unit, breaker, or vents.

If the smell does not fade away quickly or it returns, immediately shut off your system. Then, schedule professional HVAC services.

Causes of Burning Plastic Odors Coming From Your AC

There are a few common reasons why your AC might produce a burning plastic odor.

1. Overheating Electrical Wiring

AC systems rely on wiring, circuit boards, relays, contactors, and connections to function. All of these components can become overheated. Damaged, worn, loose, or corroded connections can overheat and melt nearby wire insulation. You may notice a burning plastic or electrical odor, buzzing or crackling noises, poor outdoor unit performance, or a tripped breaker. The AC may also cycle on and off unexpectedly.

If you suspect electrical issues, you should call for help. Electrical repairs should only be carried out by a trained professional.

2. A Failing Blower Motor or Fan Motor

The blower motor is responsible for moving cool air throughout your home. Meanwhile, the outdoor fan motor powers the condenser fan, which moves air across the condenser coil to help the system release heat outdoors. If either motor overheats, the wiring and internal components nearby can produce a burning plastic odor. Besides the smell, you may notice poor airflow, warm air blowing from your vents, or weak airflow. You may also hear a grinding, squealing, or humming sound.

During our Southern Oregon summers, long AC runtimes during hot days can place added stress on aging motors. As a result, blower motors and fan motors are more likely to break down.

3. A Bad Capacitor

The capacitor is responsible for helping AC motors start and run. If it isn’t working properly, the motor may struggle to start, overheat, or fail to start at all. When this occurs, you may notice a burning odor near the outdoor unit or a tripped breaker. The AC may hum but fail to start. Additionally, your outdoor fan may not spin. 

Capacitors can retain a dangerous electrical charge even after power to the system has been disconnected. For your safety, it is important to leave anything involving capacitors to an experienced HVAC technician.

4. A Dirty Air Filter Causing Overheating

When an air filter becomes clogged, it can restrict airflow and place additional strain on the HVAC system, potentially contributing to overheating or other problems. You can troubleshoot by turning off the system and replacing the filter if it is dirty. If the smell continues after the filter change, you’ll need to schedule a professional inspection.

5. Dust or Debris Burning Off

Faint, dusty odors can occur if the HVAC system runs after it has been unused for an extended period of time. If this is the cause, the odor should be relatively mild and fade quickly. 

Burning dust produces a different odor than sharp plastic, rubber, or electrical odors. If you notice the smell lasting longer, becoming stronger, or returning after each cycle, you should shut off your AC and call for service.

6. Foreign Objects Near the Air Handler or Vents

If plastic, debris, insulation, small objects, or construction materials come in contact with overheating electrical or mechanical components, it can produce the smell of burning plastic. Homeowners can visually check around accessible vents and equipment for obvious debris but should not remove panels or reach inside the system.

7. Worn Belt or Rubber Component in Older Systems

Some older residential HVAC systems use a belt-driven blower assembly. Sometimes, the belt can become worn or slip, which can produce a smell like burning rubber or plastic. If this is the case, you’ll likely notice squealing or rattling noises and weak airflow as well as the unusual smell. To resolve the issue, you’ll need to have the blower assembly inspected and the belt replaced by an experienced HVAC technician.

8. Overheating Control Board or Relay

When a relay, control board, or contactor starts to fail, it can overheat and create an electrical odor. Often, you’ll notice clicking noises or intermittent operation. The AC may also fail to respond to the thermostat. Alternatively, the indoor fan or outdoor unit may run at the wrong time. For a professional diagnosis, you’ll need an HVAC technician who has the proper tools and training.

How To Tell Burning Plastic From Other AC Smells

One way you can narrow down the possible causes of the odor is by noting the type of smell. From burning smells to the odor of dirty socks, each scent is associated with certain types of problems.

  • Burning Plastic or Electrical Smells: This odor is often due to problems with the AC’s wiring, motor, capacitor, or controls.
  • Burning Rubber Odors: Often, this smell happens when there is an overheated moving part, a faulty belt, or a motor problem.
  • Musty Odors: This type of scent is often due to mold, mildew, dirty coils, or a clogged drain.
  • Chemical or Sweet Smells: An unusual chemical odor accompanied by cooling problems or hissing may warrant an inspection for a refrigerant leak or another HVAC problem.
  • Rotten Egg Smells: You may smell rotten eggs if there is a gas-related problem. You should immediately leave your home and call 911 or your gas utility provider for help.
  • Dirty Socks Smell: This odor can occur when bacteria or other microbial growth develops on the evaporator coil, often in the presence of moisture.

What Homeowners Can Safely Check

As a homeowner, there are a few steps you can take to try troubleshooting on your own. If these steps do not work, you should reach out to Rogue Valley for professional AC repairs.

  1. First, turn off your AC.
  2. Pull out your filter to see if it is clogged. Replace it as needed.
  3. Look for any visible signs of smoke, sparks, or scorch marks from a safe distance.
  4. Note if the smell seems to be stronger near your vents, outdoor unit, indoor unit, or the electrical panel.
  5. Go from room to room to verify that your vents and returns are open and unobstructed.
  6. Pay attention to any unusual noises, poor airflow, tripped breakers, or warm air. When you call for help, share this information.
  7. Never remove any equipment panels. Do not touch the wiring or repeatedly restart the system.

When To Call Rogue Valley Heating, Cooling & Electrical

You should call for help immediately if you experience any of the following situations.

  • There is a sharp, electrical, or plastic-like odor.
  • You see smoke or sparks.
  • The breaker keeps tripping.
  • The smell returns every time your AC runs.
  • There is a buzzing noise.
  • Your outdoor unit produces a humming noise but won’t start.
  • The AC blows warm air or has poor airflow.
  • Your AC keeps shutting down unexpectedly. 

If you notice unusual AC symptoms, Rogue Valley can help. Our HVAC technicians and electricians offer local AC repair and electrical services in Grants Pass, Medford, and Southern Oregon. We know HVAC breakdowns don’t happen on a 9-to-5 schedule, which is why we offer 24/7 emergency service. Additionally, our team delivers same-day AC repairs, upfront pricing, and full system inspections.

How a Technician Diagnoses the Burning Smell

Technicians typically diagnose burning odors by performing a full electrical inspection. 

  1. We start by inspecting your electrical connections and wiring. 
  2. Then, we can test your capacitors, relays, contactors, and control boards for performance issues. 
  3. Our technician will inspect your blower motor and outdoor fan motor operation.
  4. To troubleshoot for airflow issues, we’ll inspect your filters, coils, and ductwork.
  5. Our team can inspect for melted insulation, overheating, and scorch marks to determine which component is causing the unusual odor.
  6. Once we’ve found and repaired the problem, we’ll test your system to confirm that it is safe before restoring operation.

How AC Maintenance Helps Prevent Burning Smells

With AC maintenance, you can prevent small problems from escalating into safety risks. During a routine tune-up, our technician will handle the following tasks.

  • Inspect electrical connections. 
  • Test capacitors and safety components.
  • Clean indoor and outdoor coils.
  • Replace filters as needed.
  • Check the unit’s airflow.
  • Lubricate serviceable moving parts as needed.
  • Inspect for worn motors and faulty components.

Southern Oregon’s dry air, heat, dust, and long cooling cycles can strain cooling systems, leading to premature component failure. With our Greenshield Membership Plan, you can get a complimentary AC tune-up each year and keep your AC functioning at its best. 

FAQs

To get a better understanding of why burning plastic odors might occur, read through some of our most frequently asked questions.

Why does my AC smell like burning plastic?

When a burning plastic odor occurs, it is often the result of an electrical problem. For example, this issue commonly occurs because of overheated wiring, a bad capacitor, or a failing motor.

Should I turn off my AC if it smells like burning plastic?

Yes, you should absolutely turn it off. If you notice a strong, persistent, or electrical smell, you should also shut off power at the breaker if you can safely do so. Then, call a professional.

Can a dirty air filter cause a burning smell?

A dirty air filter can limit airflow in your unit, causing the blower motor to overheat. In turn, this can cause a burning odor.

Is a burning smell from an AC ever normal?

A faint, dusty odor that goes away quickly might not be a serious issue. However, you should be concerned if you smell burning plastic, an electrical odor, or burning rubber. In these instances, the best option is to call us for an inspection.

Who should I call for AC burning smells in Grants Pass or Medford?

If you notice burning odors, we can help with same-day AC repairs and electrical inspections. Call Rogue Valley Heating, Cooling & Electrical for help with your AC in Grants Pass, Medford, and Southern Oregon.

Schedule Your AC Diagnostic Service

If an AC produces burning plastic odors, the best option is to immediately turn off the unit. Then, call Rogue Valley for help at 541-204-0966 or schedule fast AC repair services online. At Rogue Valley, we offer safety-focused diagnostics and repairs throughout the Grants Pass, Medford, and Southern Oregon region.

Image of a Rogue Valley Heating & Air technician helping a Grants Pass customer with their heat pump

Heat Pump vs Central AC: What Is the Difference?

If you’re trying to decide between a heat pump and central AC, the biggest difference is whether it can heat. While a central AC only cools, a heat pump can heat and cool. 

The right choice for your family will depend on your energy-efficiency goals, climate, comfort requirements, ductwork, existing heating equipment, and budget. To help you decide, we will review each system, its key differences, and its benefits. For a full evaluation, reach out to Rogue Valley Heating, Cooling & Electrical.

The Short Answer: Heat Pumps Heat and Cool, Central AC Only Cools

A central AC is only designed to remove heat from your home and release it outside. A heat pump can work like a central AC in cooling mode. In heating mode, it’s able to reverse direction to bring outdoor heat inside. 

If you have a central AC in Oregon, you’ll need to have a furnace or another heating system to keep you warm in winter. In comparison, a heat pump offers an all-in-one heating and cooling solution.

What Is Central Air Conditioning?

A central AC is a cooling system that uses refrigerant lines, ductwork, an outdoor condenser, an indoor coil, and a blower. It distributes cooled air through the ducts. It works best for homes with existing ductwork. If you already have a reliable furnace or simply want strong summer cooling, it is a good option.

Our team can install a full range of heating, ventilation, and air conditioning (HVAC) equipment. We can evaluate your home’s suitability for central AC systems, heat pumps, ductless mini-splits, and high-efficiency cooling systems.

What Is a Heat Pump?

Meanwhile, a heat pump can transfer heat indoors or outdoors, depending on which mode you set it to. It transfers heat from inside and releases it outdoors in the summer. With the help of the reversing valve, it reverses direction and pulls outdoor heat indoors during the winter. This energy-efficient option is especially popular in Oregon because of its all-in-one system and year-round comfort.

How Are Heat Pumps and Central AC Systems Similar?

These systems are similar because they both:

  • Rely on refrigerant to transfer heat
  • Connect to ductwork
  • Involve an indoor coil and outdoor unit
  • Require proper sizing, maintenance, and installation
  • Offer high efficiency ratings
  • Deliver superior cooling performance when adequately sized

Key Differences Between Heat Pumps and Central AC

While there are many similarities between these systems, there are also key differences that are important to consider.

Heating Capability

While heat pumps can heat and cool, central ACs only cool. If you install a central AC, you’ll need to get a gas furnace, electric heat, or another heating source.

Year-Round Use

Unlike central ACs, heat pumps can be used year-round. As a result, they typically require more frequent maintenance.

Energy Use

When in cooling mode, both systems perform similarly if they have similar efficiency ratings. Heat pumps can be significantly more energy efficient than gas furnaces in heating mode because they move heat instead of burning fuel. Your ultimate energy savings will depend on your heating fuel, electricity rates, home insulation, and HVAC efficiency.

Upfront Cost

Although heat pumps often cost more upfront, central ACs can cost more if you need to install a furnace as well. However, homes that have an existing furnace will likely spend less by opting for a central AC.

Maintenance Needs

A central AC should be serviced each spring before the cooling season begins. Heat pumps should be serviced once before the heating season and once before the cooling season. However, both systems require airflow checks, filter changes, coil cleanings, and refrigerant inspections.

Cooling Performance: Is a Heat Pump as Good as Central AC?

When it is used in cooling mode during our Southern Oregon summers, it works fairly similarly to a central AC. Your overall comfort will depend on the system size, ductwork condition, window exposure, insulation, installation quality, and equipment quality. Ultimately, the real choice is less about the cooling power and more about whether you need energy-efficient heating as well.

Heating Performance: Where Heat Pumps Stand Out

Heat pumps are known for providing efficient heating in mild to moderate climates like Southern Oregon. They offer a practical year-round option, while furnaces are good for supporting homes during colder periods. In our area, some homeowners even opt to use a heat pump and a furnace so that they have gas heat for backup during the coldest days of the year and better energy efficiency during milder weather.

Which System Is More Efficient?

Both cooling systems offer a high level of efficiency. Rather than simply compare cooling systems, you need to look at the SEER2 and EER2 ratings to see which one is more efficient. In terms of heating efficiency, the HSPF2 rating is the best indicator. If an AC and heat pump have similar SEER2 ratings, they can be expected to have similar cooling energy use under comparable conditions.

Some of the largest potential energy savings can come from replacing electric resistance heating or an older, inefficient furnace with a heat pump. However, it’s also important to consider utility costs and your home comfort goals before you make an upgrade decision.

Which System Costs More?

It depends on whether you’re replacing a single system or a full heating and cooling system. For example, opting for a heat pump instead of replacing a central AC and furnace may have a lower upfront cost than replacing both a central AC and furnace separately. If you already have a relatively new furnace and only need a cooling system, a central AC will likely be less expensive. With both systems, Rogue Valley’s financing options can make the total cost more budget-friendly.

Which System Is Better for Southern Oregon Homes?

In Southern Oregon, both systems have important benefits. Heat pumps are often a strong fit for Grants Pass, Medford, and the Rogue Valley because they offer an all-in-one heating and cooling system. However, central ACs are a good choice if you have a newer, reliable furnace.

As you make your decision, you should carefully consider the following factors.

  • Your summertime cooling demand
  • How old the current furnace is
  • If you have existing ductwork
  • Your home’s wintertime heating needs
  • Your long-term repair and replacement goals
  • Energy bills
  • Comfort issues, such as uneven temperatures and airflow

When Central AC May Be the Better Choice

A central AC is likely a better choice in the following circumstances.

  • You have an existing furnace that’s fairly new.
  • You’d like to keep gas heating.
  • You only need to get a cooling system.
  • Your home’s ductwork is in good condition.
  • Your current heating system is reliable and energy efficient.
  • You only have space in your budget for getting a cooling system.

When a Heat Pump May Be the Better Choice

There are other instances where a heat pump may be the better option.

  • You need an HVAC system that can heat and cool.
  • You’re trying to avoid gas or oil heating.
  • You need to replace an old, inefficient heating system.
  • Your existing furnace and AC are getting older.
  • You want a system that provides year-round comfort.
  • You live in an area with mild winters, making a heat pump an effective option.
  • You may qualify for heat pump-related rebates or incentives.

What About Ductless Heat Pumps?

Not all heat pumps are central ducted systems. Ductless mini-split heat pumps are able to heat and cool specific rooms and zones without the need for ductwork. They are especially effective in home additions, garages, upstairs rooms, offices, sun-facing rooms, and older homes that don’t have any ductwork. If you want to heat and cool a specific space or don’t have existing ductwork, our HVAC technicians can evaluate whether ductless heat pumps are right for you.

Questions To Ask Before Choosing Heat Pump or Central AC

When you reach out for a professional consultation, remember to ask the following questions.

  • Is my existing furnace worth keeping?
  • What system size will my home need? 
  • Is my ductwork in good condition or does it need repairs?
  • Will I require any electrical upgrades? 
  • What efficiency rating works with my budget?
  • Will a dual-fuel system work for my home?
  • Are there any rebates or specials available to reduce the overall price?
  • What type of financing options are available? 
  • How will my system perform during peak heat in the summer and cold winter days?
  • What maintenance schedule do you recommend?

Why Professional Installation Matters

Your system choice is only one factor in determining the comfort and energy efficiency of your unit. If the installation is poorly done or incorrectly sized, you may experience a range of issues,

  • Short cycling
  • Increased wear
  • Higher energy bills
  • Shorter system lifespan
  • Reduced humidity control
  • Uneven temperatures

Thanks to our years of experience, we offer a thorough installation process that includes a full home evaluation, proper sizing, accurate equipment recommendation, and expert installation services. Afterward, we carefully test and calibrate your unit for maximum performance.

When To Call Rogue Valley Heating, Cooling & Electrical

If you are unsure about which heating and cooling system to use, we can help. We also recommend reaching out in the following situations.

  • Your current AC or furnace is already 10 to 15 years old or older.
  • Your energy bills have risen for no explicable reason.
  • Your system requires frequent repairs.
  • Your home has uneven heating or cooling in different rooms.
  • You are looking for an energy-efficient, year-round comfort solution.

Our experienced HVAC technicians serve homeowners throughout Grants Pass, Medford, Rogue Valley, and Southern Oregon. We offer 24/7 emergency services, upfront pricing, flexible financing, and same-day services.

FAQs

What is the main difference between a heat pump and central AC?

While a central AC is only able to cool your home, a heat pump can heat and cool. 

Does a heat pump cool as well as central AC?

Absolutely. Like a central AC, a heat pump uses refrigerant to absorb heat inside your home to transport it outside. When properly sized and installed, it offers a high level of cooling performance and energy efficiency.

Do I still need a furnace with a heat pump?

Not always. In our area, a heat pump is an effective heating and cooling system. However, some homes pair a heat pump with a furnace in a dual-fuel system to provide supplemental heating capacity during colder conditions.

Is a heat pump cheaper to run than central AC?

The cooling costs for both systems are comparable. To determine the efficiency of your unit, you’ll need to look at the efficiency rating. The biggest energy savings tend to be during the winter because modern heat pumps are often significantly more efficient than older or less efficient heating systems.

Who installs heat pumps and central AC in Grants Pass and Medford?

Rogue Valley Heating, Cooling & Electrical can install central ACs and heat pumps throughout Grants Pass, Medford, and Southern Oregon. Give us a call to learn more.

Review Your Home’s Heating and Cooling Options

Interested in discovering whether a heat pump or central AC is right for your home? Call Rogue Valley Heating, Cooling & Electrical at 541-204-0966 or schedule service online for a clear installation experience and trusted advice.

Why Does My Furnace Smell Like Gas

A gas odor around a furnace should never be ignored. Although natural gas is naturally odorless, utility companies add a sulfur-like smell similar to rotten eggs to make it easier to detect leaks. While you may notice a brief odor at startup, any strong, persistent, or recurring gas smells require immediate action.

To help your family stay safe, we’ll look at what to do right away, common causes of gas odors, warning signs to watch out for, and when you need to call Rogue Valley Heating, Cooling & Electrical for help.

If You Smell Gas Right Now, Do This First

For the safety of your home and family, do the following emergency steps before worrying about anything else.

  • Leave your home immediately with all people and pets.
  • Do not turn your lights on or off.
  • Do not use anything that makes a spark, such as lighters, matches, thermostats, or appliances.
  • Call 911 or your gas utility once you are in a safe location.
  • Do not go back inside your home until emergency responders or the gas utility say that it is safe to do so.

Once your home has been cleared and it is safe to go inside, you should schedule a furnace inspection or repair to resolve the issue.

Is It Ever Normal for a Furnace To Smell Like Gas?

Although a faint, brief odor may sometimes happen when your unit first starts up, it should disappear fairly quickly. Gas odors are not normal if:

  • They recur frequently.
  • The odor is especially strong.
  • The smell lasts more than a few moments.
  • You hear something hissing or whistling.
  • The smell is throughout your home.
  • Your carbon monoxide alarm goes off.

When unsure, it is always safer to treat a gas smell like a leak.

What Does a Gas Leak Smell Like?

Gas can smell like rotten eggs, sulfur, or a skunk. Because natural gas has no smell, the scent actually comes from the odor added to the gas. You may also notice hissing noises near your furnace or gas line, pilot light problems, or bubbles in any standing water that’s near the gas piping. If you check near the outdoor gas line, you may also see dead or discolored plants. Exposure to natural gas at high concentrations or to combustion byproducts such as carbon monoxide may cause symptoms including dizziness, headache, nausea, or fatigue.

It’s important to remember that carbon monoxide (CO) has no smell. This is why it’s so important to install CO detectors, test them monthly, and change dead batteries as recommended by the manufacturer.

Common Reasons Your Furnace Smells Like Gas

A furnace can smell like gas due to a few different problems.

1. A Gas Leak in or Near the Furnace

This is the most urgent cause. Gas odors can occur if there’s a leak in the gas line, connection, valve, or furnace component. If you even think this could be the cause, you should immediately evacuate your home and call for a professional inspection.

2. A Pilot Light Problem

Older furnaces typically have standing pilot lights. If the pilot light goes out, gas may continue to flow and cause this odor. For your safety, you should never relight the pilot if you smell gas.

3. Delayed Ignition

Gas can build up briefly before burners ignite. If this occurs, you may notice a small boom or hard start as well as a gas smell when your furnace kicks on. Because this issue can damage the furnace, you should always get it professionally inspected.

4. Dirty or Misaligned Burners

A dirty or misaligned burner can impact combustion and result in unusual smells. Often, you’ll also notice uneven flames, soot, yellow-colored flames, or rough startup. If this is the problem, the best option is to schedule a professional cleaning and adjustment.

5. Venting or Backdrafting Problems

Your furnace’s exhaust gases are supposed to leave your home through the venting system. If they don’t because of blocked, damaged, or improperly venting exhaust systems, the combustion byproducts can end up back in your home. Besides causing combustion or exhaust odors, this also creates a serious carbon monoxide concern.

6. A Cracked Heat Exchanger or Combustion Issue

Heat exchanger problems represent a major safety concern and should be checked out by a professional heating, ventilation, and air conditioning (HVAC) technician right away. When the heat exchanger cracks, it can release combustion byproducts. If this is the cause of the unusual odor, you’ll also potentially notice soot, a CO detector alarm going off, flame rollout, or system shutdowns.

7. New Furnace or First Startup Odors That Are Not Gas

When your furnace first starts up, dust, debris, and manufacturing oils can create a burning odor. This is especially common if the furnace runs after it has sat unused for a while. However, these startup odors should not smell like rotten eggs.

If the odor does smell like rotten eggs, you should follow the gas safety steps immediately.

8. The Smell May Be Coming From Somewhere Else

Sewer gas from a dry floor drain, nearby gas appliances, trash or compost near your windows and vents, or outdoor gas line work can result in a gas odor. For your safety, you should always rule out gas leaks before you assume that the odor is coming from a harmless source.

Furnace Smell Comparison: Gas vs. Other Odors

The type of odor you smell is a strong indication of the problem. For a suspected gas leak, follow the emergency steps above. Other strong, recurring, or unusual furnace odors should be professionally inspected.

  • Rotten Eggs and Sulfur Odors: These smells often occur due to a gas leak.
  • Burning Dust: You may notice the odor of burning dust when your furnace first switches on each season.
  • Burning Plastic or Electrical Smells: These odors can occur due to electrical issues or overheating.
  • Musty Odors: Often, these smells stem from dirty ducts, excess moisture, mold, or a clogged drain.
  • Metallic Smells: This type of odor may happen when components overheat.

What Not To Do If Your Furnace Smells Like Gas

If your furnace smells like rotten eggs, you should never do the following things.

  • Do not continue running the furnace.
  • Do not turn on or off any switches.
  • Do not look for the leak using a flame.
  • Do not use any device that causes a spark, such as a lighter.
  • Do not unplug any equipment.
  • Do not attempt gas line repairs yourself.
  • Do not ignore faint gas odors that keep returning.
  • Do not go back into your home unless it has been cleared.

When To Call Rogue Valley Heating, Cooling & Electrical

Before you reach out to us for repairs, you should always call emergency responders or your gas utility first. Once they have confirmed that your home is safe, you can call us for services. We recommend scheduling a furnace inspection if you notice any of the following signs.

  • The odor happens when your furnace starts up.
  • You haven’t had your furnace serviced in over a year.
  • Your furnace makes booming or popping noises.
  • You are experiencing poor heat performance, odd odors, or short cycling.
  • Your energy bills have jumped for no apparent reason.
  • Your pilot light will not remain lit.
  • Your burner flame is yellow or flickers.

At Rogue Valley, we are a local furnace repair and maintenance team. We serve Grants Pass, Medford, and the surrounding Southern Oregon area. Our experienced team offers 24/7 emergency furnace repairs, upfront pricing, same-day service, and safety-focused diagnostics.

How a Technician Checks for Furnace Gas Odors

Our HVAC technicians will perform a few checks to diagnose the source of your problem.

  • First, we’ll test your gas connections.
  • Our team will inspect gas valves and fittings. 
  • We will check your burner operation.
  • Then, we will inspect your ignition system and heat exchanger. 
  • We will test for the presence of carbon monoxide.
  • Our staff will check your venting and combustion air.
  • Finally, we will review your furnace fault codes and check your safety controls.

At Rogue Valley, our goal is to find the cause of the problem. Gas odors are a serious issue, so it’s essential to discover and fix the source of the smell.

How To Help Prevent Gas Smell Problems

To avoid gas odors in the future, there are a few essential maintenance tasks you should carry out.

  • Change your filter regularly.
  • Install and maintain CO detectors.
  • Verify that your vents and combustion air openings are not blocked.
  • Never attempt DIY gas line or furnace combustion repairs.
  • Make sure there are no flammable items or clutter stored in your furnace area.
  • Call immediately if you notice changes in performance, unusual noises, or odd odors.

FAQs

To explore why gas odors occur and what to do, check out some of our most frequently asked questions.

Why does my furnace smell like gas when it turns on?

A faint gas odor may occasionally occur briefly during ignition. Any strong, persistent, or recurring gas smells may be due to a pilot light problem, gas leak, or delayed ignition.

Is a rotten egg smell from my furnace dangerous?

Yes, it is. A rotten egg or sulfur smell can indicate a natural gas leak and should be taken seriously. You should immediately evacuate your home and call 911 or your gas utility once you reach a safe location.

Can I relight my pilot light if I smell gas?

No, this poses a danger to yourself and your family. Instead, leave your home immediately. Once you and other occupants are in a safe location, you can call for help.

Does carbon monoxide smell like gas?

No, it doesn’t. Natural gas is odorless, but utilities add an odorant that produces a rotten-egg-like smell. Meanwhile, carbon monoxide is odorless and invisible. Because of this, it’s important to always have working CO detectors installed in your home.

Who should I call for furnace gas smell problems in Grants Pass or Medford?

Before you call anyone, immediately leave your home and get to a safe location. Then, call 911 or your gas utility. Once they have confirmed that your home is safe, you can call Rogue Valley Heating, Cooling & Electrical at 541-204-0966 to schedule furnace inspection and repair services.

Protect Your Home From a Furnace Leak

If you smell a gas odor, you should immediately leave your home. After you, your family members, and your pets have reached a safe location, you can call 911 or your utility provider to report the leak. After the area has been cleared, you can reach out to our team at 541-204-0966 to schedule a full safety inspection.

Contact us today for furnace repairs and inspections in Grants Pass, Medford, and Southern Oregon.

Generator Transfer Switch Basics for Homeowners

A typical outage can last for hours, and some Grants Pass outages have extended for multiple days. During an outage, having backup power like a generator is essential. For the generator to function properly, it must be connected to your home’s electrical system through a generator transfer switch. To see different switch types, sizing variations, safety concerns, how these switches work in practice, and when you should reach out to a licensed electrician, read on.

What Is a Generator Transfer Switch?

A generator transfer switch controls whether your home receives power from the utility grid or your generator. It is necessary for keeping both power sources from operating at the same time.

Why a Transfer Switch Is Important

From preventing backfeeding to providing backup power, there are a few reasons why transfer switches are a necessary part of your generator installation.

Prevents Dangerous Backfeeding

If you didn’t have a generator switch, it could lead to dangerous backfeeding. This occurs when generator power goes backward into the utility lines. It is a violation of the Oregon Electrical Specialty Code, which requires the use of a transfer switch or other safety devices. Without one, the backfeeding can damage neighbors’ appliances or wiring and seriously injure or kill utility workers.

Protects Your Home’s Electrical System

Eventually, power from the grid will be restored after an outage. When this happens, the transfer switch prevents overloads, fire hazards, and generator damage by preventing utility power and generator power from being connected at the same time.

Makes Backup Power More Convenient

Ultimately, having a transfer switch maximizes the convenience of your generator. Without a transfer switch, you would need to run extension cords to appliances on different circuits.

A generator can also work with hardwired systems, such as your furnace blower, well pump, lighting circuits, and sump pump. Because of this, you can enjoy having a continuous supply of power without the hassle of setting up power cords.

Manual vs. Automatic Transfer Switches

When selecting a generator installation, you can choose to have a manual or automatic transfer switch. While they both perform the same safety function, there are a few differences in cost and convenience.

Manual Transfer Switch

With a manual transfer switch, the homeowner turns on the generator by manually flipping the switch. This tends to be more common with portable generators and low-cost setups. Additionally, manual transfer switches tend to work better when you only need backup for your essential circuits.

Automatic Transfer Switch

If you have a standby generator, it’s likely equipped with an automatic transfer switch. These switches are capable of detecting an outage and switching power automatically. This makes them incredibly convenient if you are backing up your entire home, experience frequent outages, or need immediate power for medical equipment. Additionally, this option is ideal if you travel frequently and can’t manually turn the generator on yourself.

Smart or Load-Managed Transfer Switches

Smart and load-managed transfer switches can switch your home’s power source from the grid to the generator. To prevent the generator from becoming overloaded, they can automatically adjust the load to prioritize your most important circuits and appliances.

Transfer Switch vs. Interlock Kit

A transfer switch and an interlock kit are different, although they both work to prevent unsafe electrical overlaps between the generator and utility grid. Normally, the transfer switch is responsible for selected circuits, although whole-home systems may be able to power your entire home. 

In comparison, an interlock kit works through the main panel and involves a sliding plate to block either the main breaker or generator so that they do not operate at the same time. Because it must be compatible with your panel and in accordance with local codes, it’s essential to have a professional electrician set up the kit.

What Size Generator Transfer Switch Do You Need?

The size of the generator switch you need will vary based on the generator’s output, voltage, amperage, and the circuits being powered. Most portable generators run on 30- or 50-amp connections. Meanwhile, whole-home standby systems generally require larger service-rated equipment.

Your switch isn’t the only thing you need to consider. The wiring, breakers, generator, and inlet box all must be compatible for your generator setup to function safely.

Choosing Which Circuits To Power During an Outage

Unless your system is large enough to handle it, you most likely won’t be able to power everything at once. Instead, you’ll need to prioritize which of the following key appliances and electrical systems should receive power.

  • Medical equipment
  • Refrigerator or freezer
  • Garage door opener
  • Furnace blower or your heat pump controls
  • Well pump
  • Sump pump
  • Wi-Fi, router, and phone charging 
  • Key lighting circuits
  • Selected kitchen and bedroom outlets

Key Parts of a Safe Generator Connection

For your generator to connect to your electrical systems, a few key components are necessary.

  • Generator: The generator creates the power needed to run your appliances and devices.
  • Transfer Switch: This switch is responsible for changing your system from grid power to generator power.
  • Generator-Rated Power Cord: For the safety of your home’s electrical systems and the generator, you need a power cord that is rated for the generator.
  • Outdoor Power Inlet Box: This is a weatherproof box on the outside of the home where you plug in the power cord.
  • Main Electrical Panel: Your transfer switch or interlock kit is set up at the electrical panel. The panel is also responsible for transferring power to each circuit in your home.
  • Proper Breakers, Wiring, Conduit, and Labels: All of these components are necessary for transferring power from the generator to the selected circuits.

How Transfer Switch Installation Works

Once you decide to set up a transfer switch,  our electricians will help you through the following process.

  1. First, one of our electricians will discuss your backup power goals. We will evaluate your panel and generator to see which switch is compatible.
  2. Then, you can select which circuits are essential. This will determine the capacity and setup.
  3. The transfer switch is mounted near your main panel.
  4. Our electrician installs an outdoor inlet box if you’re getting a portable generator.
  5. We will verify that the wiring is properly connected and labeled.
  6. The system will be tested under safe conditions.
  7. Our team will handle any inspections and permits necessary for your local area.

How To Use a Manual Transfer Switch During an Outage

While an automatic transfer switch will handle the work for you, a manual transfer switch does not. If this is the setup you have, you should start by placing the generator outdoors and away from doors or windows. Then, connect the generator to the inlet box before you turn on the generator.

After allowing the generator to stabilize, you can switch selected circuits to generator power. You should turn each circuit on one at a time to avoid overloading your system. Later, you can safely turn the switch back off and shut down the generator once utility power returns.

Common Mistakes To Avoid

To protect your home and family, avoid the following frequent mistakes.

  • Never plug a generator into a wall outlet.
  • Never use an undersized cord or the wrong amperage.
  • Never power more circuits than your generator can safely handle.
  • Never install transfer equipment if you don’t have the right permits or inspections completed.
  • Never forget to label your backed-up circuits.
  • Never run a portable generator indoors, in a garage, or near open windows.

When To Call a Licensed Electrician

In the following circumstances, you need the help of a professional electrician.

  • You’d like to connect your generator to your home’s panel.
  • You have an old or already full panel.
  • You aren’t sure if you want a manual or automatic transfer switch.
  • You want to have a power inlet installed.
  • You would like to set up a whole-home backup.
  • You aren’t sure what switch size your generator will need.

Generator Transfer Switch FAQs

Do I need a transfer switch for a portable generator?

Not necessarily. While it might not be a requirement, a transfer switch is a more convenient way to switch between grid and generator power. Transfer switches are important because they prevent dangerous backfeeding from happening. They’re also necessary if you’ll be connecting the generator to your home’s electrical panel or wiring system.

Can I use a generator without a transfer switch?

Yes, you can. However, it should never be plugged in directly to your panel or outlet. Instead, you’ll either need to use extension cords or an interlock kit to safely power your home.

What is the difference between a manual and automatic transfer switch?

A manual transfer switch must be manually changed. An automatic transfer switch can detect power outages and instantly switch your power source.

What size transfer switch do I need?

It depends on the amperage you need. One of our electricians can evaluate the essential appliances you want to power, your breaker panel, and other factors to determine the best option. A 200-amp switch is often a good option for whole-home generators, while 30- to 50-amp switches tend to work best for portable generators. However, the right switch must match the generator capacity, service size, and load calculation.

Can a transfer switch power my whole home?

Yes, it can. However, it will need to be a whole-house model that works with a generator large enough to power your entire home.

Is a transfer switch required by code?

An approved transfer equipment or another code-compliant safety device.is always required if your generator will be permanently connected to your home’s power supply.

How often should a transfer switch be tested?

You should follow the manufacturer’s testing schedule, which often involves monthly tests. Additionally, one of our electricians can professionally evaluate the unit during an annual inspection.

Get Help With Your Transfer Switch Installation

When you’re designing a backup power setup, a transfer switch is one of the most important safety features. As a homeowner, you’ll need to decide if you want a manual or automatic transfer switch. You’ll also need to choose which circuits you want to power, whether you want a standby or portable generator, and the sizing you need.

Reach out Rogue Valley Heating, Cooling & Electrical for help with your generator transfer switch installation, electrical inspections, and outage-readiness planning.

Image of a ductless mini-split air conditioner mounted on the wall

Can One Mini Split Cool Multiple Rooms?

While a single mini-split can sometimes cool multiple rooms, it depends entirely on your home’s layout and size. An open floor plan will be easier to cool because of the improved airflow. If you have closed rooms, you’ll likely require multiple indoor heads.

At Rogue Valley Heating, Cooling & Electrical, our team can evaluate your home’s layout, mini-split placement options, airflow, and unit sizing to determine the right setup for your needs.

The Short Answer: Sometimes, But Not Always

In general, a single mini-split will perform best if it is in a single room, open area, or connected rooms that have strong airflow. If the doors remain open and the rooms are relatively small, it may be able to cool an adjoining space.

However, mini-splits generally won’t be able to cool multiple closed bedrooms well. If you have separate rooms, you’ll likely need to set up a multi-zone mini-split system instead.

How a Ductless Mini-Split Works

Ductless mini-splits rely on the same basic technology as heat pumps or central ACs. The difference is that they use separate indoor air handlers for different zones, so you don’t have to install ducts. Each air handler delivers conditioned air directly into the room or zone. Then, these air handlers connect to an outdoor unit where the heat is released when it’s operating in cooling mode.

At Rogue Valley, we generally recommend this type of setup for homes that don’t have existing ductwork. It’s also effective if you want individualized temperature control in different parts of your home.

Single-Zone vs. Multi-Zone Mini-Splits

Before you get ductless mini-splits, you’ll need to decide between a single-zone or multi-zone installation.

What Is a Single-Zone Mini-Split?

A single-zone installation involves a single indoor air handler that connects to one outdoor unit. It works best if you’re cooling a bedroom, sunroom, office, garage, studio, home addition, or open living area. Because it can only cool a single zone well, it is not as effective if you want to condition multiple rooms.

Single-zone systems are ideal if you’re cooling a single zone and want a simpler installation process. Additionally, they have a lower upfront cost than multi-zone systems.

What Is a Multi-Zone Mini-Split?

Meanwhile, a multi-zone system involves multiple indoor units that connect to a single outdoor unit. Each room or zone can have its own temperature control, making this option ideal if you have multiple bedrooms, upstairs/downstairs zones, or home additions to cool. Additionally, homeowners like this option because it provides a high level of whole-home comfort.

Some Medford homes do not have existing central AC or ductwork. For these properties, multi-zone systems are ideal because they don’t require any ductwork. While a multi-zone system costs more than a single-zone system, it delivers better comfort and control to separate spaces.

When One Mini-Split Can Cool Multiple Rooms

While a single-zone system is generally only designed for a single space, there are a few situations where it may work to cool multiple rooms.

  • The rooms are connected by a wide opening.
  • The doors will generally remain open.
  • You have an open floor plan in the space, such as a connected living room, dining room, and kitchen area.
  • Your home has good insulation and limited heat gain.
  • The indoor unit’s placement is ideal for natural airflow.
  • Your square footage matches the system’s BTU capacity.

When One Mini-Split Will Not Be Enough

Alternatively, there are scenarios where you’ll need more than one mini-split to feel comfortable.

  • The rooms are separated by doors, corners, or hallways.
  • One of the rooms receives heavy sun exposure.
  • Each family member wants a different temperature setting for their space.
  • You want to cool bedrooms that will have their doors closed at night.
  • Your system would need to be oversized to cool the space.
  • You need to cool rooms on separate floors that have significantly different cooling loads.

Why Oversizing One Mini-Split Is Not the Fix

Getting an oversized mini-split generally won’t resolve the problem because oversized units can cool the space immediately around the indoor unit too quickly. When this happens, areas farther from the indoor unit may remain too warm. Additionally, overly fast cooling cycles do not have time to reduce the humidity as much, leading to muggy rooms.

As a result, oversizing can result in short cycling, swings in comfort, and increased wear. For long-lasting comfort, performance, and energy efficiency, the best option is to properly size the system from the start.

What Affects How Many Rooms a Mini-Split Can Cool?

How many rooms your mini-split cools will be determined by your home layout, how separated the rooms are, the square footage, insulation levels, ceiling height, sun exposure, and window size. Your indoor unit placement, BTU capacity, and our local summer heat will also affect your unit’s coverage. Air movement between rooms, such as whether you open or close the doors, will determine how effective your unit is at cooling spaces farther from the indoor head.

Best Mini-Split Options for Multiple Rooms

If you want to cool multiple rooms, you have several options: a single-zone mini-split system, a multi-zone mini-split system, multiple single-zone systems, or a mini-split paired with central AC.

Option 1: One Single-Zone Mini-Split

This option works best if you have a small, open space or want to cool a single room. For example, it is effective for garages, home additions, bonus rooms, and offices. It is not effective for cooling several enclosed rooms.

Option 2: One Multi-Zone Mini-Split System

Multi-zone mini-split systems work well if you want to cool multiple separate rooms. This setup involves installing multiple indoor heads that connect to a single outdoor unit. Once set up, it delivers a high level of comfort and temperature control to individual rooms.

Option 3: Multiple Single-Zone Systems

This type of setup uses multiple independent systems, with each outdoor unit connected to its own indoor head. Because of this, it necessitates more outdoor equipment and installation planning.

Often, this setup is effective when you have rooms that are far apart, workshops, detached areas, or additions. Once the system is installed, it can deliver easy zone-specific operation and excellent energy efficiency.

Option 4: Mini-Split Plus Existing Central AC

If you have an existing central AC, a mini-split can help you cool an upstairs room, addition, sun-facing space, or hot spot. The central AC handles most of your home’s workload, while the mini-split addresses your problem area.

Why Professional Design Matters

At Rogue Valley, we can assess your home to determine whether one or more units are necessary. As part of our process, we can evaluate your room size, layout, placement, airflow, and outdoor unit capacity. We’ll also consider your comfort goals as we determine which setup makes sense for your space. By getting a proper installation, you can enhance system efficiency, minimize noise, improve your comfort, and boost your unit’s long-term reliability.

Signs You Need More Than One Indoor Unit

Your home may need more than one unit if you notice the following signs.

  • Some of your rooms stay warm, even when the main room is cool.
  • Your mini-split seems to run all the time, but the farthest rooms stay uncomfortable.
  • You need to cool a home addition or converted space.
  • Each floor is at a different temperature.
  • You would like to have different temperature settings in different zones.
  • Your bedrooms only remain cool if the doors are open.

Benefits of Multi-Zone Mini-Splits

By installing multi-zone mini-splits, you can enjoy a few important advantages. Because of the following benefits, they are considered an excellent option for homes in Grants Pass, Medford, and Southern Oregon.

  • You can enhance your comfort in each room.
  • Multi-zone mini-splits operate quietly.
  • These units offer better temperature control across occupied and unused spaces.
  • They deliver flexible placement options for older homes, additions, garages, and remodels.
  • Ductless mini-splits are known for providing energy-efficient heating and cooling.
  • You don’t have to set up major ductwork to install this type of system.

When To Call Rogue Valley Heating, Cooling & Electrical

We recommend calling our expert technicians if you are unsure whether one mini-split is enough for your home. We can evaluate your existing system and layout to determine if you need an HVAC replacement, new ductless installation, mini-split repairs, or basic maintenance services. 

Our experienced team is known for delivering upfront pricing and flexible financing. For same-day services in Grants Pass, Medford, Rogue Valley, and Southern Oregon, give us a call today.

FAQs

Can one mini-split cool two rooms?

It can, but the rooms must be relatively small and connected. The doors will also need to remain open for adequate airflow. If you want to cool larger, enclosed spaces, a dual-zone system will be a better option.

Can one mini-split cool a whole house?

A single-zone mini-split with one indoor unit may be able to cool an entire home, but it’d have to be a small, open home. In the majority of cases, a whole-home ductless setup is going to involve multiple indoor units.

How many rooms can a ductless mini-split cool?

Mini-splits are designed for zones, not rooms. A single indoor unit is intended for one zone, while a multi-zone system can cool multiple rooms because it has additional indoor units.

Is a multi-zone mini-split worth it?

Yes, if you want energy-efficient cooling in multiple rooms and individualized temperature control without any ductwork, a multi-zone mini-split system is a good choice.

Who installs mini-splits in Grants Pass and Medford?

Rogue Valley Heating, Cooling & Electrical can handle all of your mini-split installation, repair, replacement, and maintenance needs. Our team is available throughout the Grants Pass, Medford, and Southern Oregon area.

Evaluate Your Mini-Split Installation Options

Unsure if you need one or multiple mini-split systems for your space? Call Rogue Valley today at 541-204-0966 for a full evaluation. You can also schedule a ductless mini-split evaluation or installation online.

Image from the inside of residential ductwork

How Leaky Ductwork Raises Energy Bills in Southern Oregon Homes

Most people don’t spend a lot of time in their attic, crawlspace, or basement. Within the walls, ceilings, and floors of your home, duct leaks can occur that allow conditioned air to escape. 

Even if the leaks are small, energy loss, comfort issues, and indoor air quality (IAQ) impacts can add up.

Over time, duct leaks can increase the strain on your heating, ventilation, and air conditioning (HVAC) system and lead to more frequent repairs. By understanding the signs of duct leaks, you can determine if repairs are necessary and figure out when you need to get help.

Understanding the Role of Ductwork in Your HVAC System

Ductwork is like the lungs of your home’s HVAC system. It transports heated and cooled air to each room. When the airflow is good, you can enjoy the maximum level of comfort, energy efficiency, and system performance.

Unfortunately, duct leaks are a relatively easy problem to miss. Because they are hidden, duct-related problems are easy to overlook.

Where the Energy Actually Goes

With duct leaks, your home’s conditioned air can easily escape into surrounding spaces, such as the attic, crawlspace, wall cavity, or garage. The HVAC system is producing the conditioned air you need, but the conditioned air isn’t actually reaching each room. Because this can affect indoor comfort levels, it’s common for homeowners to adjust their thermostat more often as they try to maintain the right temperature.

How Leaky Ducts Increase Energy Bills

There are several duct-related factors that can influence your energy bills.

Longer Operational Time

Because your HVAC system loses conditioned air through leaks, it must run longer to reach the thermostat setting. Because of this, rooms may take longer to heat or cool.

Added System Strain

When your system has to work harder than it is designed to, this can result in added wear on your coils, blowers, motors, and other HVAC components.

Repeated Energy Loss Loop

Air loss creates an endless cycle of lost energy. Air escapes from the system. Because rooms remain uncomfortable or fail to reach the set temperature, an occupant may adjust the thermostat. In turn, this causes the system to run longer and use more energy.

The Hidden Cost of Invisible Air Loss

Unlike a broken AC or furnace, duct leaks are rarely as obvious. Instead, one of the biggest signs is that your utility bills will gradually rise over time. Often, homeowners assume that the HVAC system is why utility bills keep increasing, but the actual cause is their ductwork.

Common Causes of Air Duct Leaks

In the typical home, there are a few common culprits that are responsible for duct leaks.

Aging Duct Materials and Loose Connections

As ductwork starts to age, it is more likely to crack, separate, or lose its sealing around the joints.

Rodents, Moisture, and Physical Damage

Because ducts run through attics and crawlspaces, they are naturally exposed to pests and moisture. Over time, this leads to a higher likelihood of physical damage.

Poor Original Installation

If the original installation was the wrong size, had weak connections, or was poorly sealed, it can lead to long-term efficiency issues.

Signs Your Ductwork May Be Costing You Money

The following symptoms frequently occur when ductwork is starting to develop leaks and gaps.

  • Uneven temperatures in different rooms
  • Poor airflow from your vents
  • Longer HVAC runtimes
  • Increased utility bills without an obvious cause
  • Musty odors
  • Higher dust levels in your home
  • Poor indoor air quality

Why Insulation and Location Matter

When ductwork is installed in a hot attic or cold crawlspace, it will lose more energy if it hasn’t been properly sealed or insulated. Thanks to Southern Oregon’s temperature swings, air loss from your ducts will likely be especially noticeable. By properly insulating ductwork, homeowners can reduce temperature loss as air travels to each room.

Indoor Air Quality Can Also Be Affected

When return ducts have leaks, they are able to pull in more dust, crawlspace air, attic contaminants, and insulation particles. As a result, poor duct conditions can make your family’s asthma and allergy symptoms worse. By sealing your ductwork, you can optimize your energy efficiency and help support cleaner indoor air.

How To Check for Leaky Air Ducts in Your Home

As a homeowner, there are a few steps you can take to detect, locate, and fix minor duct leaks.

Signs Your Ducts Need to Be Addressed

First, look for sections of disconnected ducts or crushed sections. Dusty vents and rooms with poor airflow are signs that your ductwork has leaks or damage.

Locating Leaky Ductwork

While some ductwork is hard to reach, you can visually inspect ducts in your attic, crawlspace, garage, and basement if they are visible. As you stand near the duct, note whether you hear any signs of air escaping. You should also look for any indications of tape failure, damaged insulation, or gaps around joints.

DIY Fixes for Minor Leaks

You may be able to fix small, visible gaps with just HVAC mastic or approved foil tape. However, you should not use standard cloth duct tape because this material will fail over time.

When To Hire a Contractor

If you experience any of the following situations, you should reach out to a contractor for professional help.

  • The leaks are hidden or difficult to access.
  • Your ducts are crushed or disconnected.
  • The ductwork insulation is poor.
  • You notice visible mold, moisture problems, or musty odors near the ductwork.
  • The home’s ductwork is older.
  • Multiple rooms have airflow issues.
  • Your home has recurring ductwork issues.
  • Even after filter changes and maintenance work, your energy bills remain high.

Repair, Sealing, or Replacement: Which Is Best?

Duct leaks can be fixed through repairs, sealing, or a full replacement. The option you choose will depend on the extent of the problem.

Duct Sealing and Repairs

Our HVAC technicians will seal and repair ducts if the problem involves small leaks or loose joints. If the ductwork is still usable, this is the most cost-effective, energy-efficient approach.

Upgrading to Modern Insulated Ductwork

When the ducts are damaged, old, undersized, or poorly insulated, we may recommend upgrading to modern, insulated ductwork.

Is Duct Replacement Worth the Cost?

Our team will carefully evaluate your ducts to help you decide on the best path forward. In general, a replacement makes more sense when it’s clear that repairs will not solve your airflow, comfort, or energy-loss problems. If insulated duct material is wet or moldy, replacement may be necessary because it may not be cleanable.

Maintenance That Helps Keep Air Ducts Efficient

To avoid duct issues in the future, there are a few things you can do to optimize your efficiency and avoid unnecessary wear.

  • Schedule Duct Inspections: A periodic duct inspection helps you spot problems before they lead to costly repairs and lost energy efficiency.
  • Replace Dirty Air Filters: Dirty air filters lower your energy efficiency and potentially allow contaminants to get into your HVAC system.
  • Keep Vents and Returns Clear: Closed vents and obstructions can block airflow, increasing the strain on your HVAC system.
  • Maintain Attics and Crawlspaces: You can reduce the likelihood of moisture and damage risks by cleaning and maintaining your attics and crawlspaces.
  • Schedule HVAC Maintenance: Routine tune-ups help your system function at its peak performance, and they help you detect problems before they spiral out of control. 

Air Duct FAQs

How much energy can leaky ducts waste?

In a typical house, around 20% to 30% of conditioned air is lost due to leaky ducts and poor duct connections. When air is lost through leaks, your system has to work harder to replace it. This leads to increased wear and higher energy bills.

Can duct leaks increase heating and cooling bills?

Absolutely. The air lost through duct leaks must be replaced, leading to longer, more frequent runtimes and higher energy bills.

How long do air ducts usually last?

It depends on the type. Flexible ductwork often lasts around 10 to 15 years before it needs to be replaced. Meanwhile, ducts made from galvanized steel can last between 20 and 50 years. If your home’s energy bills have risen inexplicably or you’ve noticed uneven temperatures in your home, it may be time to consider duct repairs or a full replacement.

Should air ducts be cleaned or replaced?

It all depends on the extent of the problem. Return-duct leaks can pull in dust, allergens, attic air, or crawlspace air. Because of this, a simple cleaning may not always be enough. By working with our HVAC technicians, you can find out if duct cleaning, sealing, repairs, or a replacement is needed.

Can leaky ducts affect indoor air quality?

Absolutely. Due to the change in air pressure, the leaks can pull in dust and allergens. If leaks or damaged insulation allow moisture problems to develop, mold or mildew may form. By sealing and cleaning your ductwork, you can improve your indoor air quality.

Optimize Your Energy Efficiency

Over time, leaky ducts can slowly raise your energy bills, lower your family’s comfort, and strain your HVAC equipment. Addressing duct issues early helps you avoid costly energy bills and more expensive repair costs later on.

Whether you need a duct inspection, routine maintenance, duct sealing, or ductwork replacement services, we can help. Reach out to Rogue Valley Heating, Cooling & Electrical today.