Author: zeeshan@advantage-services.com

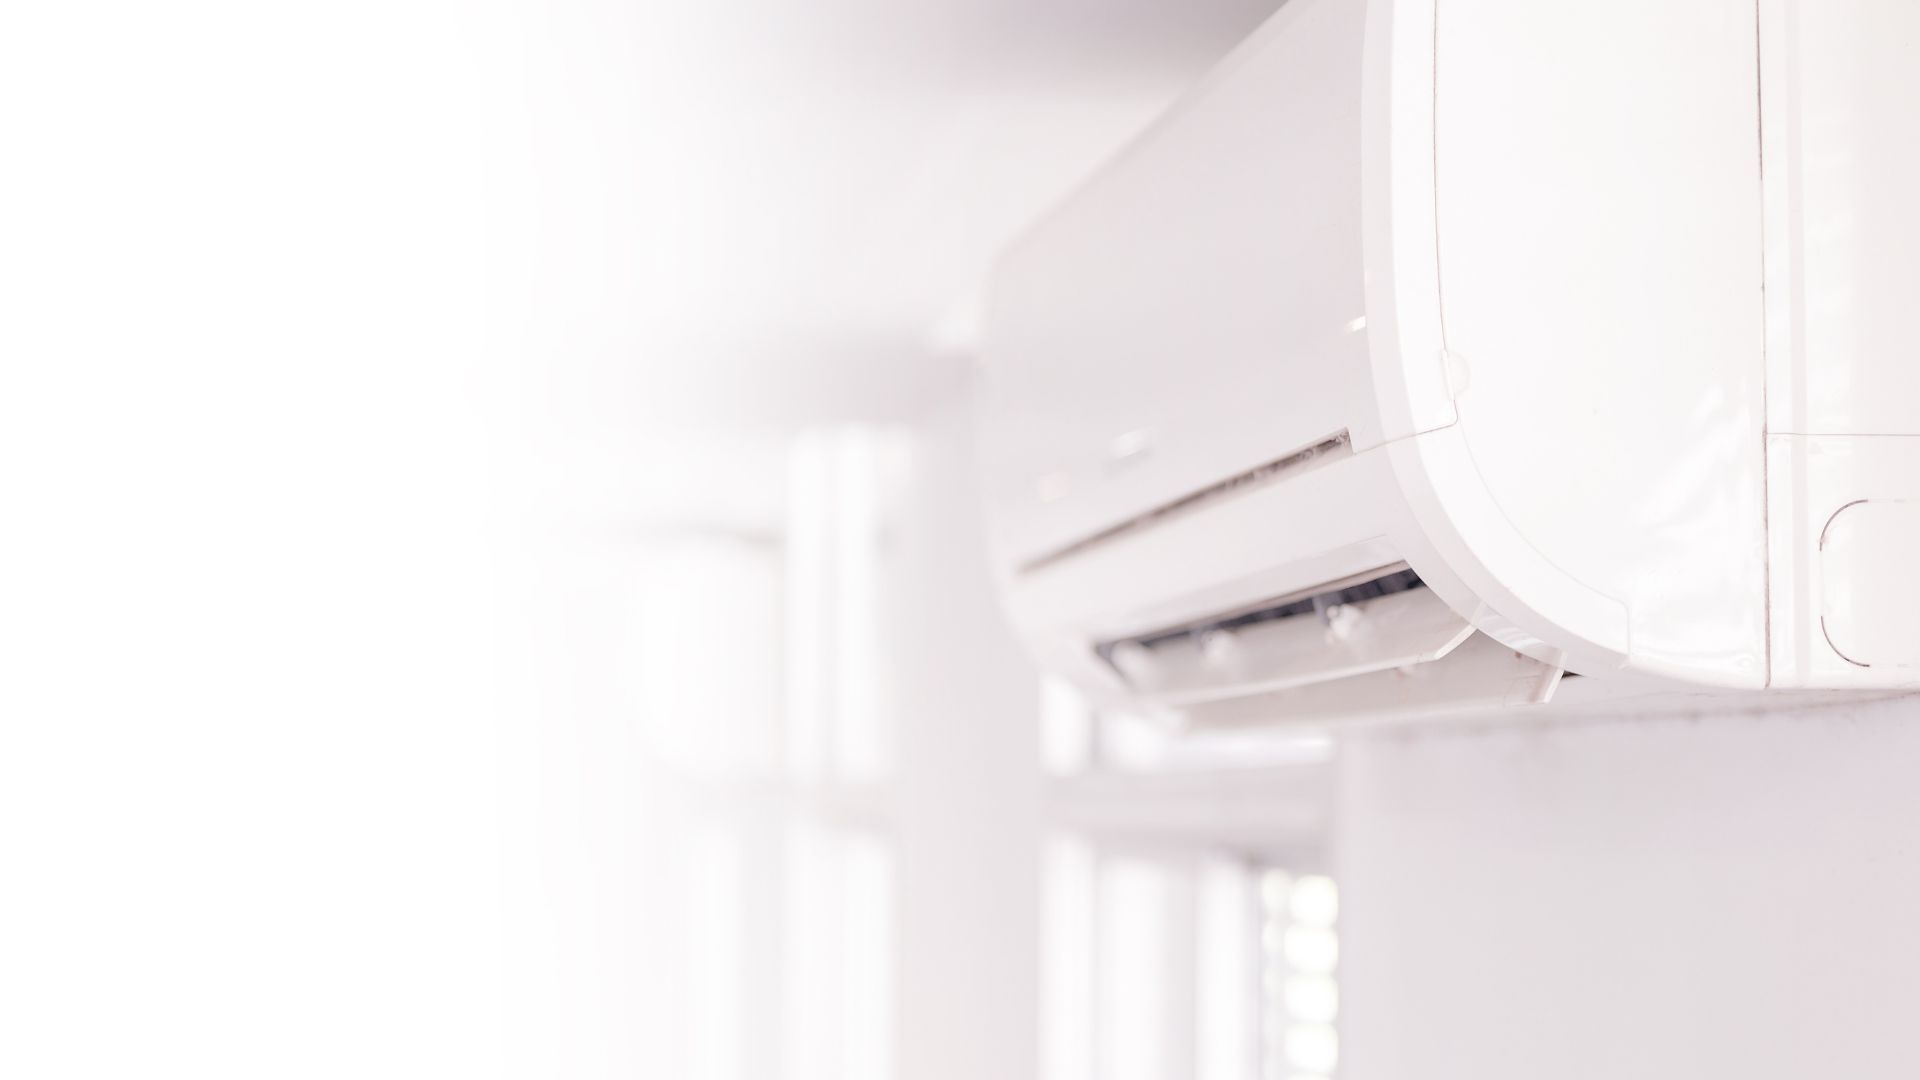
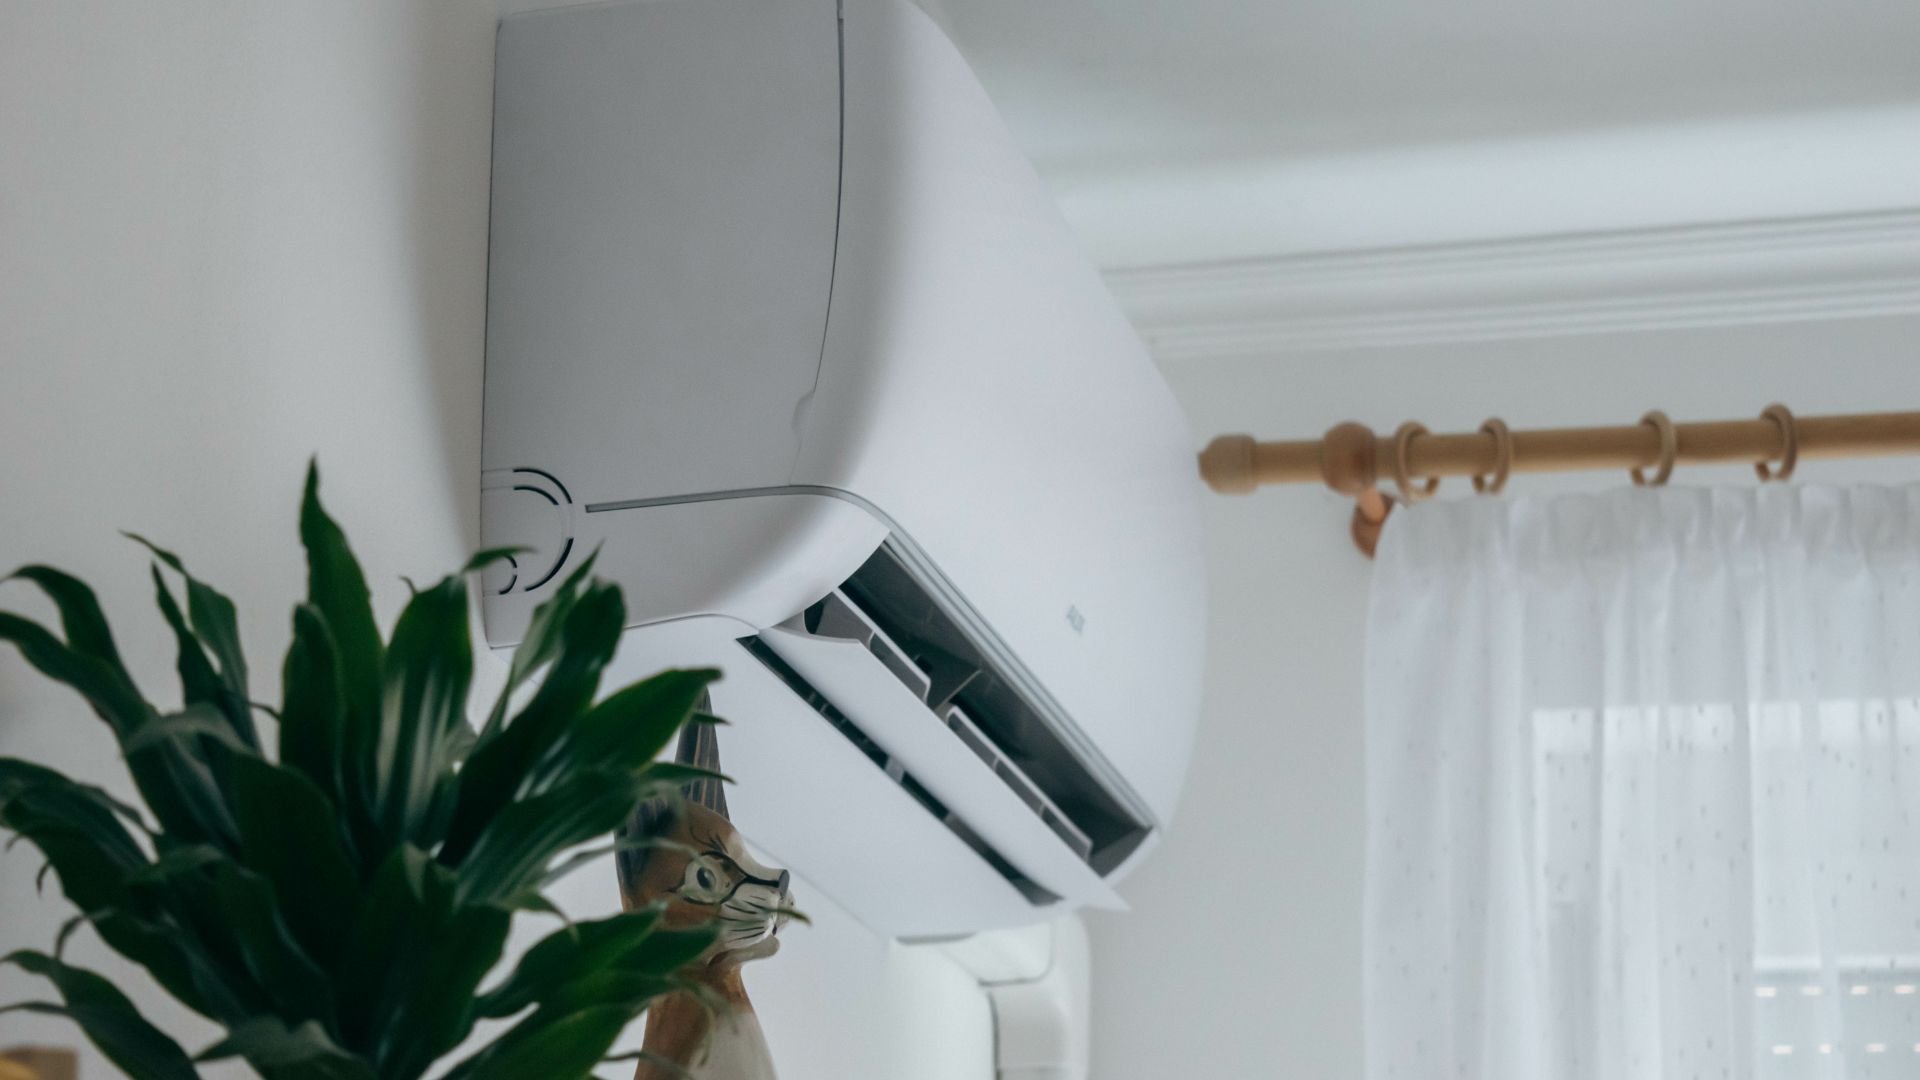
Image of a ductless mini-split air conditioner mounted on the wall

When a Ductless Mini-Split Is Better Than Extending Ductwork

Whether you’re adding a room to your home, finishing a garage, converting an attic, or adjusting comfort in a problem area, you have two basic options to choose from. You can either extend your existing ductwork or install a ductless mini-split. The best option for your situation is going to be heavily influenced by your duct access and heating, ventilation, and air conditioning (HVAC) capacity. Additionally, you should consider your family’s comfort needs, installation costs, and how your space will be used.

Why This Decision Matters

In most cases, a new or converted space wasn’t considered when the home’s original HVAC design was created. Because of this, poor planning and haphazard adjustments can lead to uneven temperatures, poor airflow, increased energy costs, and added strain on your existing system. By selecting the right HVAC option, you can optimize your home’s comfort, energy efficiency, and long-term value.

How Each Option Works

While extending ductwork and installing ductless mini-splits can both lead to a more comfortable home, each option works in a different way.

Extending Existing Ductwork

With this option, new supply and possibly return ducts are added onto your existing HVAC system. The ductwork relies on your existing AC, furnace, or heat pump to condition air in the new space. This approach works best when the room is near your existing duct system. Additionally, your current HVAC system must have enough capacity to handle the extra workload.

Installing a Ductless Mini-Split

Alternatively, an outdoor unit can be hooked up to one or more indoor air handlers. With ductless mini-splits, you don’t need any ductwork. Once the system is set up, it can heat and cool a single room or multiple zones.

When Extending Ductwork Makes Sense

There are a few scenarios where relying on your existing ductwork makes more sense.

  • The new space is close to the existing duct system.
  • Your HVAC system has the capacity to handle the increased square footage.
  • You prefer having whole-home temperature control from a single thermostat.
  • The additional ductwork won’t require major demolition work.
  • Your existing ducts are in good condition, properly insulated, and well sealed.
  • You’d prefer to have hidden vents instead of visible wall-mounted equipment.

When a Mini-Split is the Better Choice

In other cases, it may make more sense to install a ductless mini-split in the added space.

  • The room is far from your home’s main duct system.
  • You’re trying to heat and cool a garage, workshop, home office, attic, sunroom, or bonus room.
  • The existing HVAC system is already close to its capacity.
  • You want to have independent temperature control in each room.
  • The space will only be used for part of the day or part of each year.
  • You would need to cut into the walls, ceiling, or structural areas to extend the ductwork.
  • Your home is already dealing with duct losses, uneven comfort, and weak airflow.

Key Factors To Compare Before Deciding

As you make your decision, there are several factors you should keep in mind.

Installation Complexity

When you extend ductwork, there will naturally be more framing, insulation, and airflow balancing involved. In comparison, mini-splits typically require less invasive installation processes. However, they still require proper sizing, electrical work, placement, and refrigerant lines.

HVAC System Capacity

This is one of the most important factors. If the added square footage is more than your existing system can handle, you generally shouldn’t extend the ductwork without upgrading or modifying the system. One of our HVAC technicians can carefully evaluate your existing system to determine if it is feasible to add more ductwork.

Energy Efficiency

If your ductwork is long, leaky, or badly insulated, it can lead to significant energy losses. In comparison, ductless systems are known for being incredibly efficient. They deliver air directly into the room, so duct-related energy losses are avoided.

Comfort and Zoning

Your comfort and zoning preferences also play a role. With existing ductwork, the new room will be connected to the main thermostat, so you can adjust the temperature in your entire home at once. If you prefer separate temperature control, mini-splits are a better option.

Appearance

Once they are installed, duct extensions are less visible. Mini-splits require the placement of an indoor air handler on your wall, ceiling, or floor, which can impact the aesthetics of the space.

Maintenance

Ducted systems require duct inspections, airflow checks, and regular filter changes. However, it should be noted that all of these things are already necessary if you have an existing HVAC system. In comparison, adding a mini-split means you’ll need to perform professional maintenance and regular filter cleanings.

Cost Considerations

The overall cost comparison will be impacted by the number of zones involved, the room size, duct condition, insulation requirements, and the installation difficulty. When the existing ductwork is nearby and your current HVAC system has enough capacity, extending the ductwork is often more affordable. However, mini-splits are more cost-effective if you would need to upgrade to a larger HVAC system. Similarly, the cost of invasive or difficult ductwork can make mini-splits the more affordable option.

Best Spaces for a Ductless Mini-Split

In general, the following locations are ideal spots for installing a ductless mini-split.

  • Sunrooms
  • Finished attics
  • Guest suites
  • Converted garages
  • Home offices
  • Bonus rooms
  • Workshops
  • Rooms that are consistently too hot or cold

Common Mistakes To Avoid

To support your comfort and energy efficiency, avoid making the following mistakes.

  • Don’t assume your existing HVAC system can handle the added cooling or heating demand.
  • Don’t pick a system based solely on the upfront cost.
  • Don’t extend your ducts without setting up proper return airflow.
  • Don’t forget to account for window exposure, the room’s layout, and your home’s insulation.
  • Don’t install a mini-split without getting it properly sized.
  • Don’t forget to consider the long-term maintenance needs of each option.

Can You Use Both Options?

It is entirely possible to use both options in your home. In some properties, there is a central HVAC system that covers the main house. Then, a mini-split unit is set up for specific problem areas or new additions. For many homes, this is a practical way to add extra comfort to one room without redesigning your entire duct system.

Questions To Ask an HVAC Professional

As you consider which option makes sense for your home and family, it helps to have additional information. Our HVAC technicians can help you address the following questions.

  • Is my ductwork in good enough condition for an extension?
  • Does my existing HVAC system have the capacity for increased square footage?
  • Where would I place the mini-split’s indoor unit?
  • Do I need to set up a return duct in the new room?
  • Would I need to do any demolition for a duct extension?
  • Which option will cost me less to operate over time?
  • What size system will my room need?

FAQs

Is a mini-split better than extending ductwork?

It all depends on your situation. A mini-split unit is often a better choice if your existing ductwork is failing, the extension would be too long, or your HVAC system doesn’t have a high enough capacity for the increased square footage. Alternatively, a ductwork extension is likely better if the existing ductwork is already close to the extension and your HVAC system can handle the increased load.

Can a mini-split heat and cool a home addition?

Absolutely. Many ductless mini-splits rely on heat pump technology to heat and cool homes, making them incredibly energy efficient.

Is extending ductwork cheaper than installing a mini-split?

It depends. Extending ductwork may be cheaper if the existing ducts are near the extension. Additionally, your existing HVAC equipment must have the load capacity for the added space. Otherwise, a mini-split may be the cheapest option.

Will extending ductwork make my HVAC system work harder?

Yes, it will. Because you are extending ductwork and conditioning air in a different space, your HVAC system will need to work harder. Before we install any ductwork, one of our HVAC technicians will perform a Manual J load calculation, which evaluates the heating and cooling needs of your space. We’ll review your existing setup to see if it is able to handle the added heating and cooling load or if you’ll need to invest in a new system.

Can a mini-split help with one room that is always too hot or cold?

Yes, this is one of the most popular uses of a mini-split system. These units operate independently of your other HVAC equipment, so you can set higher or lower temperatures than in the rest of your home. If you have one room that is consistently warmer or cooler than the rest of the house or a family member who always feels cold, a ductless mini-split is a great option.

Should You Get a Mini-Split Unit for Your Home?

There is no single solution that works best in every home. While extending ductwork is effective when your HVAC capacity is high enough and the duct path is simple, a mini-split works better for converted spaces, additions, and rooms where independent comfort is needed.

At Rogue Valley Heating, Cooling & Electrical, our team can evaluate your system capacity and analyze your existing setup. We will help you compare the benefits of a ductwork extension to installing ductless mini-split options. Book your next HVAC upgrade today.
RV Indoor Electrical Services

How to Prepare Your Home’s Electrical System for Wildfire Season Power Shutoffs

When periods of extreme wildfire risk occur, utility providers perform something that’s known as a public safety power shutoff (PSPS). High winds, low humidity, and dry vegetation make a wildfire more likely, so any spark from electrical equipment can lead to a sudden fire. 

A PSPS may help to prevent fires, but it can directly impact your access to refrigeration, home cooling, internet, lighting, well pumps, and medical devices. To keep your family comfortable and safe, you need an electrical plan that helps you minimize the disruption to your day-to-day life.

Why Wildfire Season Power Shutoffs Require Electrical Planning

In wildfire-prone areas, homeowners have to be proactive about managing planned shutoffs and power outages. Setting up a whole-home generator needs to be done in advance because each step in the process takes time. A whole-home generator must be outfitted with a transfer switch to prevent backfeeding. Because of the electrical work involved, a permit is required.

Some homeowners try to take shortcuts by running extension cords, overloading outlets, and creating unsafe generator connections. This type of approach increases the likelihood of backfeeding, fires, appliance damage, and electrical hazards. To keep your home safe, you need to plan and set up your generator system in advance.

Identify Your Essential Electrical Loads

As you decide on the right generator setup, you should also consider what you will be powering. Depending on your family’s comfort, safety, and health needs, you may want to power the following items with your generator.

  • The refrigerator and freezer
  • Your medical equipment
  • Garage doors
  • Internet routers and modems
  • Well pumps or sump pumps
  • Phone charging 
  • Lighting
  • Heating, ventilation, and air conditioning (HVAC) systems
  • Security systems

If you are unsure of how much power you need, one of our electricians can evaluate your home and perform a load calculation.

Label Your Electrical Panel Before an Outage

When an outage occurs, you may have to switch off non-critical appliances at the breaker. To make sure you are prepared, you should clearly mark each circuit and any essential appliances that are on it. Adult family members should also be taught how to safely shut off or reset circuits.

Unclear labeling is a significant safety hazard and can increase the risk of electrical accidents. For example, if a breaker is mislabeled, someone may try working on an outlet without realizing that the power to the outlet is still on. Generic or confusing labeling should also be fixed by an electrician for the same reason.

Consider Backup Power Options

If the power grid goes out, the right backup power options can help. Depending on your goals, you may want to make the following upgrades.

  • Portable Generator: Portable generators can power appliances using extension cords or, when properly installed, through a transfer switch or interlock system. They are meant to be a temporary alternative for a smaller electrical load.
  • Whole-Home Standby Generators: These generators can connect safely to your home and have the capacity for much larger electrical loads. Because of the severe safety risks involved, you should never backfeed your generator into your home’s wiring.
  • Battery Backup Systems: With this approach, you can store power in your battery backup instead of using a generator setup.
  • Transfer Switches and Interlock Kits: To avoid backfeeding and safety hazards, you need a transfer switch or interlock kit set up if you plan on connecting your generator directly to your home.
  • Critical-Load Panels: This type of panel serves as a secondary subpanel. It can reroute your power supply during outages to critical circuits only.

Add Surge Protection Before Power Comes Back On

When power is restored, it can cause voltage fluctuations that can damage computers, HVAC equipment, refrigerators, gaming systems, and other sensitive devices. Through whole-home surge protection, you can protect your appliances and electronics from damage.

Check Outdoor Electrical Equipment

Before wildfire season arrives, make sure the following outdoor electrical equipment is functioning properly.

  • Inspect your outdoor outlets, covers, panels, and wiring.
  • Test your GFCI protection.
  • Trim vegetation and remove debris from around your electrical equipment.
  • Replace and repair cracked covers, exposed wiring, and other problems.

Prepare for Cooling Needs During Summer Shutoffs

If a planned outage is about to occur, pre-cool your home to a lower temperature. Closing your curtains and blinds can also help to keep heat out.

Before an outage occurs, family members should know which cooling equipment is able to safely run on backup power. Never assume that a generator has the capacity to power a central AC or heat pump.

Make a Safe Charging and Lighting Plan

As part of your outage plan, you should prepare by charging your battery banks, phones, radios, and medical devices. If you are using a generator or battery, you should never daisy-chain power strips. Additionally, you can prevent fires by opting for LED lanterns instead of relying on candles.

When To Schedule an Electrical Inspection

If you experience any of the following issues, it’s time to schedule a professional inspection.

  • You have an aging electrical panel.
  • There are flickering lights.
  • The breakers keep tripping. 
  • You need an upgrade, like a generator backup, battery backup, or transfer switch.
  • Your home relies on a well pump.
  • A loved one is dependent on powered medical equipment.

Prepare Your Home for Power Shutoffs 

If you want to prepare your home for wildfire power shutoffs, you need to do more than stockpile bottled water and flashlights. A safe electrical plan will support your family’s comfort and ensure your essential equipment keeps running.

Book a backup power consultation with Rogue Valley Heating, Cooling & Electrical today.

Image of a Rogue Valley Heating & Air technician helping a Grants Pass customer with their heat pump

When To Repair Your Heat Pump Before Summer Cooling Season

With summer just around the corner, it’s time to get your heat pump ready for the warmer weather. By being proactive about heat pump repairs and maintenance, you can avoid unexpected breakdowns and expensive emergency repairs during peak heat. 

Looking for a heat pump repair near me? Rogue Valley Heating, Cooling, & Electrical offers the air-source and geothermal heat pump services that Grants Pass and Medford residents need.

Why Spring Is the Best Time to Repair Your Heat Pump

Spring is the best time to schedule heat pump repairs in Medford, OR. You don’t want your heat pump to stop working in the middle of a heat wave. Additionally, heating, ventilation, and air conditioning (HVAC) appointments tend to fill up when extreme heat waves arrive. Rather than wait for an appointment during hot weather, you can book your repairs in advance.

How Heat Pumps Work During Cooling Season

During the summer, heat pumps circulate refrigerant through the evaporator coil to absorb indoor heat and transfer it outdoors. In essence, the heat pump reverses direction between the heating and cooling seasons. However, a heat pump must be properly maintained and repaired in order to handle summertime cooling requirements.

Signs Your Heat Pump May Need Repair Before Summer

As a homeowner, pay attention to the following signs that a heat pump needs repair services.

If you’re searching for heat pump repairs near me, we can help. Our team offers 24/7 emergency services and prompt repairs.

Common Causes of Heat Pump Problems Before Summer

There are a few common reasons why heat pumps might need repairs before summer begins.

  • Low Refrigerant: If there is a leak in your refrigerant lines, it can cause low refrigerant levels. Once a technician locates the leak, they can repair it and recharge your system.
  • Clogged Outdoor Units: Debris can reduce airflow to your outdoor unit. 
  • Dirty Air Filters: Ideally, filters should be changed every 30 to 90 days to prevent airflow restrictions and reduce dust buildup on the evaporator coil.
  • Thermostat Problems: A malfunctioning thermostat won’t signal your heat pump to turn on. 
  • Aging Components: As your heat pump ages, component failure becomes more likely. Eventually, a heat pump replacement may be necessary.

Heat Pump Troubleshooting Steps Homeowners Can Try

To prepare your heat pump for summer, there are a few maintenance and troubleshooting tips you can try.

  • Replace the Filter: Before hot weather arrives, clean or replace your air filter. Then, check your filter at least once a month to see if it needs replacement.
  • Clear Around Your Outdoor Unit: As part of your heat pump troubleshooting, clear a 2- to 3-foot space around the outdoor unit.
  • Check the Thermostat: Sometimes, the issue is as simple as an incorrect thermostat setting. Verify that the thermostat is set to “cool” mode and the temperature is correct.
  • Inspect the Circuit Breaker: Check to see if the circuit breaker has tripped. If it has, you can try resetting it once. However, don’t reset it repeatedly because continued tripping means that there is an underlying electrical problem.

When To Call a Professional HVAC Technician

As a homeowner, you should start looking for a heat pump repair near me if your basic troubleshooting doesn’t work. We also recommend immediately calling for professional repairs in the following situations.

  • You smell a burning odor.
  • Your breaker panel is warm to the touch.
  • Your energy bills have jumped without a corresponding change in your energy habits.
  • Your auxiliary system turns on frequently.
  • Your evaporator coil or refrigerant lines are freezing up.
  • Your breaker trips frequently.

Benefits of Repairing Your Heat Pump Before Summer

By scheduling spring HVAC maintenance and repairs, you can avoid unexpected breakdowns during extreme heat waves. Plus, you can access more scheduling flexibility during the off-season and better availability.

Through timely heat pump repairs in Grants Pass, homeowners can optimize their energy efficiency and prevent minor issues from escalating into costly repairs. More importantly, performing routine repairs and maintenance ahead of time will allow your family to stay comfortable during the hottest days of summer.

Repair vs. Replace: When Does Replacement Make More Sense?

If you’re dealing with heat pump cooling issues, a repair or replacement may be necessary. In general, repairs make sense if you have a relatively new heat pump, a limited history of repairs, and the repair cost is minimal. A heat pump replacement may be the best choice if you have an older heat pump, a history of frequent repairs, or the repair involves a key component. 

One way to frame this decision is with the $5,000 rule. This guideline says that repairs are generally the best choice if the repair cost multiplied by the unit’s age is under $5,000. If the formula equals any amount higher than $5,000, homeowners should lean toward a replacement instead.

Why Rogue Valley Homeowners Trust Our HVAC Team

If you need heat pump maintenance before summer, Rogue Valley is here to help. Residents turn to our team for a few main reasons.

  • Transparent Quotes: Our free estimates are provided upfront, so you know exactly what to expect.
  • Flexible Payment Options: We make it simple to afford HVAC repairs through our convenient financing options.
  • Trusted Advisors: Our team is committed to serving as your trusted advisor. We’re locally based, so we understand the climate and HVAC needs in Medford and Grants Pass.
  • Satisfaction Guarantee: We aren’t done until you are completely satisfied with your results.
  • Same-Day Services: When disaster strikes, our team is ready to help with same-day services and 24/7 emergency repairs.

Schedule Your Heat Pump Inspection Before Summer

Before temperatures rise, it’s time to schedule your heat pump repairs and inspections. Through timely services, you can ensure your family stays cool and comfortable all summer long. Book your next heat pump inspection today.

Frequently Asked Questions About Heat Pump Repairs

Searching for a geothermal heat pump service near me? You’ve come to the right place. Our team can quickly answer all of your pressing heat pump questions.

Why is my heat pump not cooling properly?

If your heat pump is not cooling, there is likely a repair or maintenance issue. You can troubleshoot by replacing the filter, cleaning around the outdoor unit, and verifying your temperature settings. If these measures don’t work, you should schedule a professional inspection.

How often should a heat pump be serviced?

We generally recommend servicing heat pumps in the spring and fall so that they are ready for summertime cooling and wintertime heating.

What are the signs my heat pump needs repair?

When a heat pump is starting to need repairs, you’ll notice inexplicably high energy bills, poor cooling performance, unusual noises, weird smells, and weak airflow. You may also notice short cycling or longer than normal runtimes. 

Can a dirty filter affect cooling performance?

Absolutely. Once the filter is clogged, it limits the airflow in your system and directly impacts your cooling performance. If the filter isn’t replaced, it can damage your unit.

Is it better to repair or replace an older heat pump?

It depends. After a heat pump is 10 years old, it’s a good idea to start considering a replacement. This is especially true if you’ve noticed higher-than-normal energy bills or more frequent repairs. If your unit is still energy efficient and functioning great, heat pump repairs are likely the best choice as long as they are relatively minor and inexpensive.

When should I schedule heat pump maintenance before summer?

We recommend scheduling heat pump maintenance between March and May so that your unit is ready before the first heat wave arrives. Even if you miss this scheduling window, it’s never too late to book an HVAC tune-up in Rogue Valley and prepare your heat pump for summer.

Best Time To Install or Upgrade a Heat Pump Before Summer

As heat pumps age, they gradually lose energy efficiency and experience a decline in cooling performance. When this happens, a replacement can help you avoid an unexpected breakdown in the middle of summer. By planning for your replacement in advance, you can avoid scheduling an installation during the busiest time of the year.

If you’re searching for a heat pump installation near me, our heating, ventilation, and air conditioning (HVAC) technicians can evaluate your existing setup and determine the right installation for your needs.

Why Spring Is the Ideal Time To Upgrade Your Heat Pump

Spring is the best time to upgrade your heat pump for a few key reasons.

  • Speed: Installers are less busy, so you don’t have to wait for your installation.
  • Scheduling Availability: You can enjoy better scheduling flexibility.
  • Special Promotions: Often, there are special deals offered during the off-season that make installations more affordable.
  • Stress-Free Decisions: By being proactive, you can take your time to decide on a new unit instead of being rushed to make your decision following a heat pump failure.
  • Test Without Pressure: Spring is a great time to test your system because of the moderate temperatures. If changes need to be made, you don’t have to worry about keeping cool during a heat wave.

How Heat Pumps Keep Homes Comfortable Year-Round

Heat pumps circulate refrigerant through coils that absorb and transfer heat from the inside of your home to the outdoors during the summer. In the winter, they reverse direction. They also work to dehumidify the air while they run, which helps to improve your indoor comfort.

Signs It May Be Time To Upgrade Your Heat Pump Before Summer

If you notice any of the following symptoms, it’s time to start planning your next heat pump upgrade.

Looking for a ductless or geothermal heat pump installation near me? Reach out to our team to learn more.

Benefits of Installing a New Heat Pump Before Summer

By installing your heat pump before summer arrives, you can avoid the rush and make your replacement decisions without the pressure of a summertime breakdown. Plus, proactive replacements can help you avoid the inconvenience of a total HVAC failure during the hottest days of the year. Instead of sweltering in the heat, you can enjoy comfort and energy-efficiency benefits that come with a new unit.

What Type of Heat Pump Is Best for Your Home?

If you’re considering a heat pump installation, there are a few different options to choose from.

  • Air-Source Heat Pumps: Central ducted air-source heat pumps are the most common whole-home solution. The air-source heat pump uses refrigerant lines to transfer heat. Then, ductwork is used to move conditioned air to each room.
  • Ductless Mini-Splits: Ductless mini-splits use the same technology as ducted air-source heat pumps, but they don’t rely on ductwork. Instead, air handlers are set up in each zone that connect to the outdoor unit.
  • Geothermal Heat Pumps: A geothermal unit absorbs and releases heat through lines that run underneath the ground. While they’re incredibly efficient and long-lasting systems, they are more expensive to install than air-source systems.
  • Water-Source Heat Pumps: Water-source heat pumps use nearby water as a heat exchange medium, similar in concept to geothermal systems.
  • Air-to-Water Systems: Air-to-water systems are less common in the United States than in Europe. They are set up with a hot-water radiator system that helps to distribute heat.

Most people choose an air-source heat pump or ductless mini-splits based on whether they have existing ductwork and if they need whole-home cooling. However, geothermal heat pumps are an efficient option if you want to make a long-term investment in your family’s comfort. 

Why Installing Before Summer Saves Money

When comparing mini-split heat pump installers near me, you’ll find different promotions and incentives based on the time of year. HVAC installers often have incentives available during the off-season, which can make your installation more affordable. Additionally, springtime installations can be planned before the heat pump fails, so you don’t have to pay extra money for emergency services.

Heat Pump Rebates, Incentives & Financing Options

Rebates, incentives, and financing options can help make the upfront cost of your new unit more affordable. Heat pump rebates and incentives are often available through the Energy Trust of Oregon, local municipalities, and utility providers. 

At Rogue Valley Heating, Cooling & Electrical, we also offer a range of financing options through our partners. Depending on credit and availability, these plans range from 0%, 24-month terms to 9.99%, 10-year loans.

How Professional Installation Impacts Heat Pump Performance

A professional heat pump installation is essential for your home’s comfort and energy efficiency. Our team of HVAC technicians will perform a Manual J load calculation to make sure you get the right heat pump capacity. We’ll also inspect your ductwork, seal leaks, and make changes as necessary. 

With the help of experienced technicians, you can ensure your heat pump is properly placed and set up. Over time, the proper placement and installation can reduce the wear on your unit and help you prevent costly repairs.

Why Rogue Valley Homeowners Trust Our HVAC Team

Grants Pass and Medford residents turn to Rogue Valley for a few important reasons.

  • Trusted Advisors: We’re known for providing honest recommendations, so you get the services you actually need.
  • Same-Day Services: When a disaster strikes, you can’t afford to wait for repairs.
  • Satisfaction Guarantee: Our comfort specialists are committed to achieving high standards. If you’re not fully satisfied, our job isn’t done.
  • Customer Education: Through our customer education, you’ll always know what to expect. We believe that HVAC services should never involve hidden surprises.
  • Problem Solvers: No matter how complex the issue is, our team won’t stop until we find the best solution.

Looking for a ductless heat pump installation near me? Give us a call at 541-204-0966 today.

Schedule Your Heat Pump Upgrade Before Summer

Searching for ductless or geothermal heat pump installers near me? Our team can handle all types of heat pump inspections, installations, repairs, and replacements. Through our free estimates, you can learn more about what to expect as you plan for your springtime HVAC replacement. Schedule your heat pump consultation today.

Frequently Asked Questions About Heat Pump Installation

What is the best time of year to install a heat pump?

The best time to start looking for a heat pump installation near me is generally in the spring or fall. During those times, HVAC teams are less busy. As a result, you can enjoy better scheduling flexibility and faster results. Additionally, there are often special promos during the off-season that can make your installation more affordable.

Is spring a good time to replace HVAC equipment?

Absolutely. We recommend scheduling an HVAC replacement during the off-season, so your system is ready when the first summertime heat wave arrives.

How long does heat pump installation take?

If you’re replacing an existing unit and don’t need any ductwork changes, the entire process can take as little as four to eight hours. For new, complex installations, you can expect the installation to take a couple of days.

Are heat pumps efficient during Southern Oregon summers?

Yes, they are an incredibly efficient cooling option. It works similarly to an air conditioner by transferring heat outdoors through a refrigerant cycle.

What rebates are available for heat pumps in Oregon?

Before you start searching for heat pump installers near me, check out some of the available rebates. Besides the Energy Trust of Oregon, local utility providers often provide rebates and incentives for energy-efficient installations.

Should I repair or replace my older heat pump?

Our team can help you decide whether it makes sense to repair or replace your unit. In general, repairs make more sense with units younger than 10 years old that have required minimal repairs in the past. If you’re dealing with expensive repairs or a decline in cooling performance, it may be time for a replacement.

Blower Motor Not Working? Signs, Causes, and Troubleshooting

Behind the scenes, a range of components are working together to condition the air in your home. One of the most important heating, ventilation, and air conditioning (HVAC) parts is your blower motor. If this essential element fails, you’ll quickly notice poor airflow, overheating, and higher electricity costs. 

While there are some basic checks you can do on your own, you should never attempt electrical or motor repairs yourself. If the blower motor is genuinely the issue, Rogue Valley Heating, Cooling, & Electrical’s technicians can help you diagnose and repair the problem.

What Does a Blower Motor Do in Your HVAC System?

In your HVAC system, the blower motor is responsible for pulling in unconditioned air. This conditioned air is pushed across the evaporator coil for heat pumps and air conditioners. On your furnace, it is pushed across the heat exchanger. Afterward, the conditioned air is circulated to regulate the temperature.

How the Blower Motor Moves Heated and Cooled Air

The blower motor has a fan that looks like a squirrel cage. When the squirrel-cage fan turns, it pulls in indoor air that is then delivered to the heat exchanger or evaporator coil. This entire process begins when the thermostat signals your blower motor to start turning.

Why Blower Motor Problems Affect Comfort and Efficiency

If the blower motor isn’t working right, your HVAC system won’t produce enough air. This causes it to work harder to reach the same temperature. Besides leading to premature repairs and breakdowns, this increased workload can increase your energy bills. Because the unit is struggling to reach the right temperature, your family’s comfort will also be affected.

Signs Your Blower Motor May Not Be Working

There are a few common indications that your blower motor may not be working properly.

  • Weak Airflow From Vents: If your blower motor is struggling to push air out, one of the first signs will be weak airflow.
  • No Air Coming Out Even When the System Is On: Once the blower motor breaks down completely, your HVAC system may completely stop blowing air.
  • Strange Noises Like Humming, Screeching, or Rattling: Any unusual noises, like screeching, rattling, and humming, may indicate a problem with your blower motor. Odd sounds can also be caused by other problems, so you should always get them investigated by a professional HVAC technician.
  • Burning Smells or Overheating: If you have a blocked air filter or a blocked vent, it can cause your blower motor to work harder than necessary. In turn, this can cause it to overheat and produce a burning smell.
  • System Shutting Down Unexpectedly: Whenever the blower motor overheats, it triggers your HVAC system to shut off as a safety mechanism.

Common Causes of a Blower Motor Not Working

There are a few common reasons why your blower motor may stop working. 

  • Tripped Breaker or Power Issue: Blown fuses, tripped breakers, and faulty wiring can prevent the blower motor from receiving the energy it needs to operate.
  • Dirty Air Filter Restricting Airflow: When a filter is clogged, it stops airflow from reaching the blower motor. In turn, this makes the motor work harder to reach the right temperature. You’ll notice comfort and efficiency changes right away. If the problem isn’t addressed, it will eventually cause the component to break down completely.
  • Faulty Capacitor: The capacitor stores energy. When the HVAC system switches on, this stored energy is used to start it. A faulty capacitor won’t switch on your HVAC system. The best way to fix this problem is by having a professional HVAC technician replace the faulty capacitor.
  • Blower Belt Issues on Older Systems: On older systems, the blower motor belt can slip or become cracked. When this happens, you’ll notice reduced airflow, a high-pitched noise, and burning odors.
  • Worn Motor Bearings or Failed Motor: A grinding or squealing sound typically means that your unit has bad bearings. While lubricating the bearings may provide a temporary fix, they may need to be replaced. Similarly, a motor’s resistor or relay can fail and cause the motor to stop working.
  • Control Board or Thermostat Problems: If the HVAC system’s control board or thermostat fails, the system may not be able to sense the temperature appropriately and trigger the blower motor to turn on.

Safe Troubleshooting Steps Homeowners Can Try

While many HVAC problems should be left to the professionals, there are a few simple steps you can take on your own.

  • Check Thermostat Settings: First, make sure your thermostat is set to the right mode and temperature. To see if the thermostat is working, try changing the temperature. If it’s working, your system should kick on right away.
  • Replace a Clogged Air Filter: Air filters should ideally be replaced every 30 to 90 days as part of your routine HVAC maintenance.
  • Inspect the Circuit Breaker: Sometimes, a breaker will trip and stop your blower motor from switching on. If this is the issue, you can reset the breaker. However, if it trips again right away, there is an underlying problem that should be diagnosed by a professional.
  • Make Sure Vents and Returns Are Open and Unobstructed: To ensure proper airflow, make sure all of the returns and vents are open and not blocked.
  • Listen for Motor Sounds That Help Narrow Down the Issue: Pay attention to any sounds, smells, or symptoms that can help you determine what the problem is.

Troubleshooting Steps a Professional Will Perform

When you reach out for heating and cooling repairs, our HVAC technicians will perform the following steps to determine the problem.

  • Testing Voltage and Capacitor Performance: First, we’ll check the voltage to see if the capacitor is working properly.
  • Checking Blower Wheel and Motor Amp Draw: We will inspect the blower wheel and amp draw for malfunctions.
  • Inspecting Control Board and Relay Signals: To make sure your HVAC system is being properly signaled to start, we’ll inspect your control board and relay signals.
  • Confirming Whether Repair or Replacement Makes More Sense: Once we know what the problem is, we’ll work with you to determine whether a repair or replacement makes more sense for your financial goals, efficiency needs, and personal comfort.

When a Blower Motor Can Be Repaired vs. Replaced

Our team will help you decide if a blower motor repair or replacement makes more sense for your needs.

Situations Where a Capacitor or Wiring Fix May Solve the Problem

If the capacitor or wiring is at fault, we’ll fix those issues instead of replacing the blower motor. 

Signs the Blower Motor Itself Has Failed

When the blower motor itself has failed, it’s generally better to replace the component completely. Depending on the circumstance, it may be necessary to replace the entire unit. If your HVAC system is already older than 10 years, requires frequent repairs, or uses outdated refrigerant, it may be time to replace the entire unit.

When To Call for HVAC Repair

If you notice repeated breaker trips or burning odors, call for help right away. Both of these issues are immediate safety concerns. We also recommend calling for help if there is no airflow during extreme weather. When temperatures become uncomfortable, you can’t afford to be left without a functioning HVAC system.

How To Prevent Future Blower Motor Problems

To avoid future problems, remember the following tips and best practices. 

  • Change Filters Regularly: Depending on the manufacturer’s specifications, your air filter should be changed every 30 to 90 days. During periods of intense use, they should be replaced more often.
  • Schedule Seasonal Maintenance: For the best comfort and efficiency, we recommend scheduling a spring and fall HVAC tune-up each year.
  • Keep the System Clean and Airflow Balanced: By maintaining your system, you can avoid unexpected breakdowns. Clean around the outdoor condenser coils, remove obstructions that are blocking your vents, and clear away any debris from around your outdoor unit.

FAQs

Can a furnace run if the blower motor is bad?

It cannot run safely. Without a functioning blower motor, the furnace will overheat and shut down. 

Is a bad capacitor the same as a bad blower motor?

No, they are different components within the same system. You often hear them talked about at the same time because the capacitor is responsible for triggering the blower motor to start.

How much does blower motor repair usually cost?

It depends on the repair involved. A full replacement often costs around $300 to $900. Repairs can cost between $150 and $1,500.

Furnace Gas Valve Troubleshooting: Common Problems and Fixes

Within your furnace, the gas valve is responsible for controlling the amount of fuel that flows to your burners. When there are gas valve issues, it can lead to short cycling and prevent ignition from happening. Because this is a serious safety issue, you should immediately seek help once you notice this problem. Homeowners should never attempt gas valve replacements or internal gas adjustments on their own.

What Does a Furnace Gas Valve Do?

The gas valve controls the amount of fuel that goes to your burners. It is a safety mechanism that prevents leaks and ensures the right level of ignition.

How the Gas Valve Works During the Heating Cycle

The gas valve is an integral part of your furnace’s heating cycle. When everything is working properly, the gas valve is involved in the following steps.

  1. Your thermostat signals your furnace to start heating.
  2. The control board is responsible for triggering the gas valve and igniter to start.
  3. When everything is ready, the gas valve opens and releases gas.
  4. The burners light and burn the gas to heat your home.
  5. Once your home reaches the right temperature, the thermostat and control board signal the gas valve to close.

Why Gas Valve Problems Can Stop Your Furnace From Heating

If the gas valve isn’t working, it can stop gas from being released. When the burners don’t have gas to burn, they can’t heat your home properly.

Signs of a Furnace Gas Valve Problem

 Often, you’ll notice right away if you have gas valve issues.

  • Furnace Not Igniting: The most obvious sign is that your furnace won’t ignite. If gas isn’t released, the igniters have nothing to ignite.
  • Burners Fail To Stay Lit: Similarly, no or low gas can lead to burners that don’t stay on.
  • Clicking but No Flame: If the gas valve isn’t working properly, you may hear clicking noises as the igniters try to ignite. However, there won’t be a flame if no gas is present.
  • Intermittent Heating: A malfunctioning valve may cause gas levels to fluctuate, leading the flame to go out. When this happens, the heating system may switch off and start short cycling. Additionally, a faulty gas valve can cause your furnace to refuse to start. If this is the case, it will display an error code as well.
  • Gas Smell or Delayed Ignition: When the gas valve isn’t closing properly, you may notice the smell of sulfur as gas is released. Similarly, a valve that is slow to open may lead to delayed ignition. Both issues are major safety hazards, so you should get your furnace inspected right away.

Common Causes of Gas Valve Problems

There are a few frequent issues that can cause the gas valve to malfunction.

  • Electrical Failure in the Valve: The gas valve has internal solenoids that are responsible for opening the valve. Damaged wiring and other electrical failures can prevent the solenoids from signaling the valve to open.
  • Dirty or Failing Flame Sensor Causing Gas Valve-Like Issues: The flame sensor is a safety feature that verifies the flame is present. If there isn’t a flame present, the sensor cuts off the gas supply. When the sensor is dirty or faulty, it may fail to detect a flame when one is present, causing the gas supply to shut off.
  • Control Board or Thermostat Signal Issues: The control board and thermostat must signal the valve to open. If they don’t relay this signal, the valve will seem like it’s not functioning properly.
  • Gas Supply Interruption: If the gas supply is too low, it may be impossible for the valve to operate. Alternatively, the amount of gas released may be too low to produce a strong flame. 
  • Age-Related Valve Failure: Like other mechanical components, gas valves can eventually fail.

What Homeowners Can Safely Check First

Gas components are dangerous to inspect and repair on your own, so leave any gas-related tasks to the professionals. However, there are a few other troubleshooting tips you can safely use before calling for repairs.

  • Confirm Thermostat Is Calling for Heat: First, make sure the thermostat is set to the right mode and temperature.
  • Check the Furnace Switch and Breaker: Verify that the breaker switch hasn’t tripped. Reset it as needed. If it trips again, there is an underlying problem that must be repaired by a heating, ventilation, and air conditioning (HVAC) technician.
  • Verify the Gas Shutoff Valve Is On: The gas valve is open when the handle is parallel to the pipe. If the valve does not open, call for furnace repairs. Do not attempt to open it yourself.
  • Look for Blinking Error Codes on the Furnace Board: Check for error codes. Then, look in your user guide to see what the code means.
  • Replace a Dirty Filter if Airflow Issues Are Contributing to Shutdowns: Clogged filters can lead to overheated furnaces and safety shutdowns. To troubleshoot this issue, clean or replace your filter.

What Not To Do When You Suspect a Bad Gas Valve

For the safety of your home, family, and HVAC system, never do the following things if you think there may be a bad gas valve. 

  • Do Not Force the Valve Open: Never force a stuck valve on your own. If too much gas is released, it can ignite all at once and cause injuries.
  • Do Not Bypass Safety Controls: Safety controls exist for a reason. Instead of bypassing these controls, call for help.
  • Do Not Try To Disassemble Gas Components: Never try to repair, replace, or inspect gas components on your own.

How a Technician Troubleshoots a Furnace Gas Valve

When our HVAC technicians come to your home, there are a few things we can do to troubleshoot your gas valve issues.

  • Testing for Proper Voltage to the Valve: After we arrive, we’ll quickly test the voltage to make sure the solenoids are getting enough electricity to trigger the valve to open.
  • Confirming Igniter and Flame Sensor Performance: We will clean the flame sensor and make sure the igniter is working properly.
  • Checking Gas Pressure and Burner Operation: Our HVAC technicians will check the gas pressure released and verify that the burners are operating properly.
  • Determining Whether the Valve or Another Component Is Actually at Fault: By conducting performance tests and inspecting the furnace’s components, we can figure out if the valve or a different component is responsible for the symptoms you’re experiencing.

Common Fixes for Gas Valve-Related Furnace Problems

The right solution depends on the cause of your gas valve-related issues. Before we do any repairs, we’ll always review the problem and discuss our recommendations with you.

  • Restoring Power or Correcting Thermostat Issues: Sometimes, the solution is as easy as turning the breaker switch on or changing the thermostat settings.
  • Cleaning or Replacing the Flame Sensor: If the flame sensor is dirty or malfunctioning, we can clean or replace it.
  • Repairing Wiring or Control Board Issues: Our team can fix faulty wiring and control board problems, so the control board can signal your valve to open.
  • Replacing the Gas Valve When It Has Failed: If the gas valve has genuinely failed, our team can quickly replace it so that you can enjoy a warm, comfortable home again.

When To Shut the Furnace Off and Call Immediately

We recommend immediately shutting off your furnace and calling for help as soon as you notice any of the following signs. 

  • Gas odors
  • Delayed ignition
  • Loud noises during ignition
  • Repeated lockouts
  • No heat during freezing temperatures

How To Prevent Gas Valve and Ignition Problems

To avoid future valve and ignition problems, we recommend performing the following steps. 

  • Annual Furnace Tune-Ups: Ideally, homeowners should schedule their annual tune-ups each fall before the weather gets cold.
  • Burner Cleaning and Safety Inspections: During the tune-up, our team will inspect your furnace for safety issues and clean the burners. 
  • Early Diagnosis of Intermittent Heating Issues: Most furnace failures don’t happen without some type of warning. As soon as you notice performance issues, odd noises, weird smells, or inexplicably high energy bills, you should reach out for professional repairs right away.

FAQs

Can a furnace gas valve be repaired?

For safety reasons, it is generally better to replace the valve completely. 

How do I know if it is the gas valve or the flame sensor?

When the valve is the cause, ignition often won’t occur at all. If the flame sensor is the problem, the flame will ignite briefly before turning off.

Is a bad gas valve dangerous?

Absolutely. The valve is a safety feature that is responsible for releasing the exact amount of gas your furnace needs. If too much gas is released, it can lead to gas leaks and fire hazards.

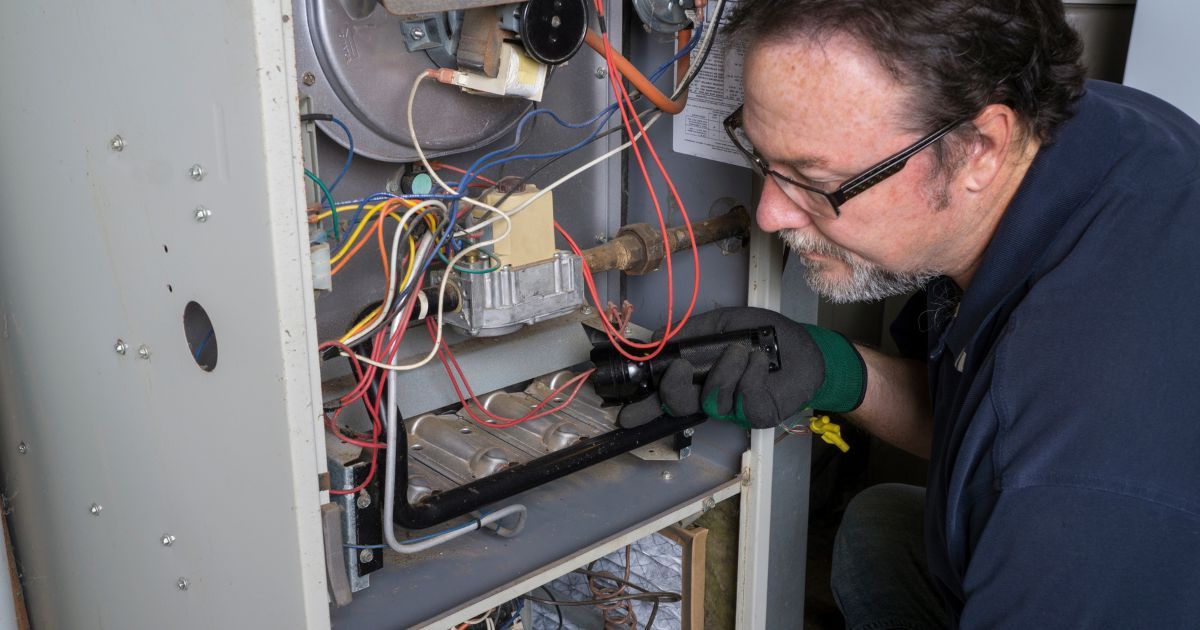
HVAC technician working an a furnace system in a residential house in Grants Pass.

Furnace Inducer Motor Troubleshooting: Signs, Causes, and Fixes

When it comes to your family’s safety, furnace inducer motor troubleshooting is essential. This motor is responsible for pushing combustion gases out of your home. If it isn’t functioning, your furnace will automatically shut down to prevent safety issues.

What Does a Furnace Inducer Motor Do?

A furnace inducer plays an integral role in your furnace and protects your family from combustion byproducts.

How It Supports Combustion and Venting

As a part of your heating, ventilation, and air conditioning (HVAC) system, the inducer motor is responsible for pulling air through your heat exchanger. Then, this air is vented outdoors. By creating a negative pressure, the motor ensures combustion byproducts are safely vented outside.

Why the Pressure Switch Depends on It

Your furnace has a pressure switch that detects the inducer motor’s negative air pressure. If it doesn’t detect the right pressure level, the switch will trigger your control board to shut everything down.

Signs of a Bad Furnace Inducer Motor

You may have a faulty furnace inducer motor if you notice the following symptoms.

  • Furnace Will Not Start: If the inducer motor doesn’t function, it can’t create enough draft for ignition.
  • Humming, Grinding, or Rattling Noises: An unbalanced fan or motor can cause rattling noises. Grinding and humming sounds often stem from worn bearings or faulty internal components.
  • Intermittent Heating Cycles: A lack of airflow and pressure can cause short cycling.
  • Error Codes or Lockouts: System lockouts will occur as a safety mechanism. Often, there will be error codes as well.
  • Burning Smell or Overheating: If the motor is seizing or the windings are failing, your furnace may overheat. It can also produce burning odors.

Common Causes of Inducer Motor Problems

There are a few common reasons for inducer motor malfunctions.

  • Worn Motor Bearings: If the motor bearings aren’t properly lubricated, it can cause your system to lock up.
  • Debris in the Inducer Assembly: Debris can block your fan wheel and keep it from turning. 
  • Cracked or Damaged Wheel: Moisture accumulation, debris buildup, and wear can cause the wheel to become damaged or cracked.
  • Electrical Failure or Capacitor Issues: Faulty capacitors, loose wiring, and other electrical problems can keep the motor from receiving enough power to operate.
  • Pressure Switch or Vent Blockage Creating Similar Symptoms: If the pressure switch is malfunctioning or a vent is blocked, your furnace may shut off as a safety measure.

Safe Troubleshooting Steps for Homeowners

While some furnace inducer motor troubleshooting should be left to the experts, there are a few tasks you can safely handle on your own.

  • Check Thermostat Settings: Sometimes, a furnace won’t turn on because a family member switched the thermostat’s mode or setting. Confirm your settings before you call for furnace repairs.
  • Confirm Power at the Breaker and the Furnace Switch: Next, see if the breaker panel has tripped. If it has, you can try resetting it once. However, don’t continue to reset it if it trips again because this indicates an underlying problem that should be addressed by a professional. You should also verify that the furnace service switch is on.
  • Replace a Dirty Air Filter: Air filters should be changed every 30 to 90 days. A dirty air filter can cause your furnace to overheat and shut off.
  • Listen for Startup Sequence Clues: How your furnace sounds can help you determine the underlying problem. 
  • Check for Obvious Vent Termination Blockage Outside: Verify that the outside vent termination isn’t blocked by leaves, a bird’s nest, snow, or debris.

Problems That Can Be Mistaken for an Inducer Motor Failure

There are a few common problems that might be mistaken for an inducer motor failure.

  • Pressure Switch Problems: When the pressure switch is faulty, the switch may think that the inducer motor isn’t working when it is.
  • Igniter Failure: If the igniter has failed, safety mechanisms will keep your furnace from running. 
  • Control Board Issues: The control board must send power to the motor so that it switches on. Any malfunction in the control board can keep your motor from running.
  • Blocked Flue or Intake Pipe: Blocked flues and intake pipes can keep your motor from pulling the air it needs to run.

How a Professional Diagnoses the Issue

When our HVAC technicians come to your home, we’ll quickly work to diagnose the cause of your furnace issues.

  • Testing Inducer Motor Voltage and Amp Draw: First, we’ll use a multimeter to make sure your inducer motor is receiving proper voltage and drawing the correct current.
  • Inspecting the Venting Path and Pressure Switch: Then, we will inspect the venting path for any blockages. Our technician will also make sure that the pressure switch is working properly.
  • Verifying Whether the Motor Starts, but Cannot Maintain Speed: Our technicians will perform a test run to see if the motor is starting. If it can’t maintain speed, it may be due to a capacitor issue, worn bearings, debris in the flue or intake, or debris buildup in the fan wheel.
  • Determining Whether Repair or Replacement Is the Better Fix: Once we know what the problem is, we can help you determine if repairing or replacing the unit is the best choice.

Common Fixes for Inducer Motor Problems

Depending on the underlying cause, there are a few methods we can use to fix your inducer motor-related problems.

  • Clearing Vent Obstructions: By clearing the flue or intake pipe, we can make sure your unit gets enough airflow.
  • Replacing the Inducer Motor Assembly: If your inducer motor is the main issue, we can replace the motor assembly.
  • Repairing Wiring or Control Problems: For electrical problems and control board issues, we may need to replace the wiring or control board.
  • Replacing Related Safety Controls When Necessary: Sometimes, the safety controls shut off a furnace incorrectly. In these instances, we can replace the safety controls involved.

When To Call for Furnace Repair

If you’re experiencing any of the following symptoms, it’s time to call in the professionals.

  • Repeated Furnace Lockouts: When your furnace doesn’t detect a flame, it will shut off as a safety mechanism. This is a safety concern for your family, so call for repairs if you experience frequent furnace lockouts.
  • Loud Noises at Startup: Any loud noises when your furnace starts up are cause for concern.
  • No Heat During Cold Weather: When temperatures drop, you can’t afford to go without heat. To ensure your family’s safety and comfort, Rogue Valley offers 24/7 emergency services.
  • Signs of Exhaust or Venting Issues: Combustion byproducts are hazardous to your health. If there are any signs of exhaust or venting issues, immediately shut off your gas lines and power to your furnace. Then, call for help.

How To Prevent Future Inducer Motor Issues

To avoid future problems with your inducer motor, remember to use the following maintenance tips.

  • Annual Heating Maintenance: Scheduling annual heating maintenance can help you catch problems before they escalate into costly repairs and unexpected breakdowns.
  • Vent Inspection and Cleaning: Periodically, inspect your vents for blockages and clean them. Besides reducing the wear on your inducer motor, this is also an important safety precaution.
  • Early Attention To Unusual Furnace Noises: By paying attention to noises and performing furnace inducer motor troubleshooting early, you can avoid costly, complicated repairs in the future. Furnaces rarely break down without some type of prior warning, so immediately reach out for professional repairs as soon as you notice any signs of a problem.

FAQs

Can a furnace run with a bad inducer motor?

No, most likely not. The inducer motor is necessary for venting exhaust gases. If it isn’t working, the furnace’s control board will shut the unit down as a safety feature.

Is an inducer motor the same as a blower motor?

No, they aren’t. Inducer motors pull combustion gases out of the heat exchanger to protect your home and family. Blower motors are designed to push air through your ductwork.

How much does an inducer motor replacement usually cost?

The actual motor typically costs between $400 and $1,100. In addition to materials, homeowners will have to cover labor costs as well.

Image of a ductless mini-split air conditioner mounted on the wall

Best Mini Split Temperature Settings for Winter and Summer

As the seasons change, your ductless mini-split settings need to change as well. In Southern Oregon, we alternate between cool winters and hot summers. By selecting the right mini-split settings, you can improve your family’s comfort without adding to your energy bills. 

Why Homeowners Need the Right Mini-Split Setting

When it comes to heating, ventilation, and air conditioning (HVAC) systems, there is a trade-off between comfort and energy costs. The best approach is to set a smart range that matches your family’s comfort and energy-efficiency goals. A single universal number won’t work for every climate, family, and HVAC setup.

Finding the Right Temperature Settings for Southern Oregon’s Unique Climate

In Southern Oregon, we have a mild, Mediterranean climate. Winters tend to be wet and cool, while summers are hot and dry. To stay comfortable without overpaying, Medford and Grants Pass homeowners need the right settings for cool winter mornings and hot summer afternoons.

How Better Temperature Settings Can Improve Your Year-Round Comfort

For the best comfort and energy efficiency, you should always set it and forget it. While traditional air conditioners are made to cycle on and off, ductless mini-splits aren’t. They work best by running at a low speed for extended time periods, so the best approach is to set the temperature and leave it alone.

Best Mini-Split Temperature Settings at a Glance

To get a basic look at mini-split settings, check out the following summer and winter temperature ranges. For each season, you should create a range for when you are at home, away, and asleep. You can make small adjustments to these suggested ranges based on your home’s sun exposure and room use. Avoid having any extreme setbacks because it can be challenging for mini-splits to recover.

Summer Starting Range

  • Home: 72℉ to 78℉
  • Away: 78℉ to 84℉
  • Sleep: 72℉ to 75℉

Winter Starting Range

  • Home: 68℉ to 70℉
  • Away: 60℉ to 64℉
  • Sleep: 64℉ to 68℉

Why Mini-Splits Usually Work Better With Steady Settings

Most cooling systems, such as traditional air conditioners, are designed to either be off or on. In comparison, inverters can modulate the mini-splits’ behavior so that they can operate at a low level. Because the mini-splits don’t have to devote as much energy to startup, this design allows you to save money on energy bills. If you constantly adjust the temperature, it can work against these energy benefits.

Inverter Operation in Homeowner Terms

Basically, mini-splits are able to adjust their output to match the temperature required. It is like placing a car on cruise control instead of driving in stop-and-go traffic. Through steady settings, you can save more money and stay comfortable.

Why Big Temperature Swings Are Not Ideal

Because of all these reasons, you don’t want major temperature swings from frequent manual changes and aggressive setbacks. Similarly, shutting down your mini-split system when you’re absent for a few hours can cause your system to use more energy. Plus, additional shutdowns lead to added wear due to frequent startups. 

Best Mini-Split Settings for Summer

Let’s dive into the best mini-split settings for summer.

When You Are Home

Most Medford homeowners will feel comfortable between 72℉ and 78℉. However, you may want to adjust this by a couple of degrees if your room has a lot of sun exposure or to match your personal preferences.

When You Are Away

If you are away, adjust the settings to 78℉ to 84℉. This allows you to spend less money on cooling your home without creating a dramatic setback that might be hard for your system to recover from on hot days.

Overnight Cooling

At night, you can adjust the temperature to 72℉ to 75℉ to ensure the right temperature for sleeping. You may also need to change the fan settings so that they are quieter. 

Best Mini-Split Settings for Winter

When winter arrives, the right temperature settings can help you achieve the best balance of energy consumption and comfort.

Daytime Heating Setting

If you are at home, 68℉ to 70℉ tends to be a comfortable setting. To match your personal preferences or sun exposure, you can adjust this temperature by a few degrees.

Overnight Setback

Extreme setbacks can be hard to recover from and hurt your energy efficiency. As a result, you should generally set your nighttime temperature to 64℉ to 68℉.

Away-From-Home Setting

To minimize your energy use and help your home return to a comfortable temperature, you should generally adjust your away settings to 60℉ to 64℉.

Mode and Fan Settings That Support Comfort and Efficiency

In real-world conditions, your comfort also depends on a range of other settings.

Heat, Cool, Auto, and Dry Mode

  • Heat: In the winter, this mode works to heat your home by transferring heat from the outdoor air indoors.
  • Cool: Cool mode triggers the unit to kick on and deliver cool air to your home.
  • Auto: This mode allows your mini-splits to alternate between heating and cooling as needed. It is often used during our shoulder seasons, where daytime and nighttime temperatures can vary significantly. However, this can create unnecessary swings when we have cool mornings and hot afternoons, leading to unnecessary energy consumption.
  • Dry Mode: On damp winter mornings in Medford, you can use dry mode to remove excess moisture from the air.

Fan Speed and Louver Direction

  • Airflow Direction: During the summer, turn the louvers so that they face up. Cold air naturally settles, so this encourages a better distribution of air. In the winter, the louvers should face down. Because hot air rises, ensure the warm air is directed toward the floor.
  • Auto Fan: When the fan is on auto, it will only run when the unit is actively heating or cooling your home. 
  • Room Distribution: If you’re dealing with hot or cold spots, you may want to leave the fan in on mode for a few hours so that air can distribute evenly throughout the room.

How To Fine-Tune Settings for Room Use and Southern Oregon Conditions

To improve your comfort, keep the following tips in mind.

Hotter Rooms and Sun-Heavy Spaces

In the following locations, you may need to lower your thermostat settings to counteract the warmer environment.

  • West-facing rooms
  • Rooms on upper levels
  • Glass-heavy spaces

Lightly Used Rooms and Multi-Zone Systems

Thanks to zoning, you can adjust the temperature in different rooms based on your actual use. If you never use the bedroom during the day and spend most of the time in your home office, you can set your bedroom to the away temperature range and only focus on cooling air in your home office.

Common Mini-Split Mistakes That Raise Bills

To save money on your energy costs, remember the following tips.

Setting Extreme Temperatures

Setting a very high or low temperature doesn’t lower your energy costs. It creates an extreme setback that is hard for your mini-splits to recover from. Mini-splits conserve energy by reducing frequent on-and-off cycling.

Turning the System Off Too Often

Constant shutdowns and restarts use more energy than just having the system on, so they should be avoided as much as possible.

Ignoring Filters and Airflow Basics

To maximize your energy efficiency, you need to clean or change the air filter every one to three months. Additionally, blocked vents and closed-off rooms can negatively impact air pressure and cause your system to work harder than necessary.

When the Issue Is Not the Setting

If you are consistently struggling with high energy bills and poor comfort, the real problem may be a faulty component. By getting your mini-splits diagnosed and repaired, you can improve your indoor comfort.

Signs of a Performance Problem

The following are common signs that your mini-splits have performance issues.

  • Weak airflow
  • Frequent error codes
  • Difficulties reaching the correct temperature
  • Unusual smells
  • Ice buildup
  • Odd noises

FAQs

What temperature should I set my mini-split to in summer?

In summertime, you should set your home temperature to 72℉ to 78℉ and nighttime temperature to 72℉ to 75℉. When there are no occupants at home, you can switch the temperature to 78℉ to 84℉. However, you may also need to adjust based on room conditions and personal preferences.

Should I turn my mini-split off when I leave the house?

No, turning it off forces it to work harder to catch up later. Additionally, on-and-off cycles use a significant amount of energy. Instead, you should opt for a more moderate setback when you are away.

Is auto mode efficient on a mini-split?

It can be. However, homeowners need to be cautious about using this mode because cold mornings and hot afternoons can cause you to spend money heating and cooling your home instead of harnessing the outdoor temperature changes to lower your energy costs.

Why does my mini-split feel wrong even when the setting looks right?

The problem may involve your home’s airflow or sun exposure. Similarly, service issues and dirty filters can impact how well the unit functions.

Update Your Mini-Split Settings for Each Season

Our team has years of experience working with homeowners in the Medford and Grants Pass area. By partnering with Rogue Valley Heating, Cooling & Electrical, you can get help with mini-split tune-ups, diagnostics, and performance checks. 

Learn more about our mini-split services today.

Wall-mounted ductless air conditioner is installed in a room of a residential house in Grants Pass.

Why Is My AC So Loud? Common Noises and What They Mean

When Medford’s temperatures start to rise, a sudden screeching or banging noise is cause for alarm. While some AC noises are perfectly normal, others indicate a major underlying problem. To help you know when you should seek help, we’ll cover when an AC noise needs to be addressed right away and what you can do about it.

When AC Noise Is Normal and When It Is Not

All air conditioning systems make noise when they are operating. A rushing of air, humming sounds, swishing noises, or slight vibration is normal. If the volume suddenly changes or the sound type shifts, then something is wrong and needs to be addressed right away. 

Normal Operation Versus New Noise

While a hum or the sound of airflow is normal, any sudden loud banging, squealing, or buzzing is cause for concern. 

Get Help With Our Noise-by-Noise Guide

Each type of AC malfunction can cause a different noise. By understanding what each noise means and checking your system, you can determine when a repair is necessary.

Why a Louder AC Should Not Be Ignored

A noisy AC is more than a minor annoyance. If the noise isn’t resolved, it can result in worse comfort, lower energy efficiency, and more costly repairs.

Comfort and Efficiency Impact

When your AC has a faulty component, a dirty filter, or other issues, it can reduce your cooling performance and lower your energy efficiency. The added strain also increases the likelihood of a breakdown.

Damage Can Spread Fast

If you have a loose component or a faulty part, it can cause your repair needs to quickly escalate. Instead of fixing a minor issue, you may have to invest in more expensive repairs.

Common AC Noises and What They Usually Mean

To get a better idea of what is going on with your AC, let’s take a look at some of the most common AC noises and what they mean.

  • Banging or Clanking: A banging or clanking noise is often a sign that there are loose or broken internal parts. It can also be due to compressor problems and fan issues.
  • Buzzing or Humming: When your AC makes an unusual humming or buzzing sound, it is often due to loose parts, electrical problems, or dirty condenser coils. If the sound occurs at startup, it is often due to a failing capacitor. This needs to be addressed right away, or it can cause the compressor to fail as well.
  • Clicking: While it is normal for an AC to click during startup, repeated clicking indicates that electrical components and relays are starting to fail. A continuous clicking sound may be due to a failed capacitor.
  • Screeching or Squealing: Screeching and squealing noises are an indication that you need to reach out for professional repairs. These can occur due to problems with the belt in older equipment, a blower motor malfunction, or issues with the fan motor.
  • Rattling: Often, rattling sounds are caused by loose panels, fasteners, debris buildup, or early wear. Vibration can loosen screws and panels over time, leading to a rattling noise as these parts move.
  • Hissing: A hissing noise frequently stems from air leaks, refrigerant leaks, or internal pressure issues. All of these problems must be addressed by a licensed HVAC technician and should not be handled on your own.
  • Whistling or Whooshing: When you hear a whooshing or whistling noise, it indicates that airflow is restricted in some way. For instance, there may be a dirty filter or duct leak. While you can troubleshoot by replacing the air filter yourself, duct problems will need to be professionally sealed.

Safe Checks Homeowners Can Do First

As a homeowner, there are a few checks you can safely perform on your own. 

Check the Filter and Vent Airflow

Dirty air filters can block airflow, leading to whooshing or whistling noises. Replacing the filter can help you immediately fix this issue. Similarly, making sure your returns are unobstructed and your supply registers are open can also help you improve your system’s airflow.

Check for Visible Outdoor-Unit Debris or Loose Panels

Check around your outdoor unit for debris that could be blocking it. You should also see if any panels are loose. However, you should only perform a surface-level inspection for your safety and the safety of the AC.

Noises That Mean You Should Shut the System Off and Call Now

While some sounds can be remedied on your own, others indicate an urgent problem. If you hear the following noises, call for professional help right away.

Electrical or Burning-Related Noises

Electrical problems often produce buzzing noises with burning odors, repeatedly tripped breakers, and sharp popping sounds. All of these symptoms indicate that you should immediately shut off your unit and call for emergency AC repairs.

Mechanical Noises That Can Cause Damage Fast

Any time you hear grinding, loud banging, or metal-on-metal sounds, there is a major risk to your AC involved. To avoid serious damage, you should schedule repairs right away.

How Routine Maintenance Helps Prevent Loud AC Problems

By performing routine maintenance, you can prevent many repairs from becoming necessary and catch problems before they spiral out of control.

What Tune-Ups Catch Early

During a tune-up, our heating, ventilation, and air conditioning (HVAC) technicians have a chance to look for loose components and excess wear. We can catch worn-out motors, airflow problems, and dirty coils before they become louder.

Why Seasonal Service Matters in Southern Oregon

Before peak heat arrives in the summer, it’s important to make sure your AC is ready. Getting a timely tune-up in the spring can help you prevent mid-season breakdowns. HVAC failures are more likely to occur during periods of intense usage, so early tune-ups help you avoid repairs during the busy season.

When Repair Versus Replacement Becomes Part of the Conversation

While it is possible to repair air conditioners, it might not always be the best choice. If the cost of the repair is too much or the unit is older, it may make more sense to replace the AC instead.

Repair Candidate

In general, it is better to repair the unit if the following factors are true.

  • It’s a First-Time Issue: If your AC has a limited repair history, performing this repair is likely a one-off and not a sign of system failure.
  • The AC Performs Well: An AC that is still at its optimal performance level will likely be able to maintain that level once it has been repaired.
  • It’s Just One Part: When only one part needs to be repaired, it is unlikely that you’re facing a systemic issue.

Replacement Candidate

When major repairs, old age, or efficiency issues are involved, a replacement is a viable solution. 

  • Your Electricity Bills Keep Growing: As an AC starts to fail, it becomes less efficient. Because of this, you’ll generally notice higher energy bills before it breaks down completely. 
  • There Are Repeated Compressor and Motor Problems: Compressor and motor issues can get expensive. If you frequently have this type of malfunction, it’s time to just get a new unit.
  • Your AC Is Older: A traditional AC often lasts around 12 to 17 years. If your AC is already past 10 years old and is starting to have frequent repair problems, you should consider getting a replacement.

Whether you need a repair or replacement, our HVAC technicians can evaluate your situation and walk you through both options. Once you decide, we can handle the installation or repair process for you.

FAQs

Why is my AC suddenly louder than normal?

When you hear new AC sounds or the noises grow in intensity, it signifies that something is wrong with your system. Air conditioners often become louder if they have loose parts, motor wear, airflow problems, or compressor-related issues.

Is a buzzing AC dangerous?

A buzzing noise may stem from problems with the electrical connections or the compressor. Additionally, loose parts can often cause buzzing noises. While these symptoms may not pose an immediate risk in every case, they can eventually cause damage to your air conditioning system. Because of this, it’s a good idea to get these problems checked out as soon as possible.

Should I keep running my AC if it is making a banging noise?

No. When there is a loud or persistent banging noise, it often indicates a problem with your fan or compressor. Leaving your AC on can lead to irreversible damage, so you should turn it off before you call a technician for repairs.

Can a dirty air filter make my AC louder?

Yes, it can. When an air filter is clogged, it can block airflow and lead to louder noises. If this is the root cause, replacing the filter should resolve the extra noise. 

Diagnose Unusual AC Noises

At Rogue Valley Heating, Cooling & Electrical, our team offers 24/7 emergency services. When you need help, we’re only a phone call away. Whether you are struggling with an unusual noise or need a spring AC tune-up, our team is ready to help.

Looking for expert AC noise diagnosis and repairs? Give Rogue Valley a call today.

Large air conditioning unit stands on concrete slabs beside a residential house in Grants Pass.

Why Are AC Vents Sweating? Causes and Fixes

When you’re just trying to keep cool during an Oregon summer, it can be unnerving to see water building up around your AC vents. While this can appear concerning, it is likely due to a normal condensation process. However, there are instances where it may be cause for concern, so it’s essential to understand which signs to look for and what to do.

Why Sweating Vents Get a Homeowner’s Attention Quickly

Although sweating vents are a fairly common problem, they are more than just a cosmetic issue. If the sweating continues, it can cause staining, rust, and mold. 

As a homeowner, it’s important to pay attention when you see ceiling stains around registers, beading water, or water dripping from supply vents. All of these are signs that you may have a future mold and rust problem on your hands.

Why AC Vents Sweat in the First Place

Before we cover what you should do about this issue, let’s first look at why vents start to sweat in the first place.

Warm Humid Air Meets a Cold Vent

The basic reason why vents sweat is because of how cold your ducts and vents get. When your warm indoor air meets the cold surfaces around the vent, it causes the moisture in the air to turn into a liquid. Interestingly, the same dew point principle is the reason why you’ll sometimes see dew on your car or the grass in the morning.

Why Humidity and Vent Temperature Both Matter

This situation can happen if your indoor air is excessively humid, your vents are extra cold, or a mixture of both factors is in play. Because the cause can vary, it’s typically a good idea to get this problem checked out by a professional heating, ventilation, and air conditioning (HVAC) technician.

Most Common Causes of Sweating AC Vents

Before we dive into the potential repair and maintenance options that can solve this problem, let’s review some of the most common reasons why AC vents start to sweat.

High Indoor Humidity

Condensation is more likely when indoor humidity is elevated. While this can be due to high humidity levels outside, there are many indoor sources of moisture as well. Bathing, cooking food, boiling water for tea, and leaks can increase your indoor moisture. This is one of the reasons why it’s so important to use exhaust fans whenever you cook or bathe.

Dirty Filter or Low Airflow

When an air filter becomes dirty, it restricts airflow. This causes the evaporator coil to become too cold, leading to excessively cold air and vents. In turn, this increases the risk of condensation forming.

Leaky or Poorly Insulated Ducts

In a typical American house, around 20% to 30% of the air that passes through a home is lost through leaks, holes, and gaps in the ductwork. This allows the conditioned air to escape and interact with the warmer air in your crawlspace or attic, which can cause condensation to form.

Similarly, poor insulation around your ducts can lead to a significant difference in temperature between the cool air passing through and the air in the surrounding space. Because of this, moisture in the air can begin to condense.

Oversized or Malfunctioning AC Equipment

If your equipment is oversized, it may experience short cycling. This happens because it cools the air too quickly and shuts off, which stops it from removing an adequate amount of moisture from the air. 

Likewise, poor humidity control or abnormal cooling behaviors can lead to excess moisture in the air. Before long, these issues can lead to sweating around your AC vents.

Frozen Coil or Drainage-Related Problem

Coil icing or condensate drain line problems can lead to moisture developing around your unit. Both of these problems can often be prevented or alleviated through routine AC maintenance.

What Homeowners Can Check First

As a homeowner, there are a few DIY checks you can perform before you call for professional help.

Start With Filter, Vents, and Returns

First, check your air filter and see if it needs to be replaced. You should also look for other indications of potential airflow problems, such as obstructed supply or return vents.

Look at Humidity Clues Inside the Home

When the problem is due to your indoor humidity levels, it’s important to determine the source. Look for foggy windows, poor bathroom ventilation, and muggy rooms. 

Check for Attic or Ceiling Clues Around the Vent

If your attic or ceiling is letting in outdoor air through gaps, it could be causing the problem. Similarly, you should check for any missing insulation, loose registers, and duct leakage.

How To Tell if the Issue Is High Humidity or Vents That Are Too Cold

To determine if the cause is high humidity or excessively cold vents, consider the following signs and symptoms.

Signs Humidity Is the Main Problem

Homeowners can figure out if humidity is the underlying cause by checking for the following signs.

  • The room feels excessively muggy.
  • Multiple vents in your home are sweating.
  • There is moisture at other locations in your house.

Signs the Vent or System Is Running Too Cold

Meanwhile, the following symptoms are an indication that either your vents or your AC system is running too cold.

  • You have poor airflow in your home.
  • Your equipment performance has declined.
  • Your evaporator coil has frozen.

Problems Sweating Vents Can Lead to if Ignored

Once your vent starts sweating, it’s important to address the problem right away. Otherwise, it can lead to a range of other issues.

Cosmetic and Indoor Air Quality Damage

Over time, higher moisture levels can lead to mold growth, peeling paint, stains, and rust. The added mold in your home can be especially difficult for loved ones who suffer from allergies, asthma, or other respiratory issues.

Comfort and Energy Problems

More importantly, sweating vents mean that there is a problem with your indoor comfort level. To experience this problem, there is likely an issue with your humidity control, airflow, or overall efficiency. Besides negatively impacting your family’s comfort, all of these problems can also result in higher energy costs.

Fixes a Professional May Recommend

If you are experiencing a problem with moisture around your vents, one of our experienced HVAC technicians can help you diagnose and repair the underlying cause.

Airflow and Duct Repairs

Airflow issues are common reasons why condensation may occur. To remedy this problem, we’ll start by testing for duct leaks and sealing your ducts. We’ll also make sure the ducts are properly insulated.

Our HVAC technician will also check your filter and replace it as needed. If a clogged filter has caused the evaporator coil to become dirty, we can also clean the coil.

Humidity-Control or Equipment Updates

If humidity is the cause of your indoor condensation, our team can start by checking your condensate drain line for clogs and correcting the drain. We will also calculate your cooling load requirements to determine if your AC is the wrong size for your home. 

As a part of our routine inspection and tune-up, a technician will check your refrigerant levels to determine if they are low. If they are, we’ll find the source of the leak and repair it. Afterward, we can recharge your refrigerant so that your system functions normally again.

FAQs

Why are my AC vents sweating even when the house feels cool?

This happens when your humid indoor air meets extremely cold air around the vent. The added coolness around the vent causes moisture in the air to condense and become a liquid.

Can a dirty air filter cause AC vents to sweat?

Absolutely. If the air filter is dirty, it reduces airflow and causes the evaporator coil to become too cold. In turn, this overcools the air. As soon as this over-cooled air meets any warmer, more humid air, the water vapor present will turn into a liquid.

Are sweating vents dangerous?

They aren’t an immediate danger, but they can become hazardous over time. Besides staining and damaging your ceiling, sweating vents can cause mold to grow. This can be dangerous for your family’s respiratory health.

It’s also important to note that sweating vents can occur because of an underlying mechanical issue with your HVAC system. If this problem is not addressed, it can lead to lasting damage or an unexpected HVAC failure. 

How do I stop AC vents from sweating?

There isn’t a single one-size-fits-all approach to preventing this problem. Instead, you have to discover the underlying cause and fix it. For instance, changing an air filter and cleaning your evaporator coil can prevent the coil from cooling the air excessively. In turn, this can prevent sweating vents.

How To Address Sweating AC Vents

Determining the underlying cause of sweating vents can be challenging. By partnering with Rogue Valley Heating, Cooling & Electrical, you can quickly diagnose your humidity, airflow, and duct issues. Our experienced technicians offer same-day services and 24/7 emergency support, so you can enjoy better peace of mind.

Give us a call today to learn more about our AC repair services.